Operating the Oven
Care and Maintenance
Self Help
Getting Familiar...
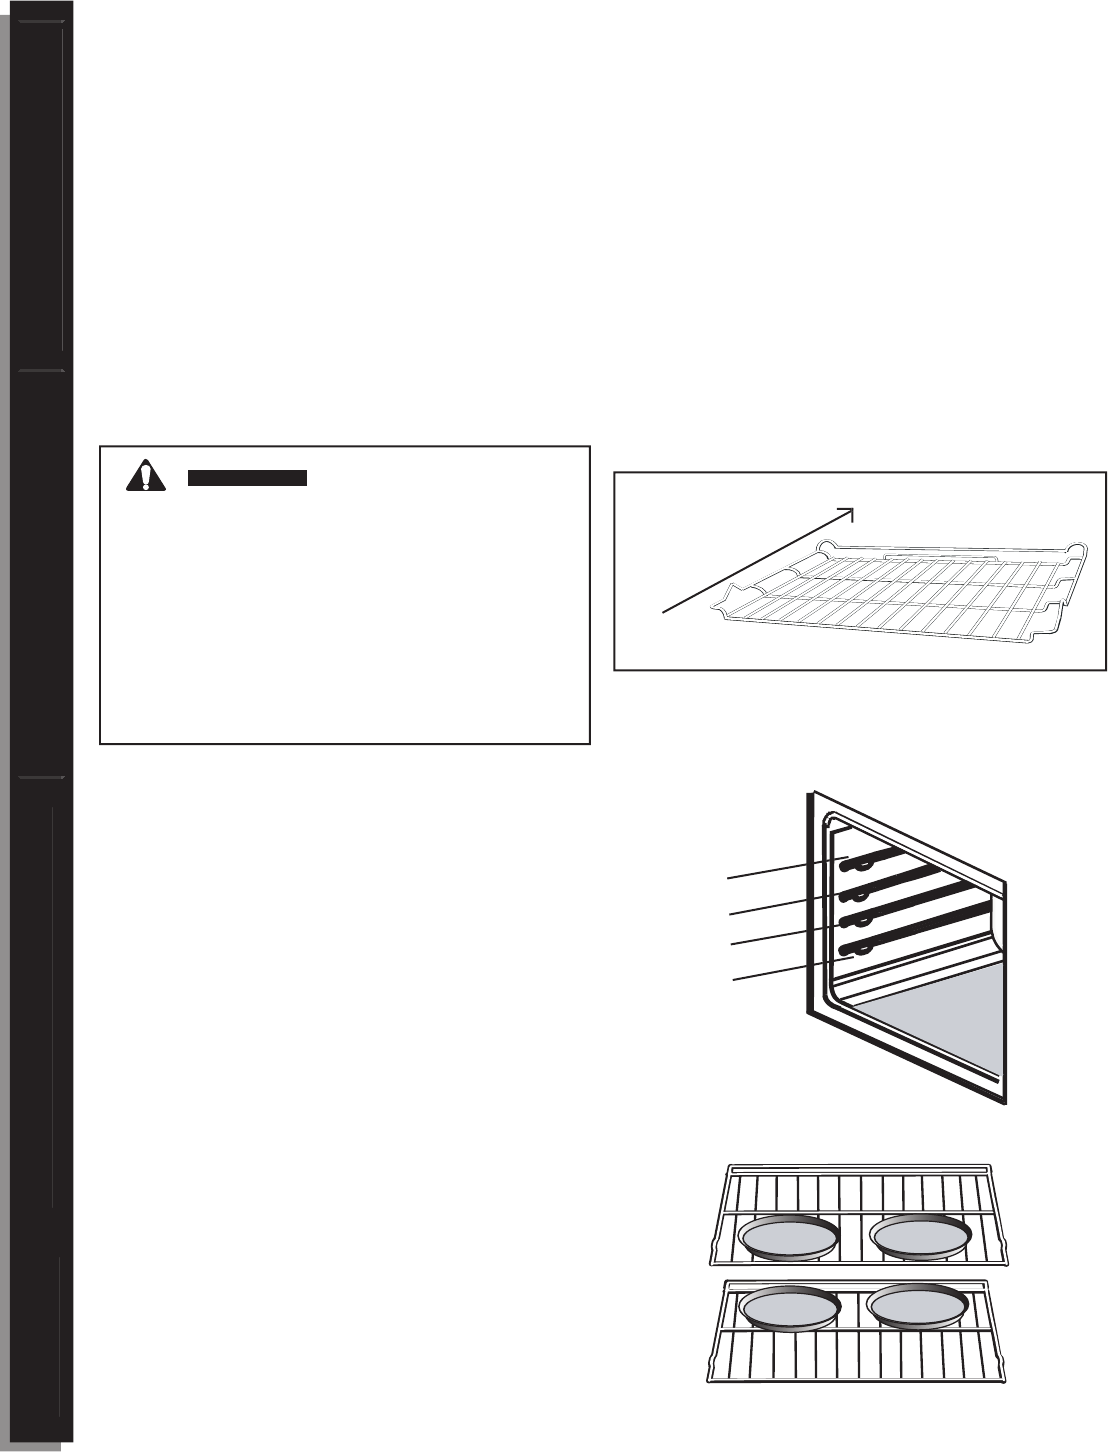
• The oven has rack guides at four levels as shown in
page 7.
Rack positions are numbered from the bottom rack
guide (#1) to the top (#4).
• Check cooking charts for best rack positions to use
• Make sure that the racks are level once they are in
• The racks are designed to stop when pulled
• CAUTION! Never use aluminum foil to cover the
oven racks or to line the oven. Heat trapped under
the foil can cause damage to the oven liner.
place oven racks in desired positions before turning
the oven on. Always use oven mitts when the oven is
Grasp rack fi rmly on both sides
and pull rack toward you. When the stop is reached,
tilt rack up and pull the rest of the way out.
Grasp rack fi rmly on both sides.
Tilt rack up to allow stop into rack holder. Bring rack to
a horizontal position and press the rest of the way in.
Rack should be straight and fl at, not crooked.
To avoid possible burns,
CAUTION:
To avoid possible burns,
Figure 5: The Flat Rack
Insert rack with back of rack
toward back wall of range
2 Rack baking: Use positions 1 and 3.
3 rack baking: Use positions 2, 3 and 4.
When baking four cake layers at the same time,
stagger pans so that one pan is not directly above
another. For best results, place cakes on front of upper
rack and back of lower rack (See graphic at right).
Allow 1” -1 1/2” air space around pans.
2
4
3
1
Selecting the Rack Position
- Highest position. Use for melting cheese
- Use for broiling most meats and for toasting
- Use for pies, casseroles, breads, bundt or
pound cakes, small roasts or poultry. Also use for
broiling thicker cuts of meat.
- Lowest Position. Use for angel food cake,
Figure 6: Rack Positions
Figure 7: Multiple Rack Pan Placement
Rack 3
Rack 1


