Installing the Software
2
Installing the Software
1 Place the Setup CD-ROM in the drive.
For Macintosh: Double-click the [Setup] icon. Enter the administrator ID and password on the
authentication dialog box.
For Windows 2000/XP and Macintosh, skip step 2 and go to step 3.
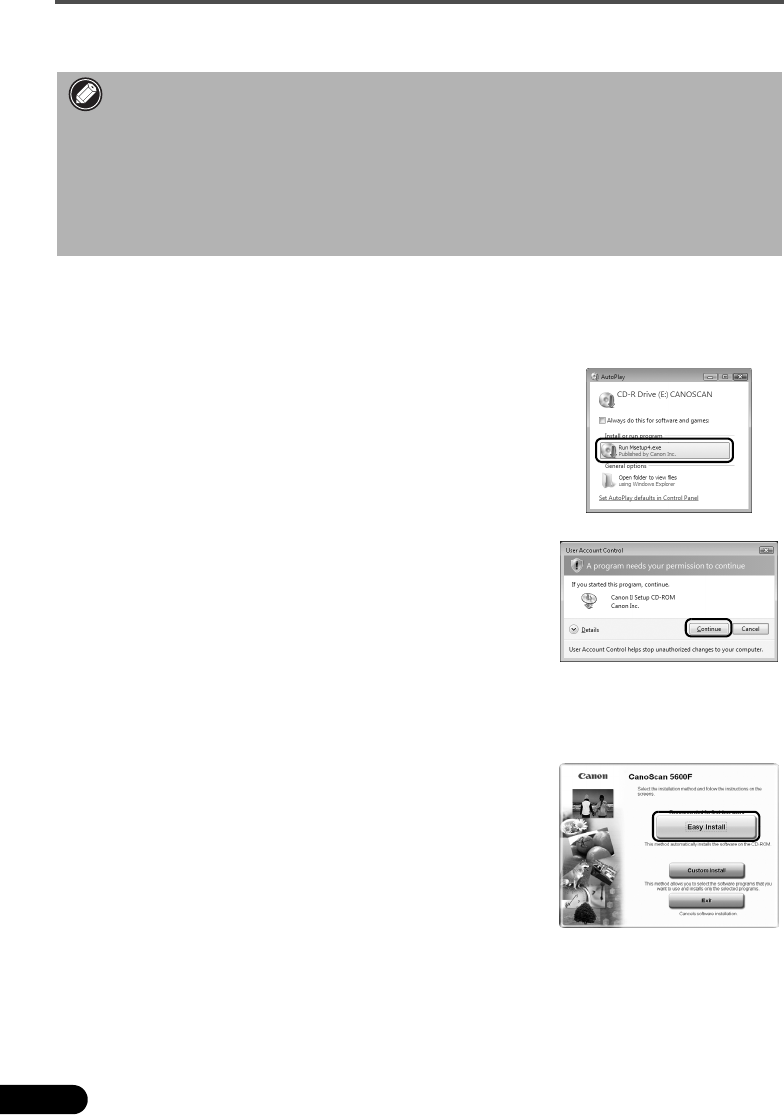
2 For Windows Vista, when the AutoPlay dialog box
appears, run the setup program, and then click [Continue]
to proceed when the User Account Control dialog box
appears.
3 If prompted, select your language and place of residence.
In some countries, these dialog boxes will not appear.
4 Click [Easy Install] on the main menu.
• Do NOT connect the scanner to a computer before installing the software. If you connect the
scanner and the Found New Hardware screen appears, unplug the USB cable from the
computer and click [Cancel]. The screen may close automatically when the USB cable is
unplugged.
• Quit all running applications before installation.
• To upgrade from Windows XP to Windows Vista, first uninstall software bundled with the
Canon scanner.
• Log in as an administrator to install the software.
• Do not switch users during the installation process.


