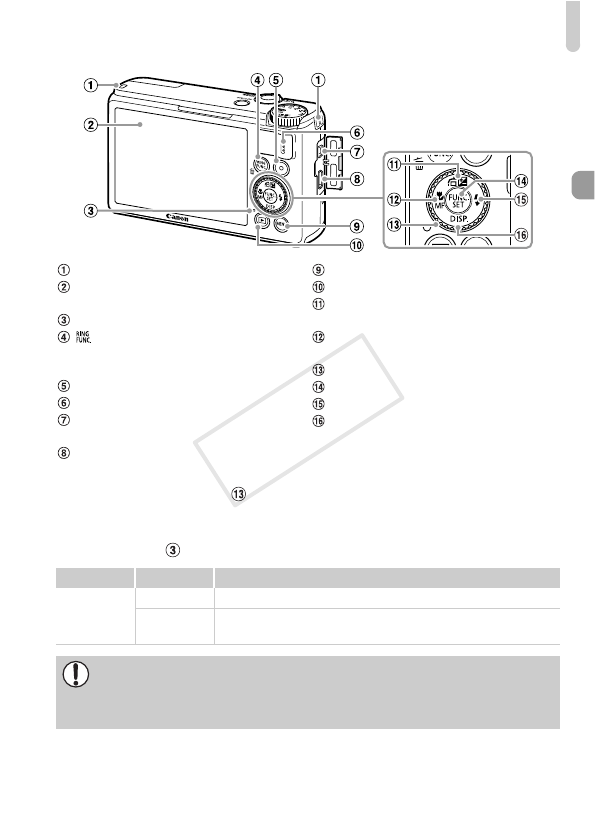
Components Guide
39
• Turning the control dial allows you to perform operations such as
choosing items or switching images. Except for a few operations, the same
operations are possible with the opqr buttons.
• The indicator will light or blink depending on the camera’s status.
Strap Mount (p. 13)
Screen (LCD Monitor) (pp. 40, 204,
208)
Indicator (see below)
(Ring Function Selector) (p. 121) /
Call Up Registered Functions (p. 187) /
a (Single Image Erase) Button (p. 29)
Movie Button (pp. 30, 127)
Speaker
A/V OUT (Audio/Video Output) /
DIGITAL Terminal (pp. 35, 164, 192)
HDMI
TM
Terminal (p. 193)
n Button (p. 43)
1 (Playback) Button (pp. 28, 137)
b (Exposure Compensation) (p. 81) / d
(Jump) (p. 140) / o Button
e (Macro) (p. 92) / f (Manual Focus)
(p. 102) / q Button
Control Dial (see below)
m FUNC./SET Button (p. 42)
h (Flash) (pp. 50, 81, 106) / r Button
l (Display) (p. 40) / p Button
Color Status Operation Status
Green
Lights When connected to a computer (p. 35), display off
Blinks
During camera start-up, recording/reading/transmitting
image data, or while the logger function is operating (p. 113)
When the indicator blinks green, do not turn the camera off, open the
memory card slot/battery cover, shake or jolt the camera. These actions
may corrupt the image data or cause the camera or memory card to
malfunction.


