125
You can automatically correct images with red-eye and save those images
as new files.
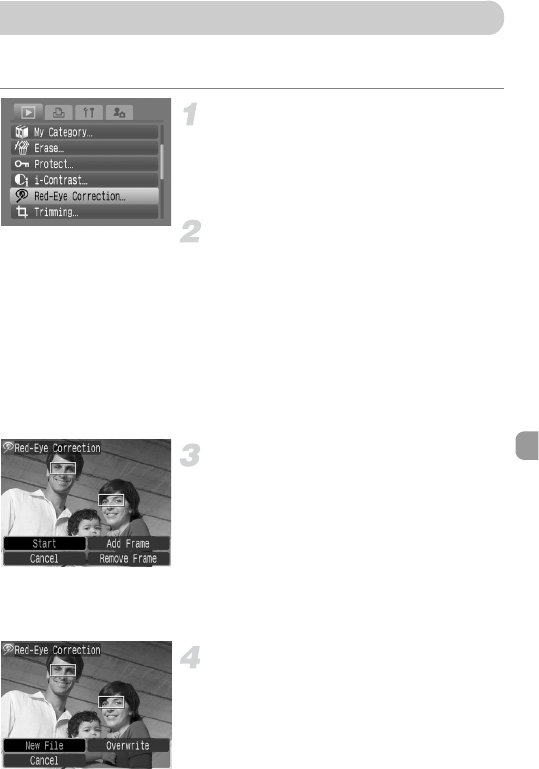
Select [Red-Eye Correction].
● Press the n button and select the 1
tab, then select [Red-Eye Correction] and
press the m button.
X
The [Red-Eye Correction] screen will appear.
Select an image.
● Press the qr buttons or turn the  dial
to select an image to correct, then press
the m button.
X A frame will appear around the red-eye
portion detected by the camera, and
[Start] will appear.
● You can enlarge or shrink the image using
the operation in “k Magnifying Images”
(p. 111).
Correct the image.
● Press the opqr buttons or turn the Â
dial to select [Start], then press the m
button.
X The image will correct, and [New File] will
appear.
● You can enlarge or shrink the image using
the operation in “k Magnifying Images”
(p. 111).
Save as a new image and display.
● Press the opqr buttons, or turn the Â
dial to select [New File], and press the m
button.
X The image will be saved as a new file.
● Perform the operation in Step 5 on p. 121.
] Correcting Red-Eye Effect


