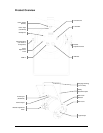
LED PAR 38-Tri B&C User Manual 10 Rev. 2
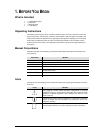
The Control Panel shows the current state of the unit. It is used to select the operating mode, as well
as the sub-features. For a detailed layout of the control panel functions, please see the “menu map”
section on the following page.
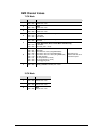
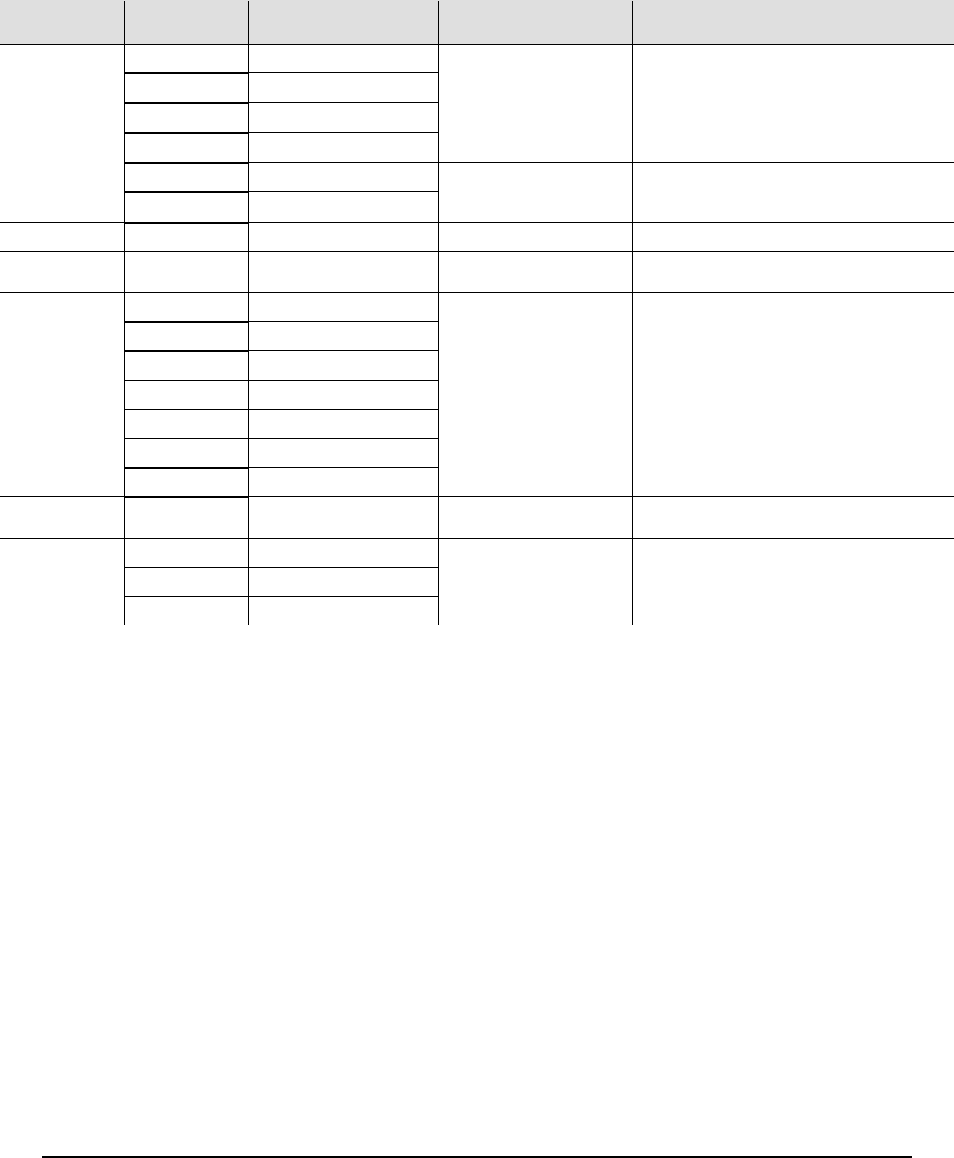
Menu Map
MAIN FUNCTION SUB-FUNCTION SELECTION SUB-SELECTION INSTRUCTION
P--
7 Color Switching
-
Select between 2 switching and 2 fading
built-in programs
7 Color fading
3 Color Switching
3 Color Fading
Knob located on the back
Select between 2 sound active programs
3 Color sound active
Select 3-channel DMX mode (RGB control)
~
- -
Select 7-channel DMX mode: RGB, macros,
run speed, strobe, automatic/sound, dimmer
C--
-
Select between 7 static colors. The display
will read
C1~C7. The colors that each of
these represent are indicated to the left.
Blue
Cyan
Magenta
White
~
(default range is
)
-
This is the speed range for the 4 switching
and fading built-in programs
U--
Red
000~100
Combine red, green, and blue to create a
custom, static, color
Green
DMX Operation
This is the operating mode which will allow for control with an external DMX controller. You must set the starting
address for this mode. If this is your first time using DMX, then it is recommended that you refer to the “DMX
Primer” section in the “Appendix” of this manual.
1. Press <MENU> until
3-CH or 7-CH appears on the LED screen.
2. Press <ENTER>.
3. Using <UP> and <DOWN>, select the desired DMX address (
d001~d512).
Master/Slave
This is the operating mode which will allow 1 fixture to act as the “master” and control all of the other “slave”
fixtures. You must set both the master and the slave(s) fixtures to the correct mode for this operation.
Master Settings:
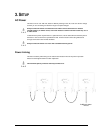
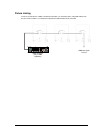
1. Connect the fixtures with DMX cables, as shown in the “Fixture Linking” section.
2. Use any one of the standalone modes for the master unit. This includes:
P--, C--, and U--
Slave Settings:
1. Press <MENU> until
3-CH or 7-CH appears on the LED screen.