Administering the SPA400 and Voice Mail Service
Configuring a SPA400 to Interoperate with the SPA9000
SPA9000 Voice System Administration Guide 110
5
• Leave the Session Timer fields at the default values: Enabled with 0 seconds in
both Refresh Time fields.
STEP 5 Click Save Settings at the bottom of the page.
STEP 6 Click Setup tab > Voice.
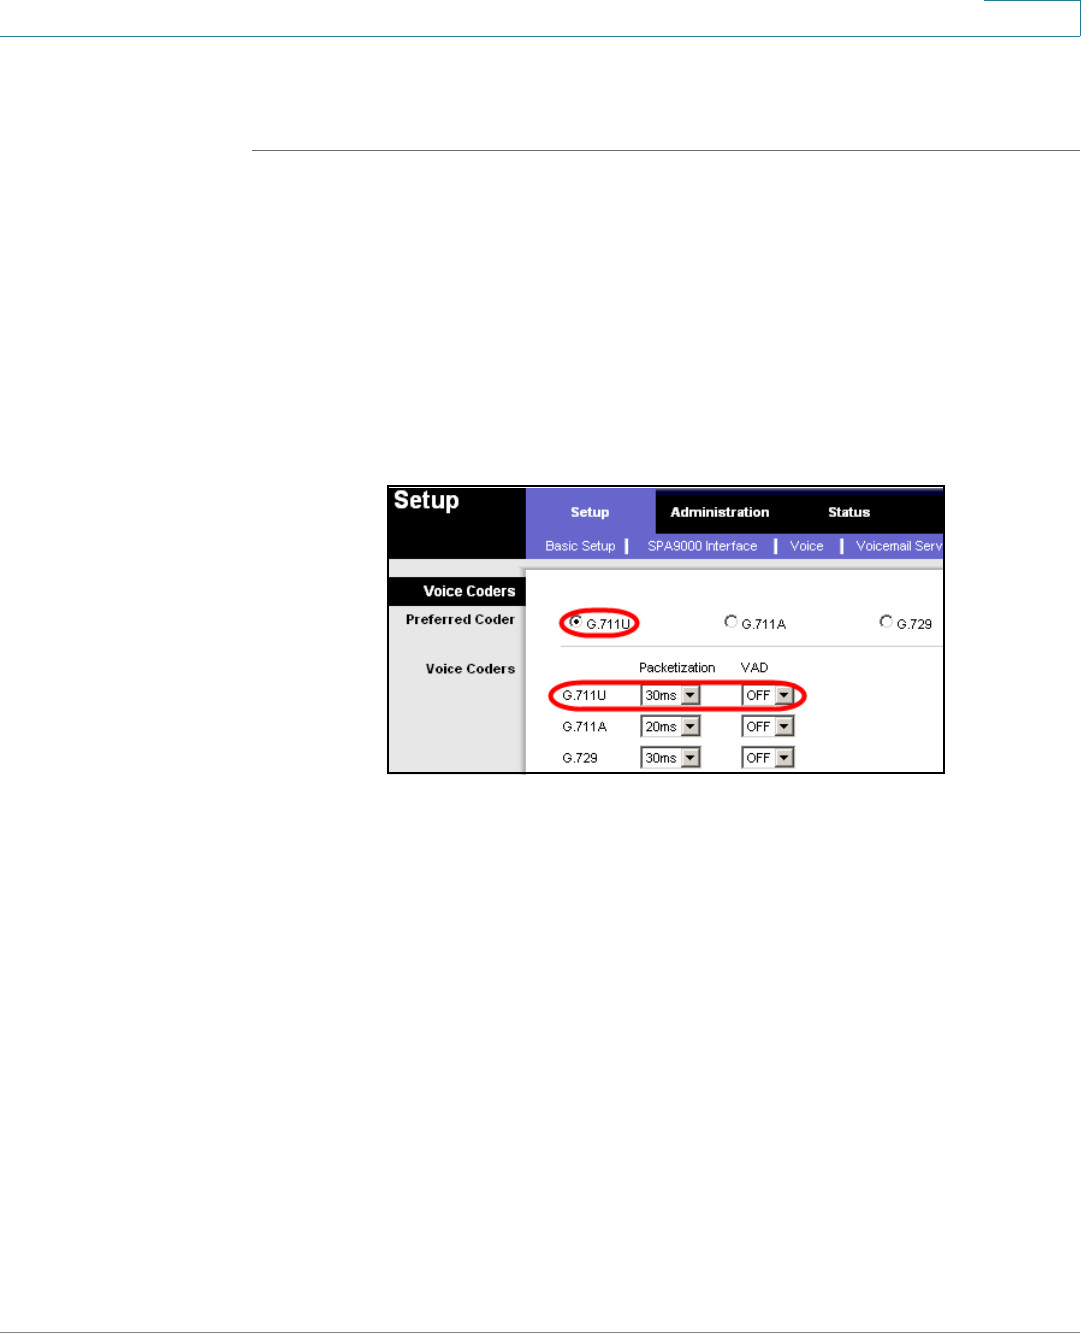
STEP 7 Enter the following settings:
• Preferred Codec: Select G.711u.
• Packetization: Choose 30ms from the
Packetization
drop-down list for G.711U.
• VAD: Choose OFF from the
VAD
drop-down list for G.711U.
SPA400 Setup > Voice
STEP 8
Click Save Settings at the bottom of the page.
STEP 9 To restart the SPA400, complete the following steps:
a. Click Administration tab > Reboot.
b. Click the Restart System button.
c. When the confirmation message appears, click OK. The SPA400 reboots.
d. When the
Reboot OK
. Go to Setup page? message appears, click OK.
STEP 10 If you are using this SPA400 as a PSTN gateway, connect the RJ11 cables from the
SPA400 to the wall outlet for PSTN access.
STEP 11 To verify your progress, perform the following tasks:
• Click the Status tab, and confirm that the SIP registration status is Registered.
• If you connected PSTN lines to the ports on the SPA400, confirm that you can
place an external call to the phone number that is associated with the PSTN
