14. Carefully place the upper housing
over the upper glass, making certain
that the upper glass seats firmly in the
upper housing flange.
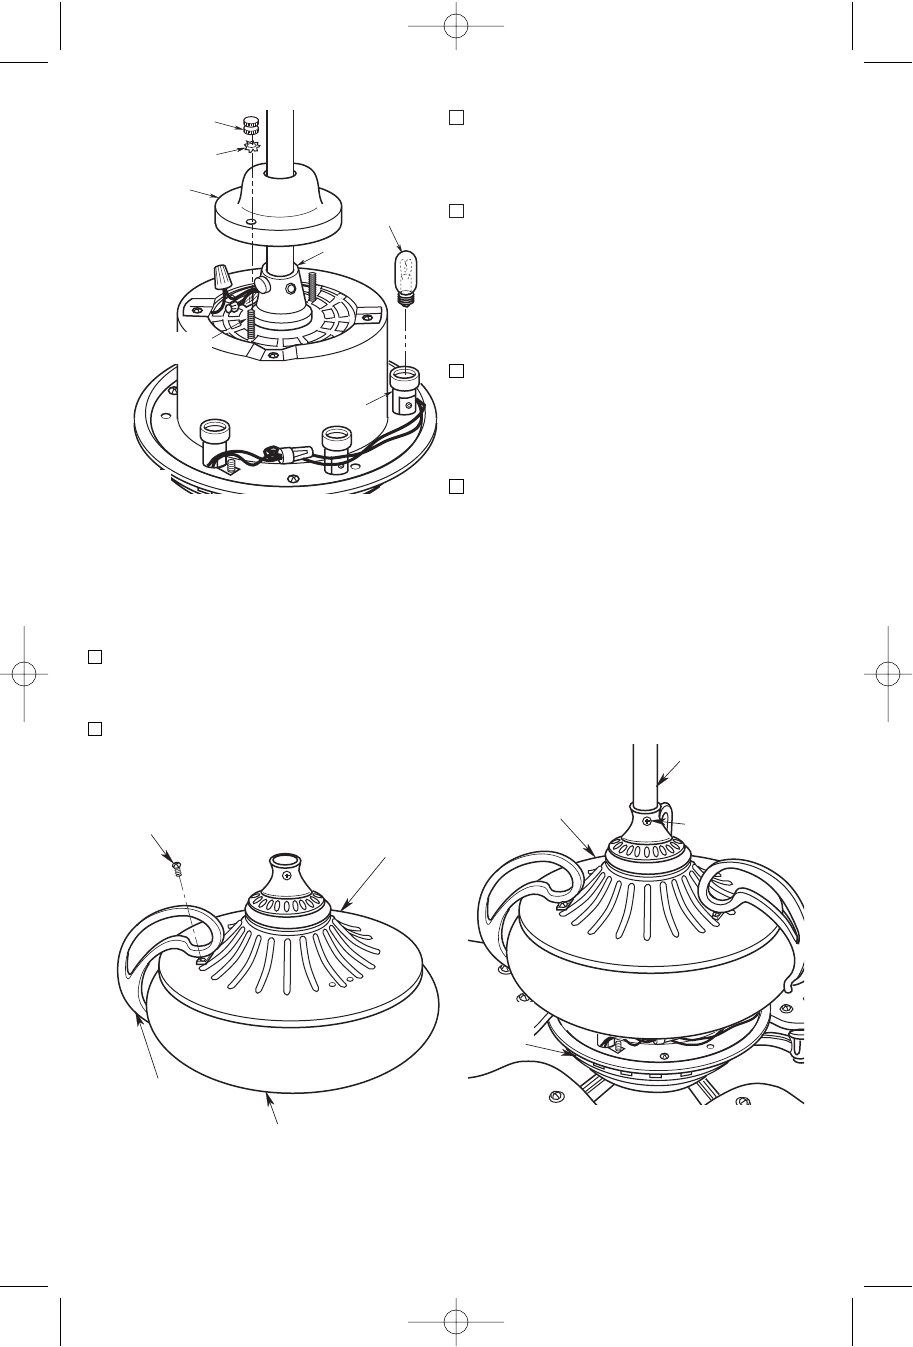
15. Align the two holes in the housing trim
with two threaded holes in the upper
housing (Figure 8). Loosely install two
8-32 x 1/2” pan head screws
(supplied) to secure the trim. Repeat
this procedure for the remaining two
housing trims.
16. Made sure the upper housing is still
seated evenly on the upper glass.
Then alternately tighten the screws
securing the housing trim one-half
turn until the screws are tight.
17. Thread the three motor wires through
the hole in the upper housing. Then
slide the upper housing/glass over the
downrod until the glass seats evenly
in the lower housing flange (Figure 9).
After the glass is properly seated,
tighten the setscrew in the upper
housing.
CAUTION: Be sure there are no wires
pinched between the glass and the
lower housing flange.
8
Figure 8
NOTE: Lightly snug the knurled knobs
and make sure the wires and wire
connectors are completely inside the
coupling cover and not pinched
between the coupling cover and the
motor.
12. Install six 7-watt (maximum) candelabra
bulbs (not supplied) in the sockets on
the motor housing (Figure 7).
13. Place the upper glass on a padded
work surface with the larger opening
towards the top (Figure 8).