RAC 104 • Quick Start Guide
Quick Start Guide — RAC 104, cont’d
QS-2
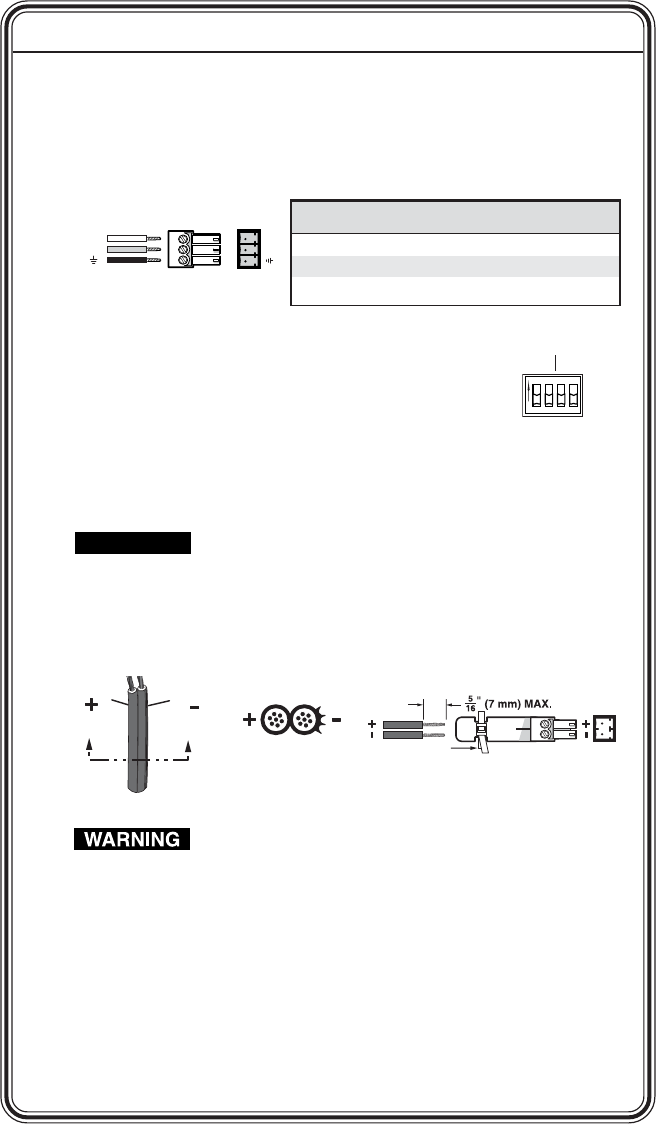
Step 4
If the RAC 104 is to be connected to a computer or host controller for
remote control, connect the host’s RS-232 cable to the RAC 104’s
3-pole captive screw RS-232 connector. Wire the connector as shown
below. See chapter 3 for more information on remote control.
Step 5
Set the line level selector DIP switches to -10 dBV
(unbalanced, consumer line level) or +4 dBu (balanced,
professional line level).
Step 6
Connect power cords. Wire the RAC 104’s power connector as
shown below.
CAUTION
When connecting the power supply, voltage polarity is
extremely important. Applying power with incorrect
voltage polarity could damage the power supply and the
RAC 104. Identify the power cord negative lead by the
ridges on the side of the cord or a black heat shrink
wrapping around it.
The two power cord wires must be kept separate while the
power supply is plugged in. Remove power before
wiring.
Step 7
Turn all the equipment on.
Step 8
Set volume, bass, and treble levels using the front panel controls,
Simple Instruction Set commands, or the Extron Audio Products
Control Program. See chapters 2 and 3 for more information.
Pin
RS-232 function Description
1 Tx Transmit data
2 Rx Receive data
3 Gnd Signal ground
Transmit (Tx)
Receive (Rx)
Ground (Gnd, )
RS-232
Tx Rx
ON
LINE LEVEL
IN
A B A B
OUT
+4 dBu
-10 dBV
Orange Captive Screw
Connector
Tie Wrap
Power Supply
Output Cord
Ridges
Smooth
AA
SECTION A–A


