876
21
3
4
•Alwaysputiteminapouch.Neverlaminateanemptypouch.
•Trimexcesspouchmaterialfromaroundyouritemafterlaminating
and cooling.
•CleanlaminatorrollerswithFellowesrollerwipes(item#5703702)after
15-20 laminations to guarantee optimum laminating results. For further
details, please see “maintenance” section.
•Beforelaminatingvaluableitems,doatestrunwithanitemsimilar
in size and thickness.
•Donotlaminateheat-sensitivedocuments(i.e.,tickets,ultrasounds,etc.).
•Useadry-erasemarkerforwritingonlaminatedpouches.
TIPS
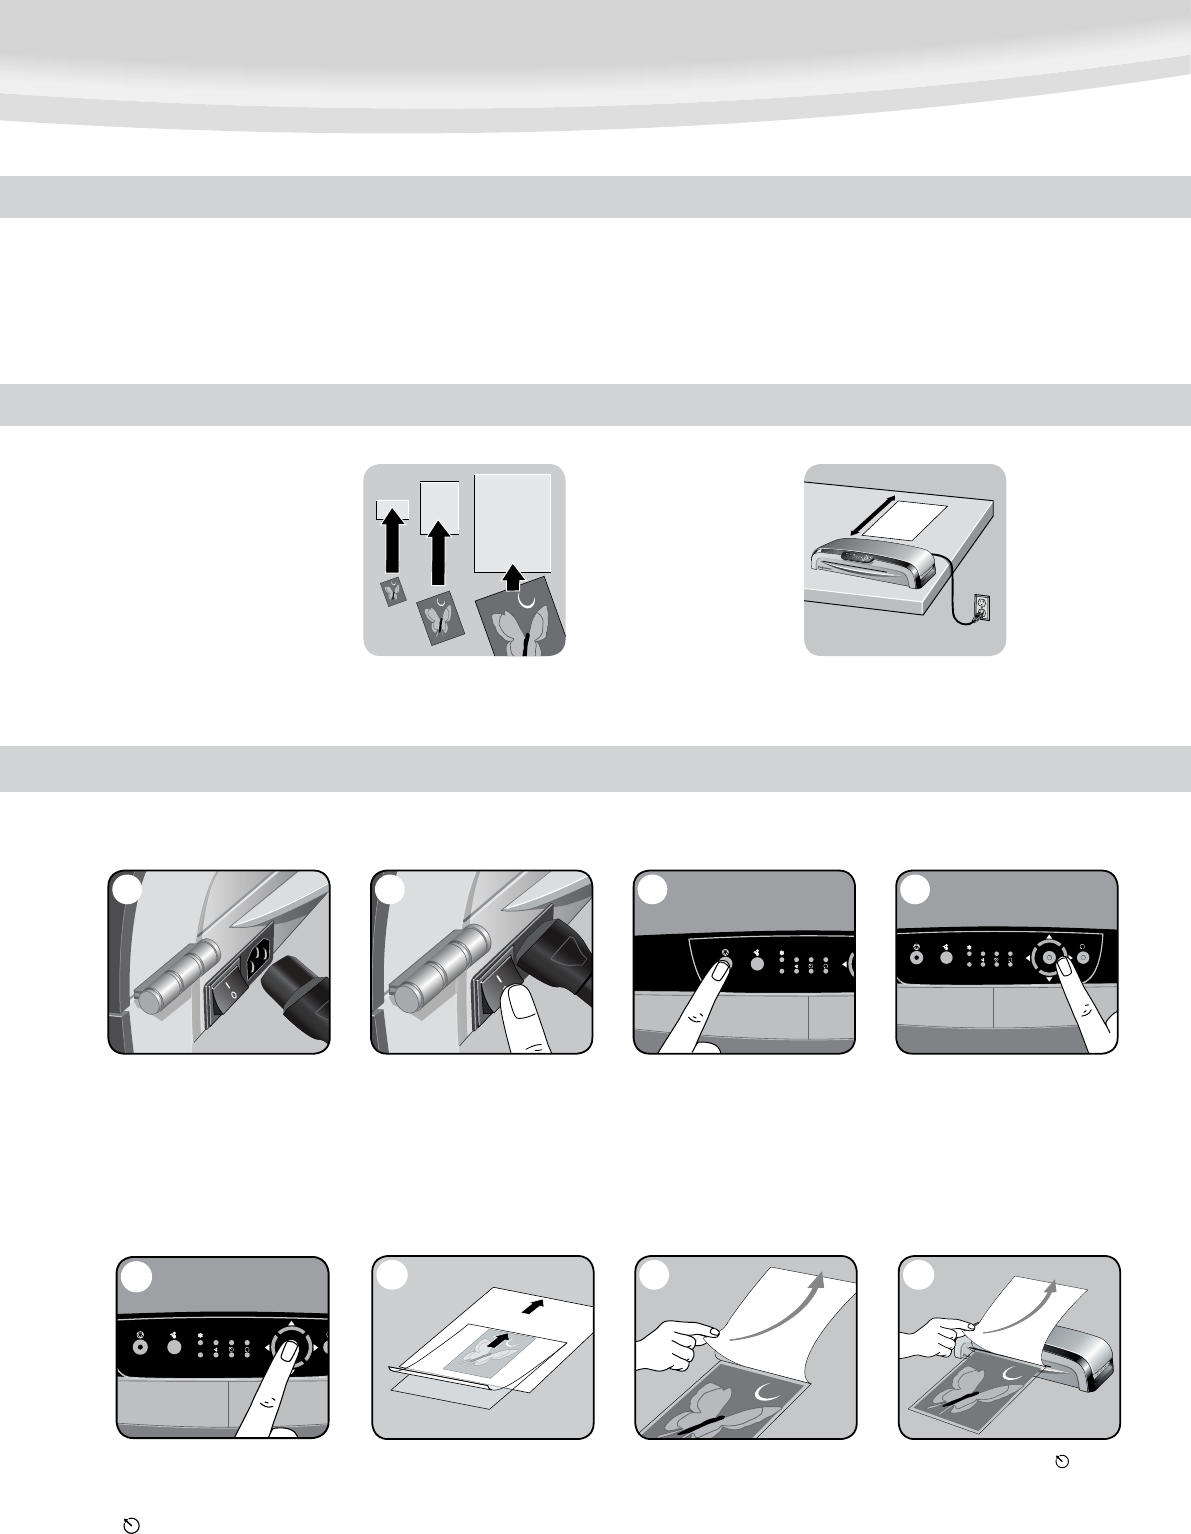
COLD LAMINATION STEPS
Position laminator
so you have enough
space to allow
items to pass freely
through the machine.
Use Fellowes® brand pouches
for best results. Select correct
pouch size for laminated item.
3
BEFORE YOU LAMINATE
CAUTION:Onlyuseself-adhesivepoucheswhenlaminatingwithacoldsetting.
1. Please connect the laminator to
the socket using the separate power
2. Switch laminator on with
Power On / Off button at back
of machine.
3. Press Stand-by button at left
of front operating panel to switch
laminator on.
4. Use navigation keys to select
setting for cold lamination.
6. Center item on clear side against
sealed edge; documents cannot be
repositioned once laminated.
7. Peel a small part of the protective
sheet away from document.
8.Whenthe“wait”LED()stops
flashing, place pouch, sealed edge
first, into laminator entry. Keep
pouch straight and use the edge
guide to center it. Continue peeling
the protective sheet away.
5
5. Confirm your selection by
pressing “Enter” button in the middle
of navigation keys. “Wait” LED
( )willstopashingandbeepwill
sound when laminator has finished
temperature adjustment.


