9
K3033pr-0921
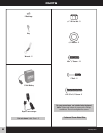
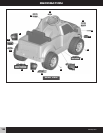
Intheunassembledstate,thispackagecontains
smallparts.Adultassemblyisrequired.
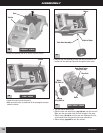
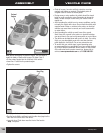
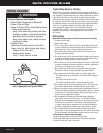
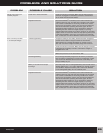
BATTERY CHARGING
Battery
Connector
Charger
Connector
A
B
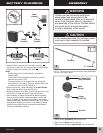
•Plugthebatteryconnectorintothechargerconnector
A
.
Pushfirmlytomakesuretheconnectorsarecompletelyjoined.
•Plugthechargerintoastandardwalloutlet
B
.
Notes:
-Usethechargeronlyinawalloutlet.Donotpluginto
aceilingoutlet.
-Ifpowerflowtothewalloutletiscontrolledbyaswitch,
makesuretheswitchis“ON”.
-Thepowerindicatoronthechargerdoesnotindicatethe
chargestatusofyourbattery.Thepowerindicatorallowsyou
toseethereispowerfromthewalloutlet.
•Beforefirst-timeuse,chargethebatteryfor at least 18 hours.
Neverchargethebatterylongerthan30hours.
•Rechargethebatteryforatleast14hoursaftereachuseofyour
vehicle.Donotchargethebatterylongerthan30hours.
•Oncethebatteryischarged,disconnectthebatteryconnector
fromthechargerconnector.Unplugthechargerfromthewall
outlet.Thebatteryisnowreadytobeinstalledinyourvehicle.
PleaseseetheBatteryInstallationsectiononpage19fordetailed
instructionsoninstallingyourbattery.Ifyourbatteryisalready
installedinyourvehicle,simplyre-connectthemotorharness
connectortothebatteryconnector.
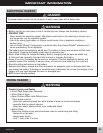
WARNING
Childrencanbeharmedbysmallparts,
sharpedgesandsharppointsinthe
vehicle'sunassembledstate,orbyelectrical
items.Careshouldbetakeninunpacking
andassemblyofthevehicle.Childrenshould
nothandleparts,includingthebattery,
orhelpinassemblyofthevehicle.
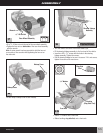
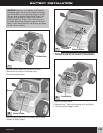
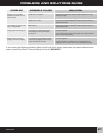
ASSEMBLY
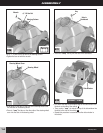
•Fita
3
/8"-16hexnutontooneendoftherearaxle.Handtighten
thehexnuttoholdinplace.
Rear Axle
1
INCORRECT
GAP
CORRECT
NO GAP
Power
Indicator
3
/8" -16 Hex Nut
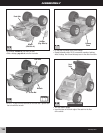
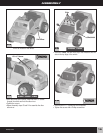
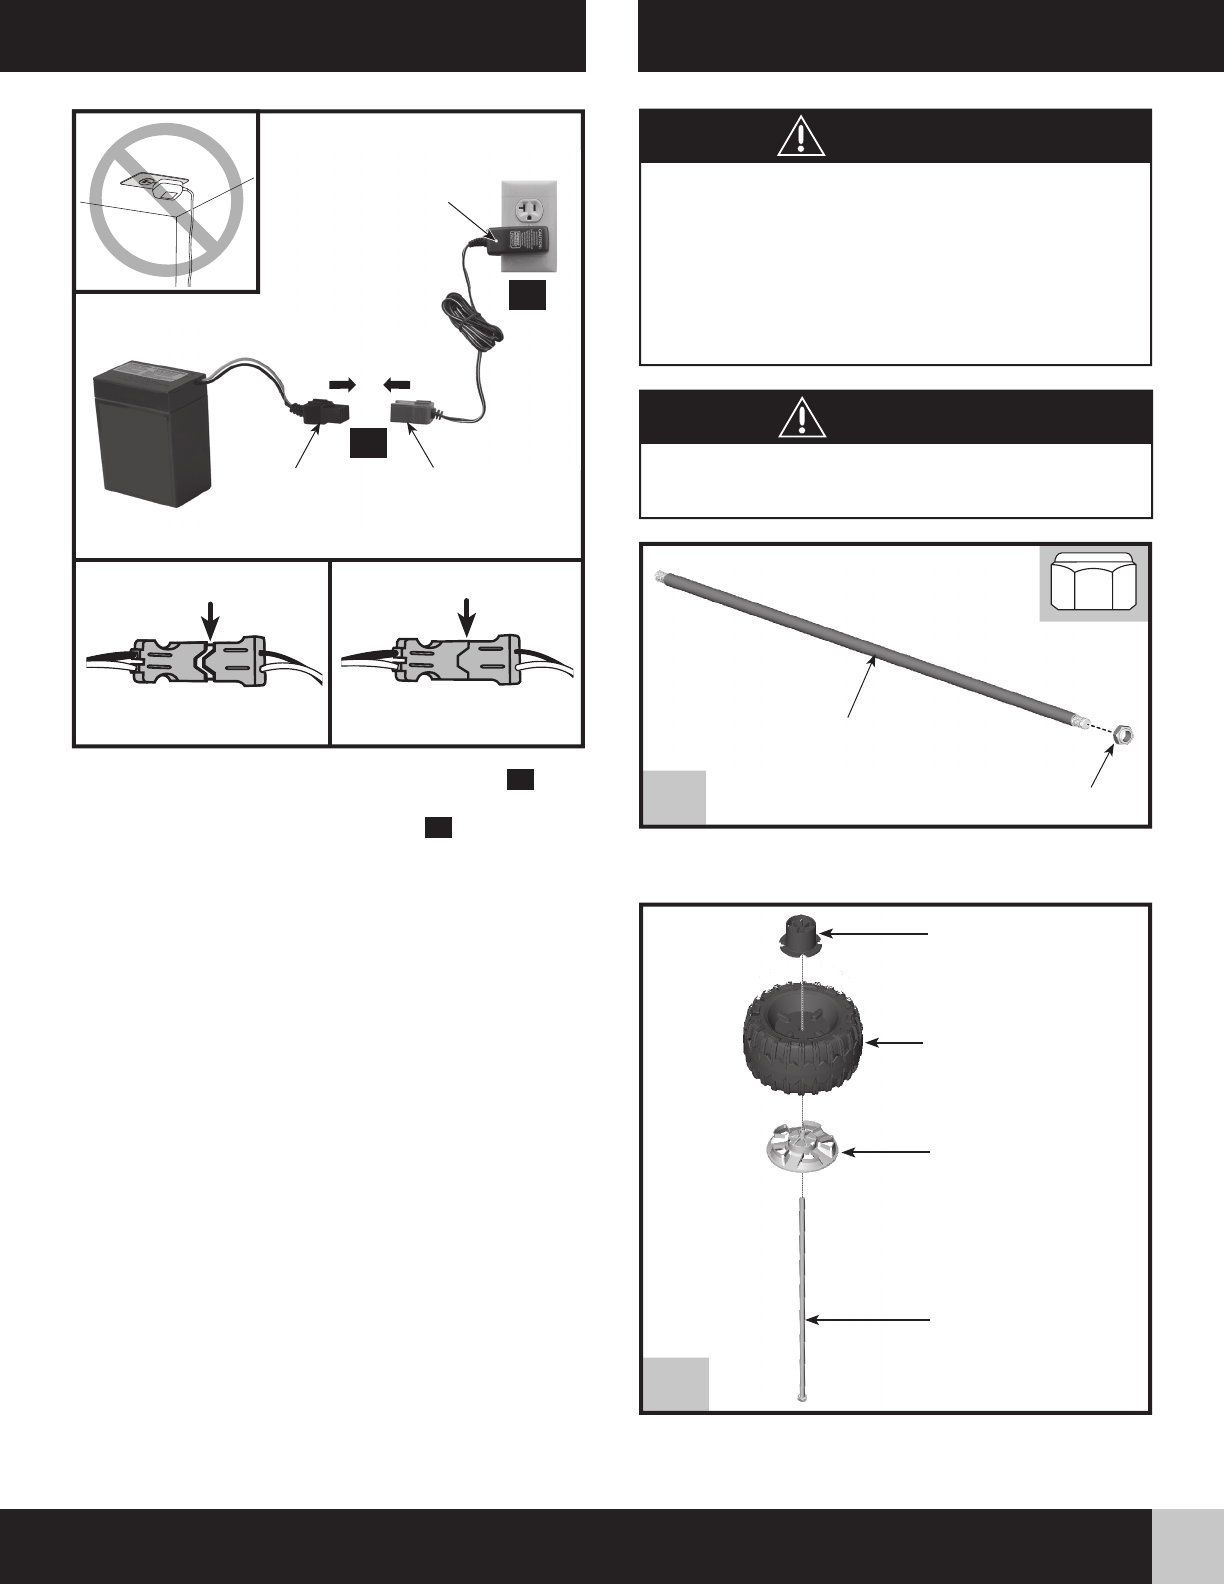
2
•Slideahubcap,peg side up,ontotherearaxle.
•Slideawheel,ribs up,ontotherearaxle.
•Slidearearwheeldriver,ring side down,ontotherearaxle.
Rear Wheel Driver
(Ring Side Down)
Wheel
(Ribs Up)
Hubcap
(Peg Side Up)
Rear Axle
CAUTION