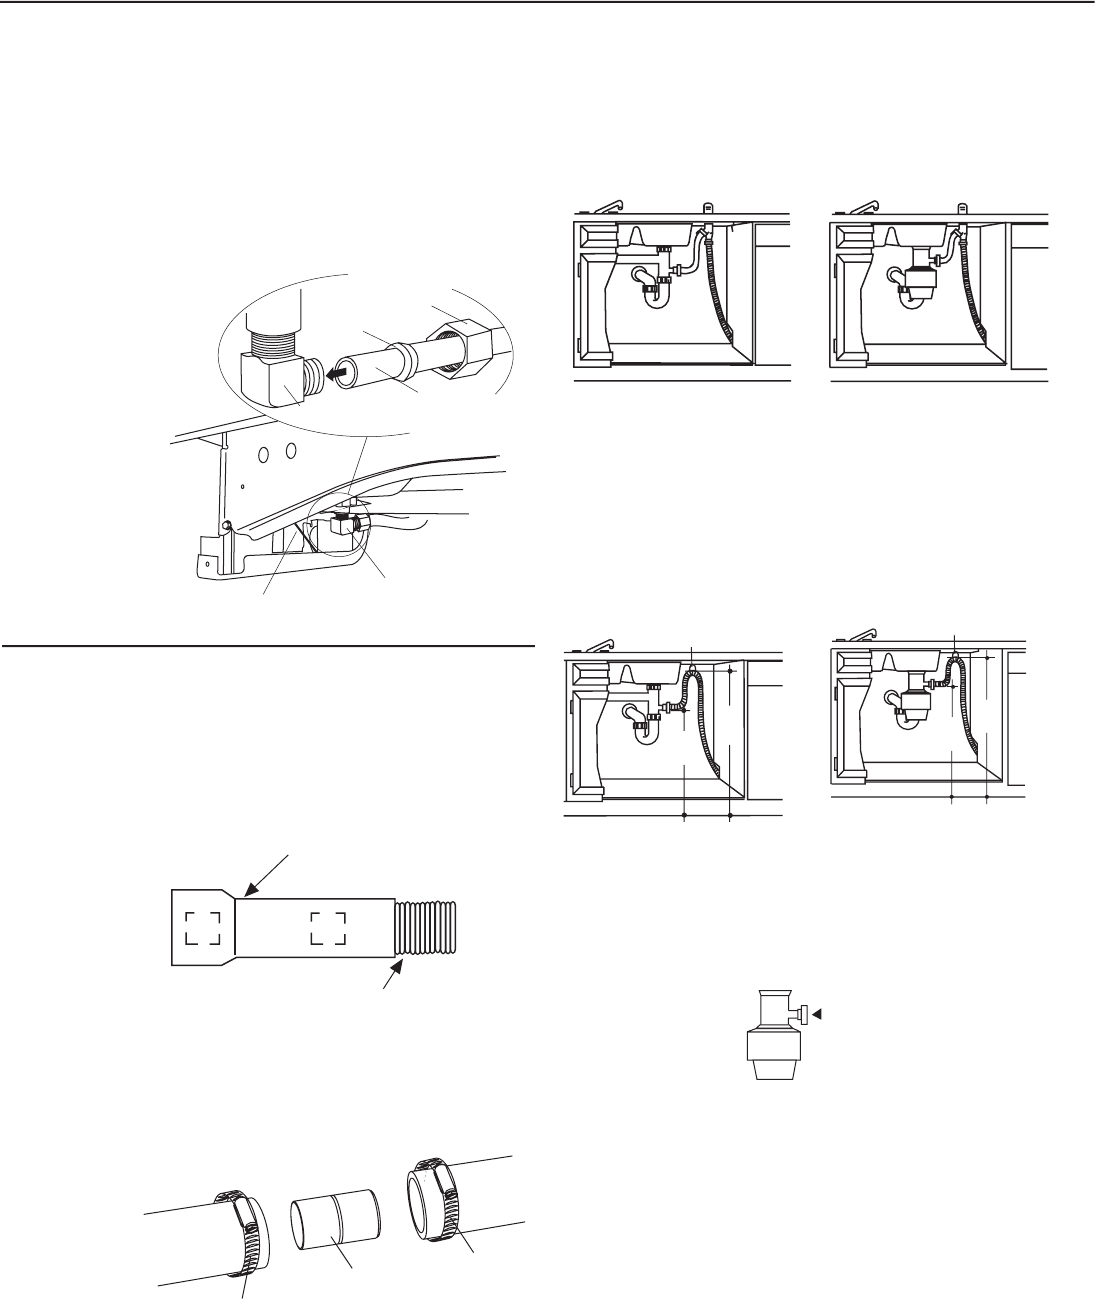
• Connect drain line to air gap, waste tee or disposer
using the previously determined method. Secure hose
Method 1 – Air gap with waste tee or disposer
Method 2 – “High drain loop” with waste tee or disposer
With this method you will need the drain hose hanger set
When connecting drain line to
disposer, check to be sure that drain plug has been removed.
DISHWASHER WILL NOT DRAIN IF PLUG IS LEFT IN PLACE.
STEP 17: CONNECT DRAIN LINE
The molded end of the drain hose will fit 5/8" through 1"
diameter inlet ports on the air gap, waste tee or disposer.
• Determine size of inlet port
• Cut drain hose connector on the marked line, if required, to fi t
• If a longer drain hose is required and you did not purchase
drain hose GPF10L, add up to 42" length for a total of 120"
(10 feet) to the factory installed hose. Use 5/8" or 7/8" inside
diameter hose and a coupler to connect
TOTAL DRAIN HOSE LENGTH MUST NOT EXCEED 10 FEET
FOR PROPER DRAIN OPERATION.
Avoid unnecessary service call charges for a no drain
Make sure excess drain hose has been pulled through
the cabinet opening. This will prevent excess hose in the
dishwasher cavity from becoming kinked or crushed by the
STEP 16: CONNECT WATER SUPPLY
Connect water supply line to 90° elbow.
• Slide compression nut, then ferrule over end of water line.
• Insert water line into 90° elbow.
• Slide ferrule against elbow and secure with compression nut.
Check to be sure that door spring
and/or door spring cable do not rub or contact the fi ll hose or
90° Elbow
Ferrule
90° Elbow
Door Spring
756Dia57
Hot Water
Supply Line
Compression
Nut
1871 Art4
Cutting Line
1"
5/8"
IMPORTANT: Do not cut corrugated
portion of hose
32"
Min.
18"
Min.
05D-1294B
Drain Hose Hanger


