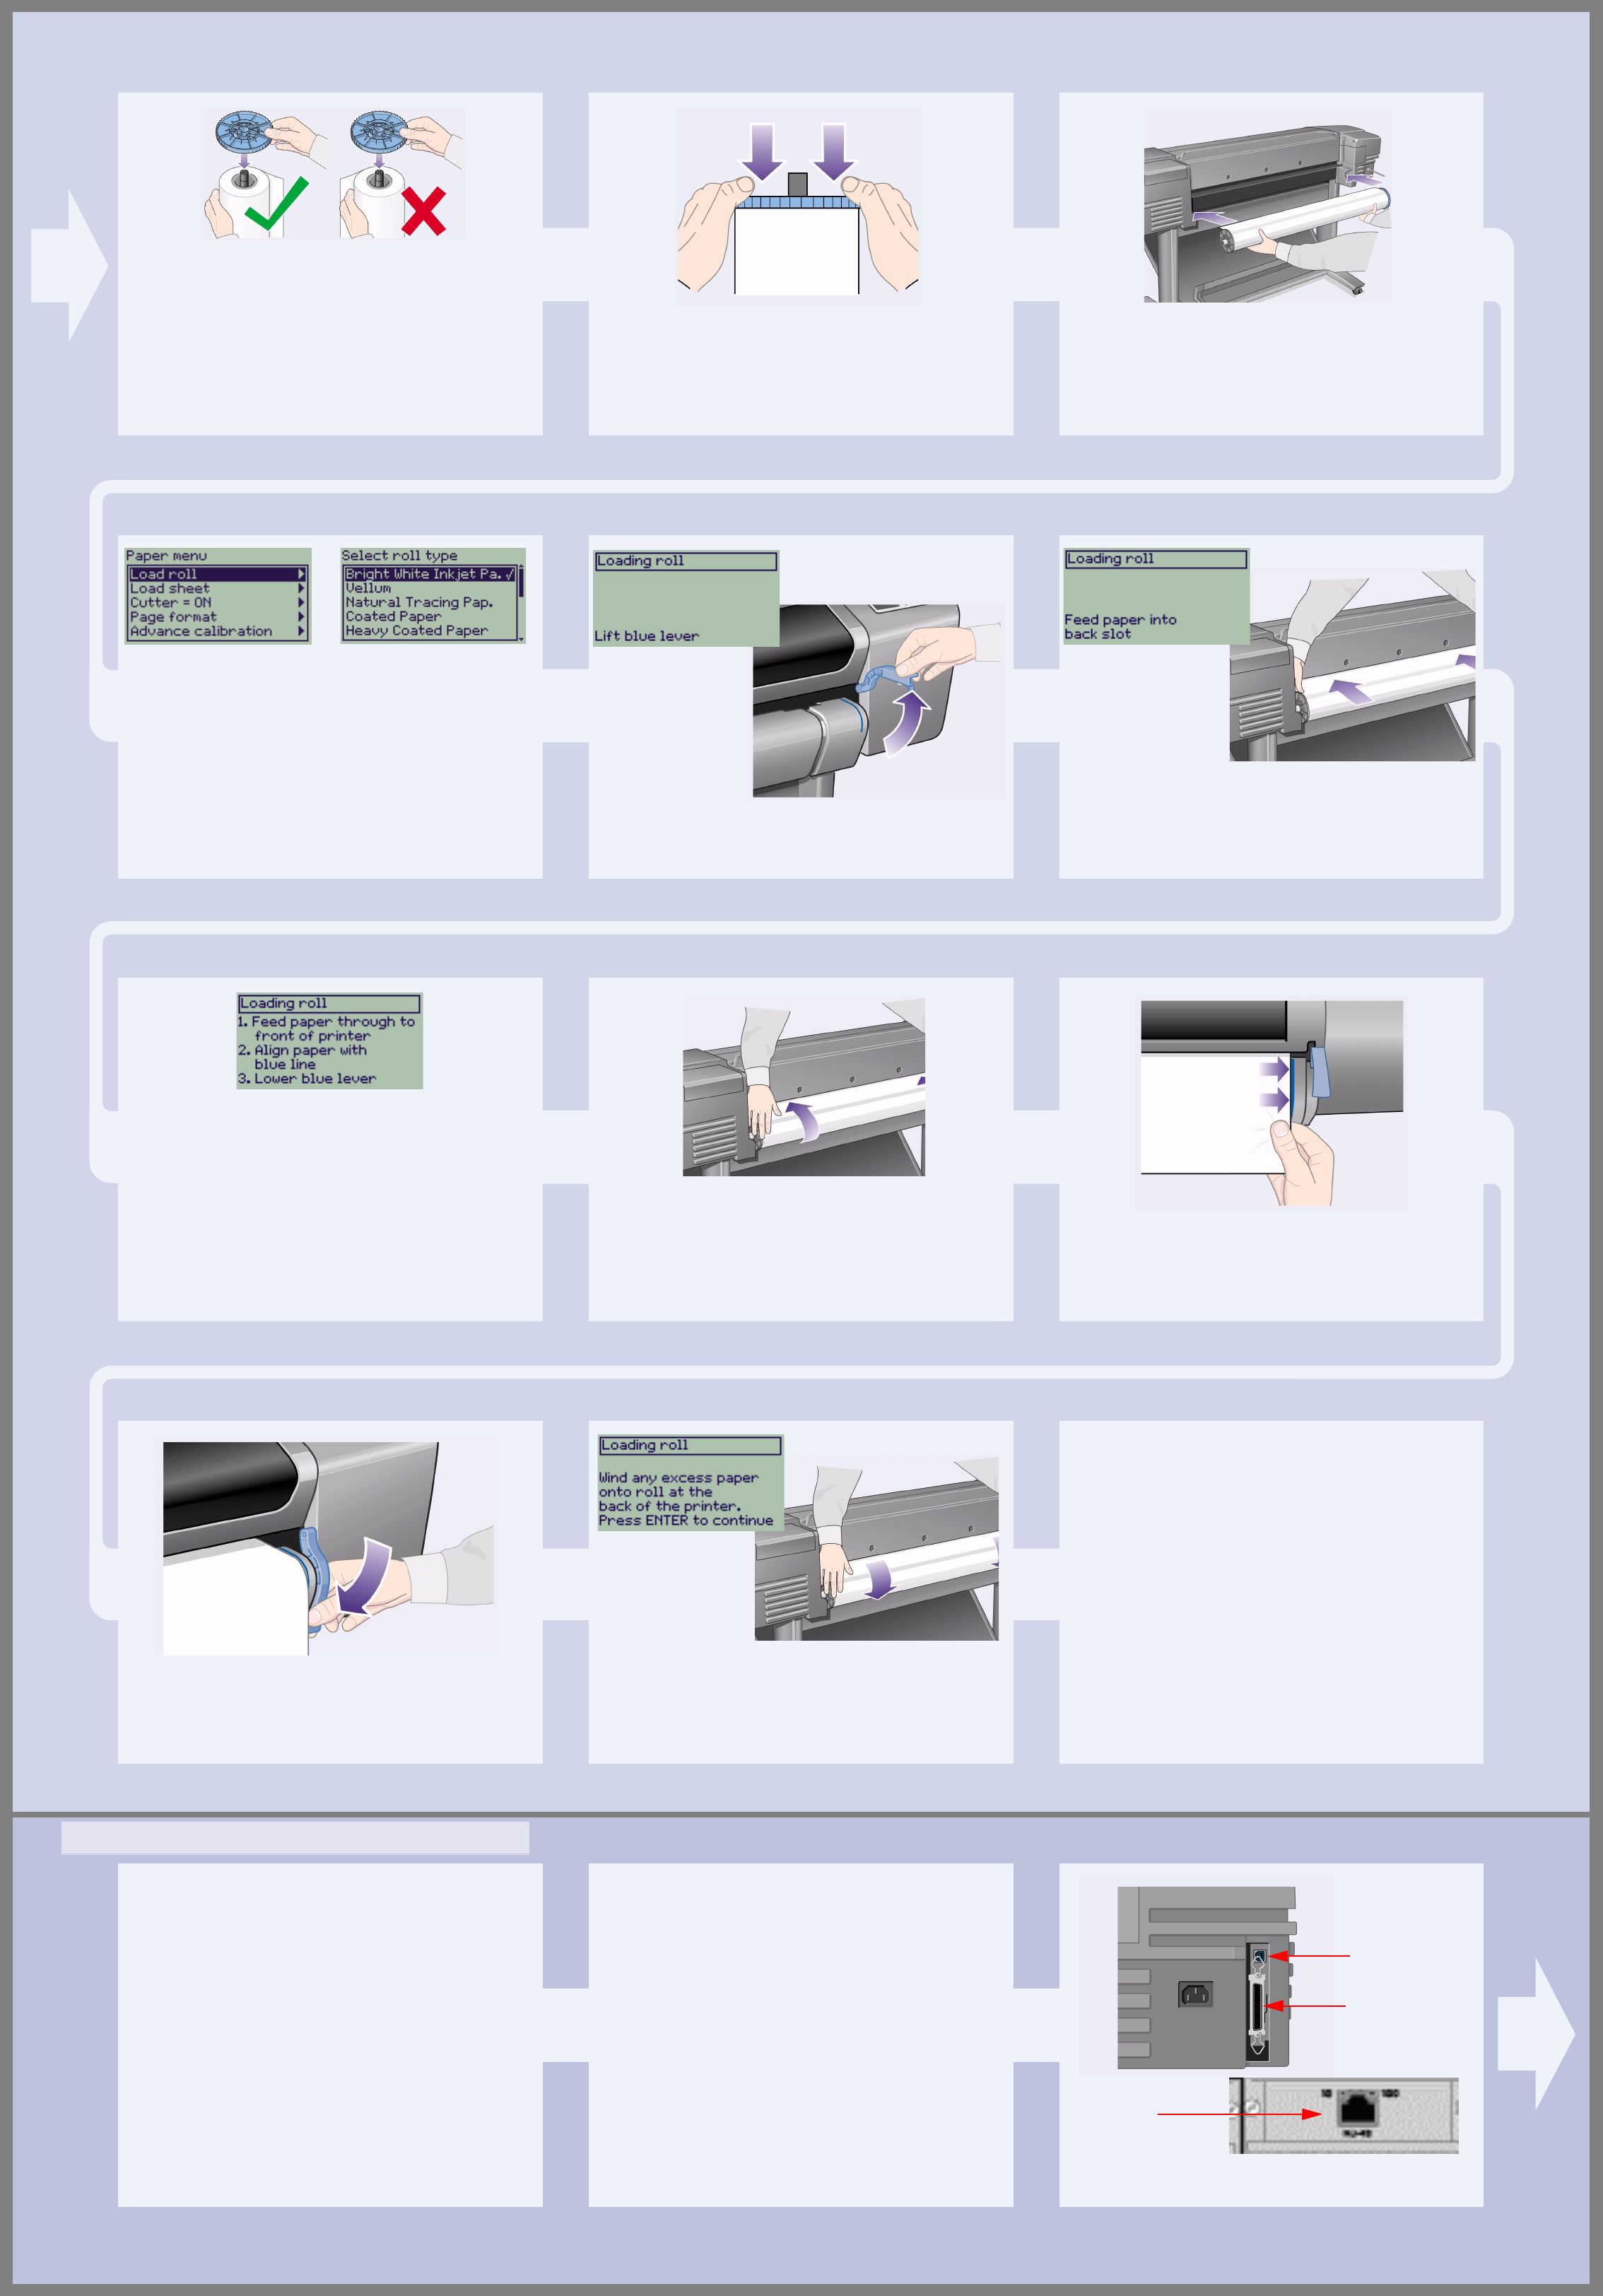
4–Slide the new roll of paper on to the spindle.
Make sure the orientation of the paper is loaded exactly
as shown. If it is not, remove the roll, turn it through 180
degrees vertically and slide it back on to the spindle.
5–Put the removable stop on to the upper end of
the spindle,
and push it down as far as it will go.
6–With the blue-colored roll stop on the right
(as seen from the back of the printer),
slide the
spindle into the printer left and then right as shown by
the arrows. The paper should oriented on the roll
exactly as shown.
7–A front-panel message prompts you to load
paper to align the printheads.
Press the Enter key.
Then, as above left, select Load roll (or Load sheet, if
you prefer–see the Pocket Guide for loading
instructions) and press Enter.
Using the ∆ or ∇ keys, select the type of paper loaded
(see above right) and press the Enter key. (If in doubt,
you should find the ‘type’ of the paper on its box.)
8–Lift the blue paper-load lever.
C6074102
9–From the front of the printer lean over the top
and feed the paper towards you into the slot at the back
of the printer, as shown here. (You may find it easier if
the paper bin is pushed back out of the way.)
10–Follow the prompts (see steps 11 to 13).
Try to avoid touching the paper in the middle (keep your
fingers as close as possible to each edge). Handle
glossy paper by the edges or wear cotton gloves. Skin
oils can interact with the ink and cause it to smear.
11–Leaning over the printer, feed the paper
through towards the front.
12–At the front of the printer, align the paper
against the blue line as shown here.
13–Lower the blue paper-load lever. The printer
checks the alignment of the paper.
If it is not correctly aligned, the front panel displays help
instructions. The printer trims the edge of the roll.
14–If there is an excess of loose paper wrap it
back onto the roll by turning the roll; then press Enter.
15–The printer will now print its alignment
pattern, using the paper you have loaded.
If there is a problem printing, check the front panel error
messages. Explanations of these messages are in the
Pocket Guide (which you should have inserted in the
slot on the right-hand side of the printer).
You should not cancel the alignment print as correct
alignment of the printheads is essential for good-quality
printing.
You may also be prompted to let the printer perform its
Color Calibration routine. Again, don’t cancel this as it
will help ensure that the colors printed are best for the
paper you have loaded.
Printhead Alignment and Color Calibration are
different processes and should both be done when
required. They are briefly described in the Pocket Guide
and more fully in the online User’s Reference Guide.
If you have purchased a network card, for connecting
your printer to a local area network (LAN), now is a
good time to install it—see Stage 12 below.
Also install now any HP-GL/2 Accessory card and any
additional memory for your Accessory card. See the
instructions packaged with these items for full
information on how to install them. The HP-GL/2
Accessory card is installed in much the same way as a
LAN card, as in Stage 12 on page 7.
See Stage 12 on page 7 for connecting a LAN cable.
If you use a PC with Windows 98 and a USB
connection, see Stage 13 on page 7.
For details of how to install the software you may need
(except with a PC running Windows 98 and a USB
connection), turn to Stage 14 on page 8.
Sockets for connecting your printer to a
computer or to a network
The diagram on the right shows the sockets (or “ports”)
that you can use.
• The USB and parallel sockets are at the back of the
printer, alongside the mains socket.
• The LAN cable socket is inside the back cover of the
printer—see Stage 12 on page 7 for how to access it.
USB socket
Parallel socket
LAN cable socket
(inside
back cover)
11. Understand Printer Connections (all models)


