The set-up printheads are provided to protect the ink
system while the printer is being transported from the
factory, and to fill up the ink tubes inside the printer when
it is first initialized. They must be replaced by active
(normal) printheads when the printer’s tubes have filled
with ink.
Set-up printheads cannot be used for printing.
It is important not to remove the set-up printheads too
early, as they are required while the printer is being
initialized.
When you have removed the set-up printheads (as
described in this stage), you should throw them away, as
they cannot be used for printing and are not needed any
more.
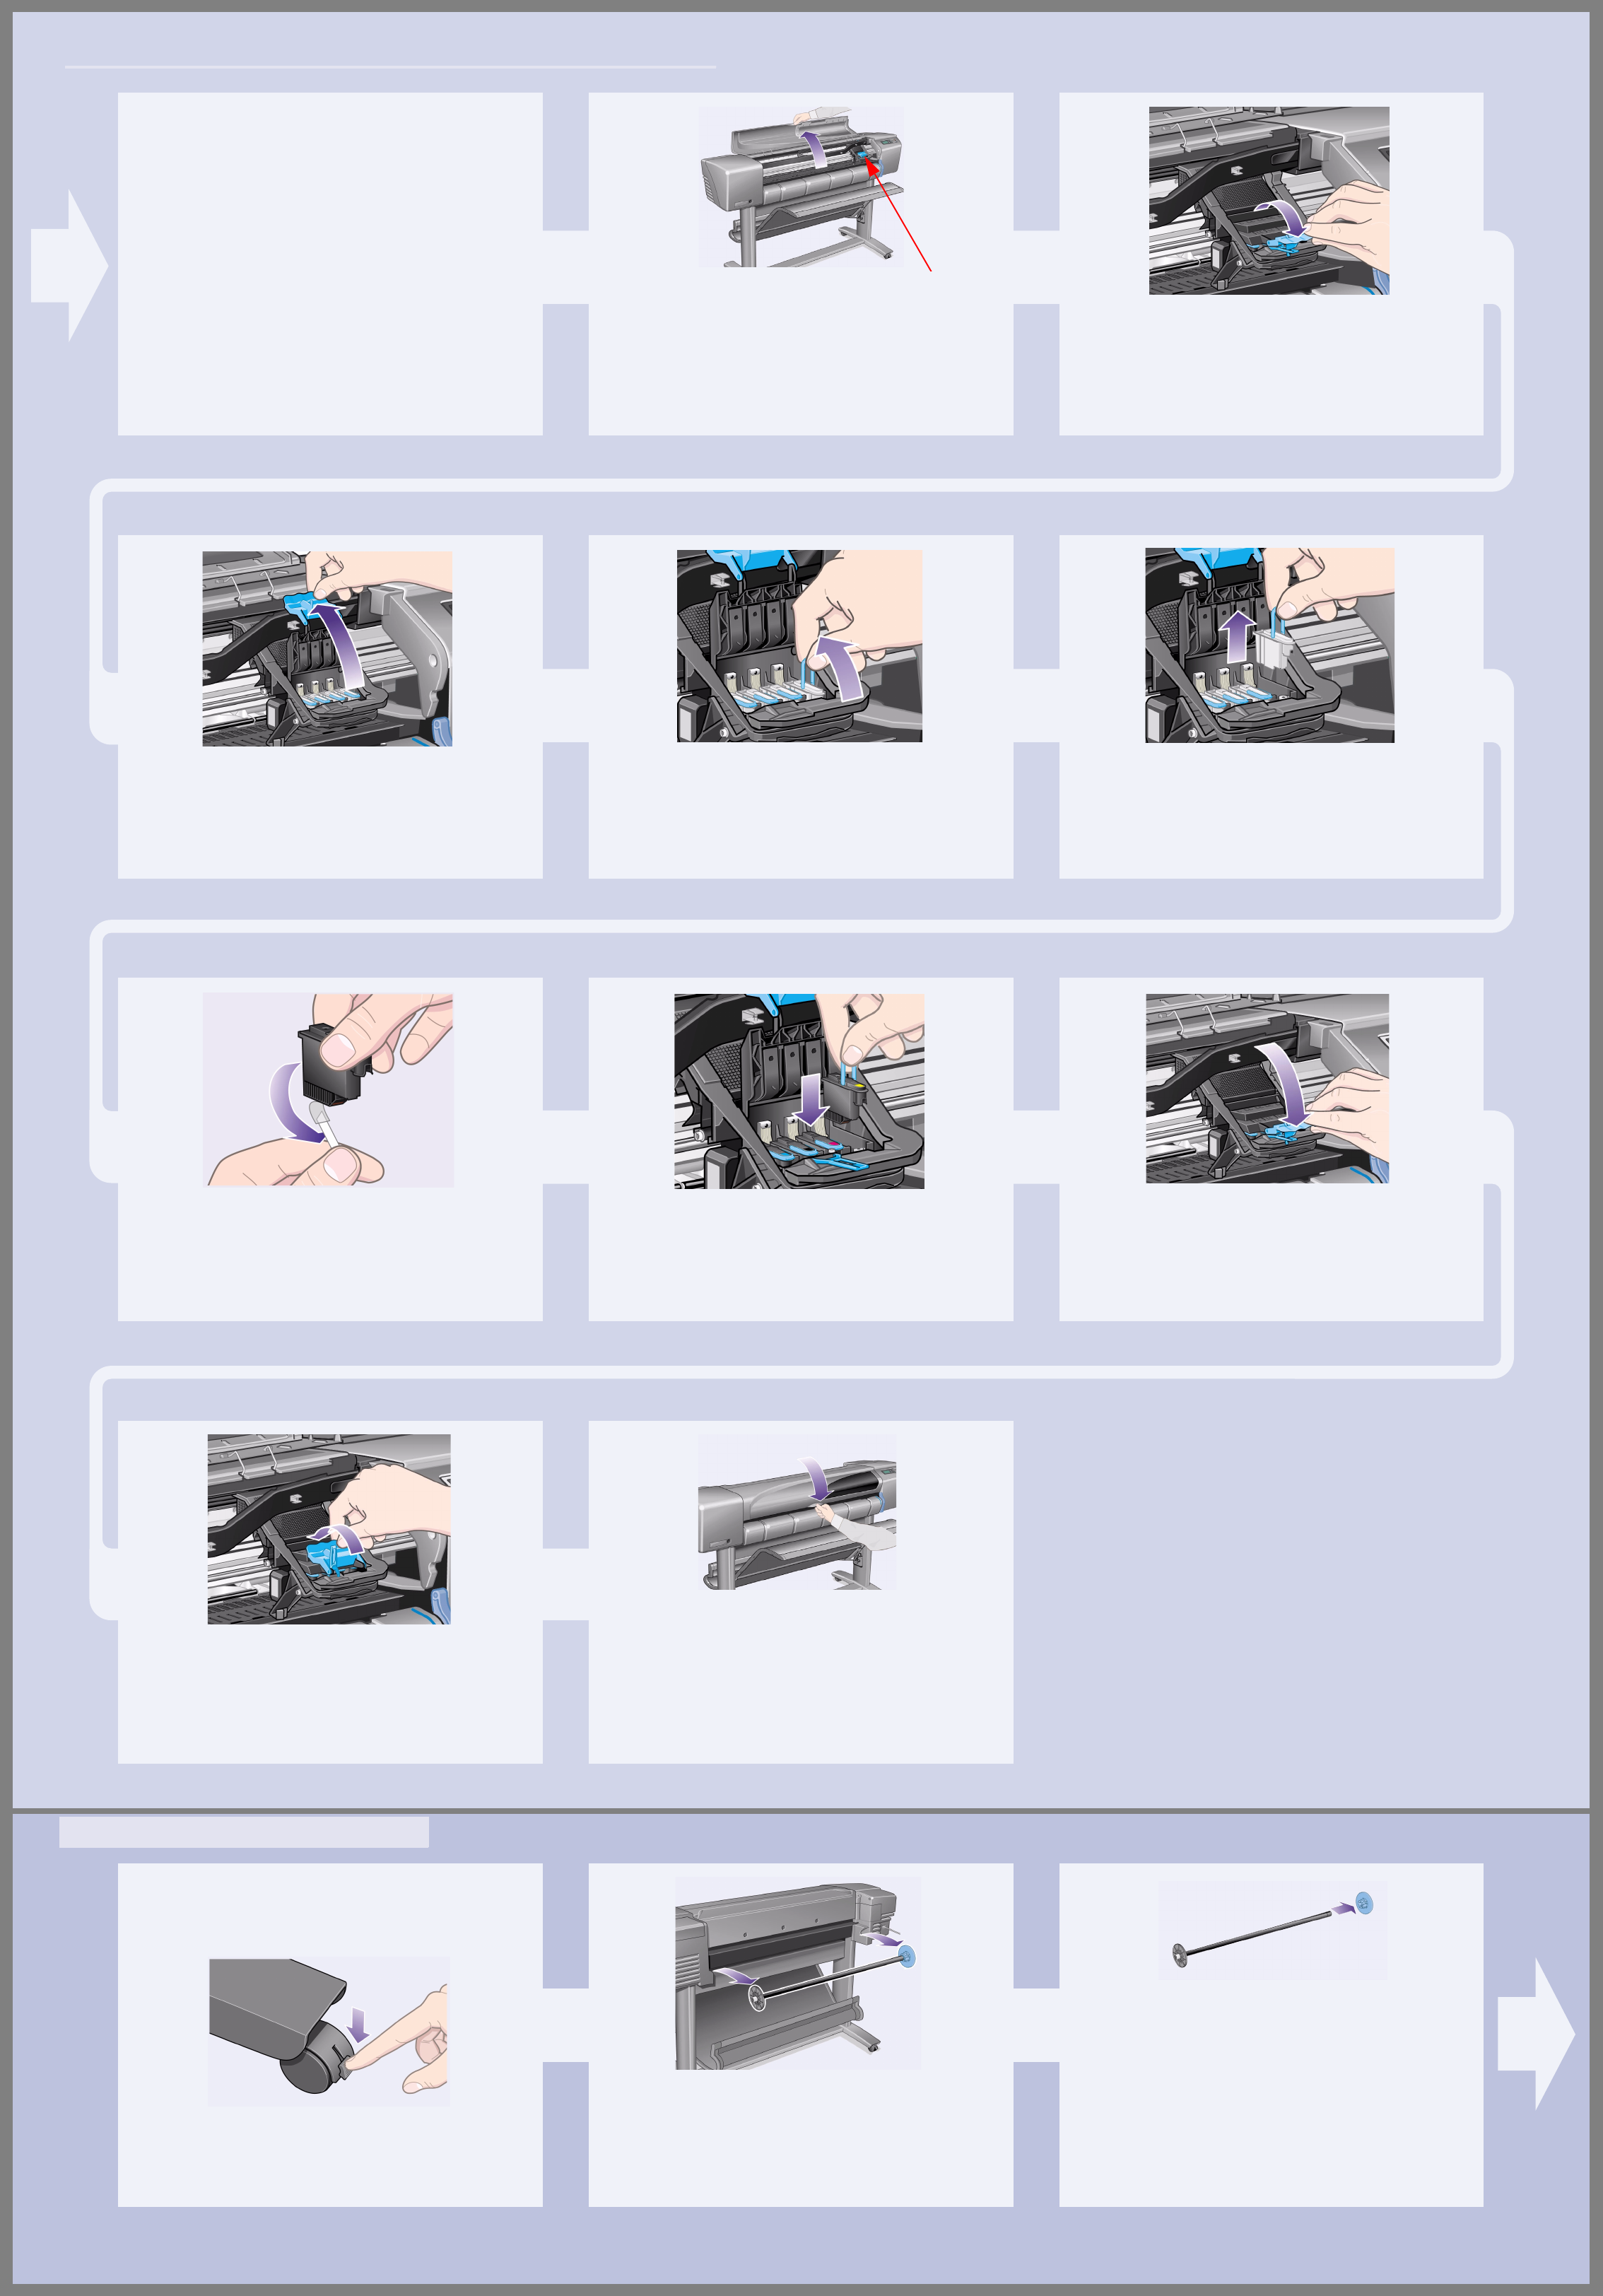
1–When you are prompted to do so in the front
panel, open the window and locate the carriage
assembly.
This will be accessible once the ink tubes
and set-up printheads have filled with ink.
2–Release the latch on the printhead cover. You
may need to hold this latch up out of the way during the
next steps.
3–Lift up the printhead cover; this will give you
access to the set-up printheads.
4–To remove a set-up printhead, lift up the blue
handle.
5–With controlled force pull the blue handle
upwards until the printhead is released from the
carriage assembly.
6–Remove the tape from the new printheads.
7–Insert a new normal printhead ensuring that the
colored label on the printhead corresponds to that on
the printhead slot.
8–When you have replaced all the set-up
printheads with normal printheads, pull the
printhead cover down over the printheads, ensuring that
the cover hooks over the latch.
9–Close the latch on the printhead cover. The
latch may feel rather stiff, but don’t worry as it needs
some pressure to close it.
10–Close the window. After the replacement of the
set-up printheads, the printer checks that the normal
printheads are functioning correctly. This may take
several minutes. You will be prompted to accept
Printhead Alignment—correct alignment of the
printheads is essential for good-quality printing. For this
you will need to load paper, as described in the next
stages.
The printer will now use a certain amount of paper for
checking and calibration. (If you prefer to use sheet
paper, see the Pocket Guide for loading instructions.)
1–If your printer has legs, make sure the printer
wheels are locked (the brake lever is pressed down)
to prevent the printer from moving.
2–At the back of the printer, remove the empty
spindle by pulling firmly on each end as indicated.
3–The spindle has a stop at each end to keep
the roll in position.
The stop that is colored blue can
be removed to mount a new roll; it slides along the
spindle to hold rolls of different widths.
Remove the blue-colored stop from the end of the
spindle, and stand the spindle vertically, with the fixed
stop on the floor.
10. Load a Roll of Paper (all models)


