3
EN
Preliminary information for installing the hood:
Disconnect the power supply at the domestic main
switch before carrying out electrical connections.
Remove the grease filter/s.
1. Using a pencil, draw the centre line on the wall up
to the ceiling to facilitate installation operations.
2. Apply the drilling template to the wall: Align the
vertical centre-line on the drilling template with the
centre-line drawn on the wall. The template’s
bottom edge represents the bottom edge of the
hood.
3. Place the lower support bracket on the hole
diagram so that it matches the dotted rectangle,
mark the two external holes and drill.
Note: Drill all the holes indicated on the template:
the top 2 holes are for hanging the hood and the
bottom holes (generally 1 central or 2 side holes)
are for fixing it securely to the wall.
Remove the hole diagram, insert the wall plugs and
fix the hood support bracket with two 5 x 45 mm
screws.
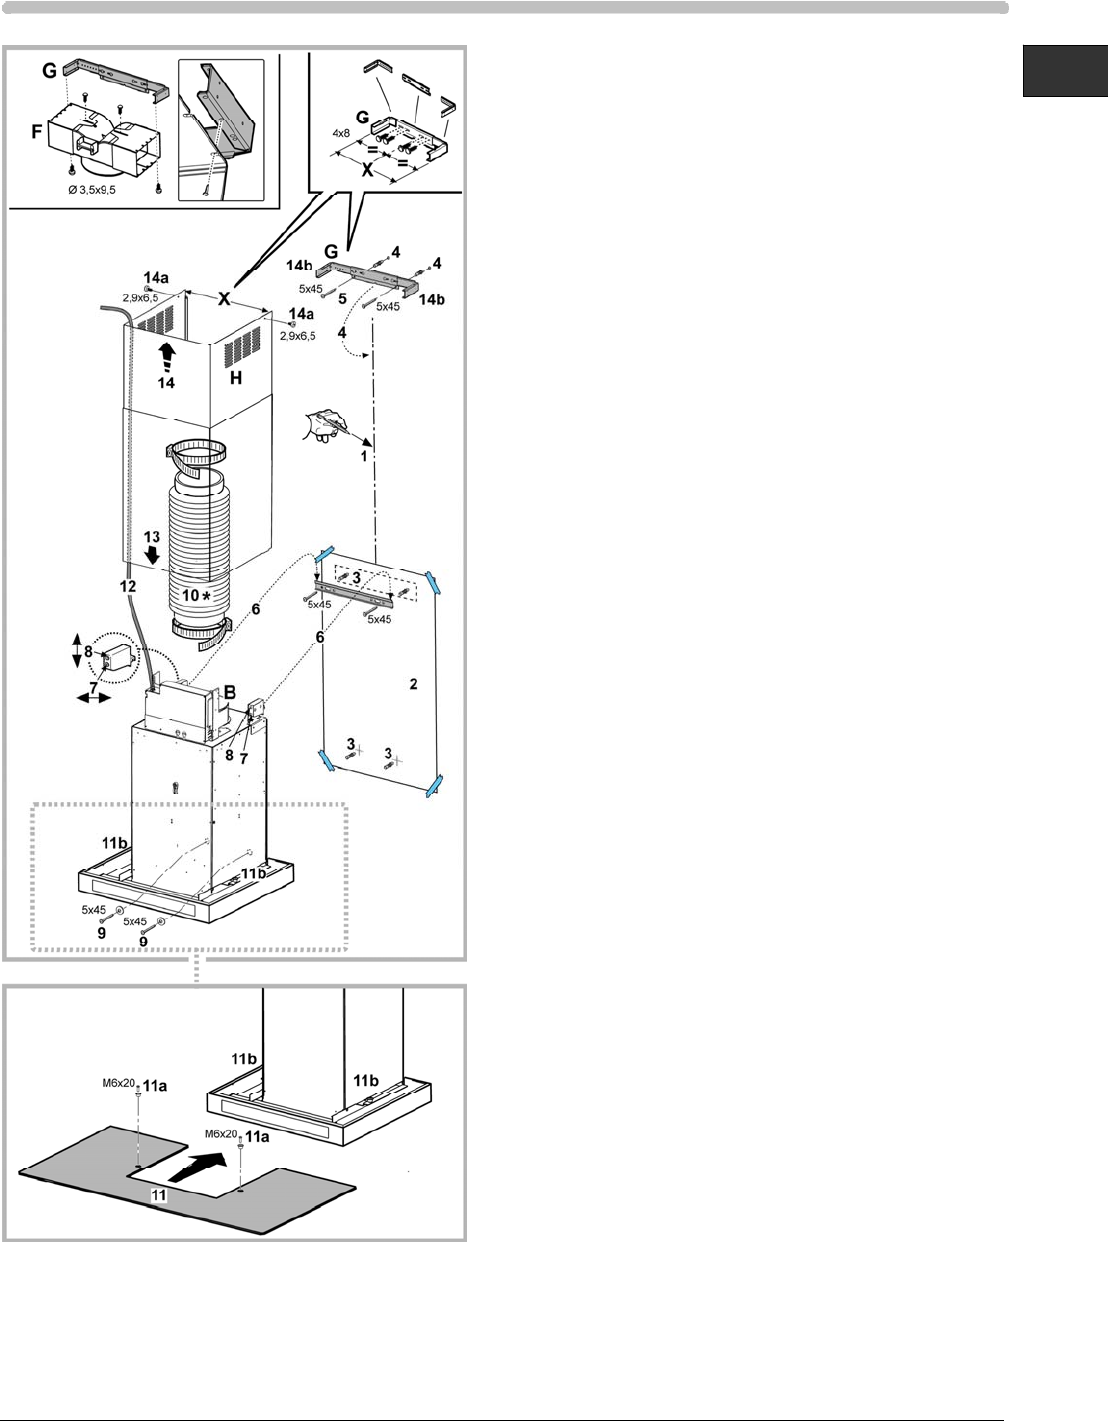
4. Fit the flue support bracket “G” to the wall and
against the ceiling, use the support bracket as a
hole diagram (if present, the small slot on the
support must match the line drawn on the wall ),
mark 2 holes with the pencil then drill the holes (Ø 8
mm) and finally insert 2 plugs.
5. Fix the flue support bracket to the wall with two 5 x
45 mm screws.
6. Hook the hood to the lower bracket.
7. Adjust the distance between the hood and the wall.
8. Adjust the hood horizontally.
9. Fix the hood securely to the wall (ABSOLUTELY
NECESSARY!!).
10. Connect an exhaust pipe (pipe and clamps are not
supplied and must be bought separately) to the
collar located above the extraction motor unit.
For extractor operation, connect the other end of
the exhaust pipe to the home discharge device. For
filter operation, fix the deflector F to the flue support
bracket G and connect the other end of the exhaust
pipe to the deflector collar F.
11. Insert the steam deflector and secure it to the
supports (11b) on the extractor unit with 2 bushings
and 2 screws (11a).
12. Make all necessary electrical connections.
13. Fit the flues over the extractor unit, engaging them
in their seat above the hood.
14. Slide the top section of the flue and secure it with 2
screws (14a) to the flue support bracket “G” (14b).
Refit the grease filter/s and check for correct hood
operation.


