11
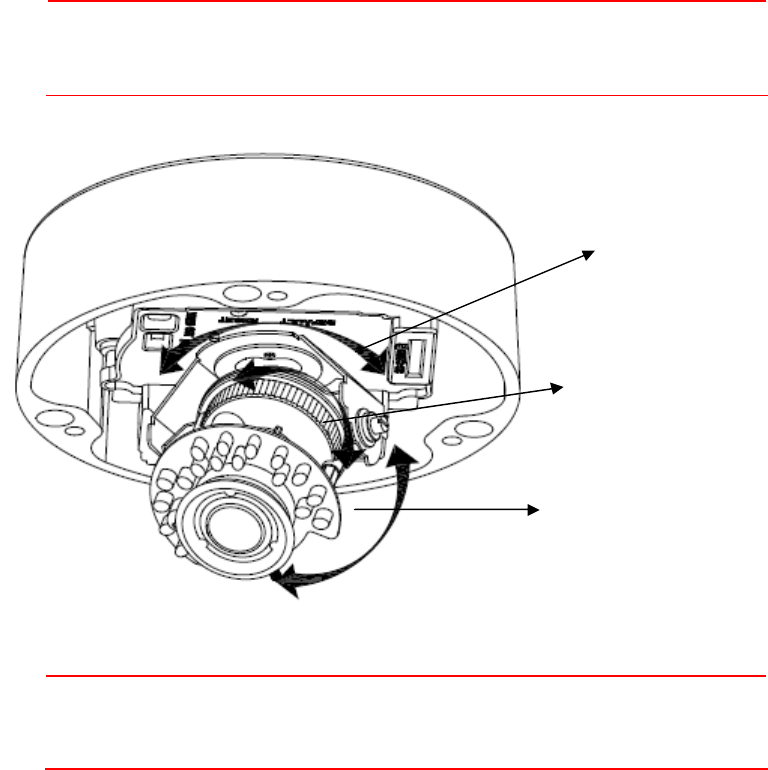
Adjusting the Camera Position
The dome camera has three axes for positioning the camera. While
monitoring the picture on the monitor, adjust the camera position as follows:
Ÿ Pan Adjustment (A) For Wall Mount and Tilted Ceilings Rotate the lens
base (maximum360° ) until you are satisfied with the field of view.
Ÿ Horizontal Rotation (B) Rotate 3D assembly in the base. Do not turn
assembly more than 360° as this assembly may cause the internal
cables to twist and disconnect or break.
Ÿ Tilt Adjustment (C) After loosening the thumbnuts, position the camera as desired,
then finger –tighten the thumbnuts to set the position.
Caution
Do not turn the lens more than 360° as this may cause internal
cables to disconnect or break.
Caution Retighten the locking screws to prevent loss of adjustment.
Mounting the Camera
Ÿ Place the guide pattern sticker (supplied) on the mounting surface and
mark three holes according to the guide pattern sticker. Then fasten the
sticker to the mounting surface with screws.
Ÿ Connect the Safety Wire (Fall Prevention Wire, not supplied) to the
camera and the ceiling.
A
C
B


