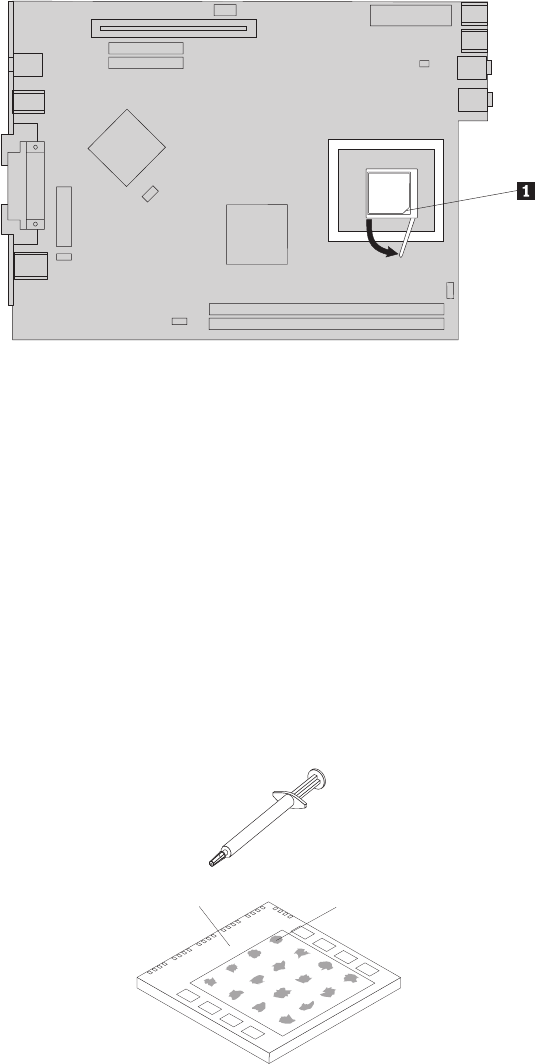
7. Position the microprocessor so that the pins are aligned with the socket and
with the beveled corner 1 on the microprocessor is aligned in the socket as
shown.
8. Lower the handle until it is fully in the down position and locked into the
socket. This secures the microprocessor in the socket.
9. Remove the cleaning pad from its package and use the cleaning pad to wipe
the thermal grease from the bottom of the heat sink.
Notes:
a. The cleaning pad and thermal grease are separate FRUs and are not
included with the system board or microprocessor FRUs. These must be
ordered separately and shipped along with the FRUs being replaced.
b. Be sure that all of the thermal grease is removed.
Note:
0.01ML is one tick mark on the syringe. If the grease is properly
applied, approximately half (0.22ML) of the grease will remain in the
syringe.
10. Use the thermal grease syringe to place 16 uniformly spaced dots of 0.01ML
each on the top of the microprocessor.
Microprocessor
0.01 mL of
thermal grease
11. Place the heat sink into position on the microprocessor.
12. When tightening the screws that clamp the heat sink, do not overtighten.
Tighten the clamp screws evenly by tightening one side some and then the
other until they are both snug.
13. Go to “Completing the FRU replacement.” on page 104.
Chapter 8. Replacing FRUs 101


