22
Defrosting
The appliance defrosts automatically. The water that forms on the
rear wall drains into a reservoir at the back of the appliance and
evaporates automatically through the compressor heat.
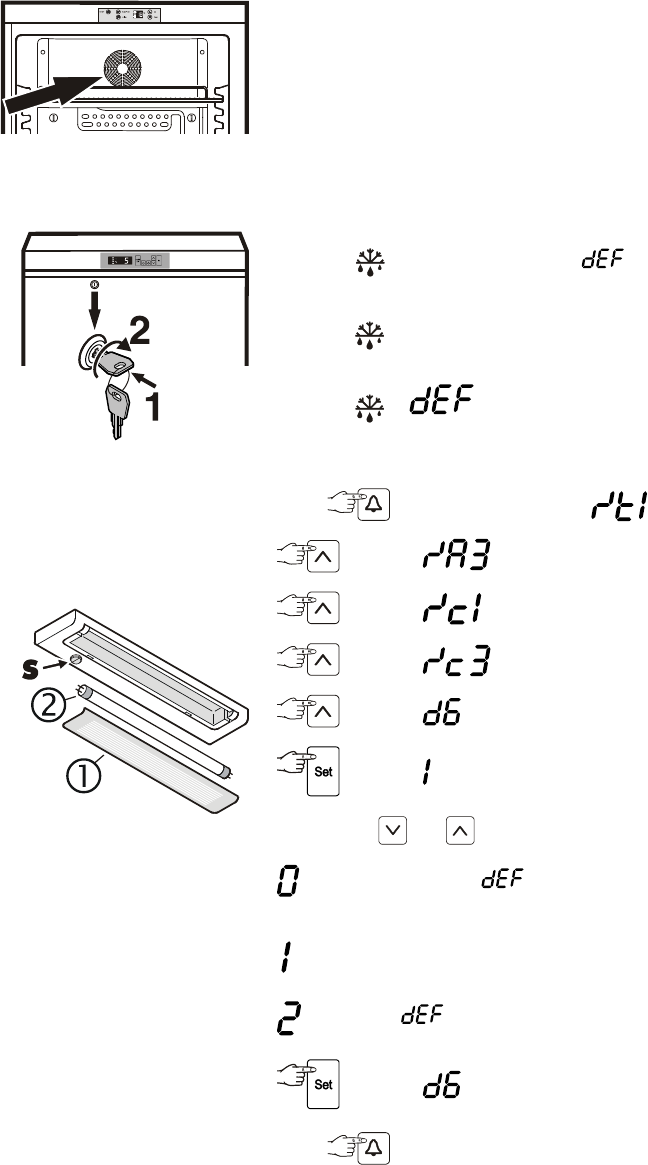
Safety lock
The lock in the appliance door is
equipped with a safety mechanism.
Locking the appliance:
•Insertthekeyasshownbyarrow1.
•Turnthekey90°.
To unlock the appliance, the same
procedure must be repeated in the
same order.
Cooling
The grid shelves can be moved
toaccommodatedierentheight
bottles or packages.
The ventilation slots of the
recirculating fan on the inside
must not be covered!
Interior light in appliances with glass door
Theinteriorlightisttedontheinsideatthetop.SwitchonswitchS,
the interior light comes on.
Changing the tube:
Pull out the mains plug or remove/
unscrew the fuse.
•Leverout thecoverpanel➀ on
the lamp housing at the front and
remove downwards.
•Turnthetube➁ 90° and pull out
downwards. Insert a new tube and
turn 90°.
•Replace the cover panel ➀ by
inserting at the back and clicking
into place at the front.
If the interior light still does not work after you have changed the
bulb, please consult your nearest customer service point.
Setting the display indication for the defrost
phase
The following indications can be set for the defrost phase.
•Symbol
+ alternating display of and the current tem-
perature in the interior of the appliance.
•Symbol
+ temperature before the start of the defrost phase
(factory setting).
•Symbol
+ .
Change the display during the defrost phase
Press for5seconds.Display=
Display=
Display=
Display=
Display=
Display=
Use buttons and to select the desired setting.
=alternating display of and the current temperature in the
interior of the appliance.
=temperature before the start of the defrost phase.
=displayof only.
Display=
Press for 5 seconds.
The electronic control system will automatically switch back to
normal operating mode.


