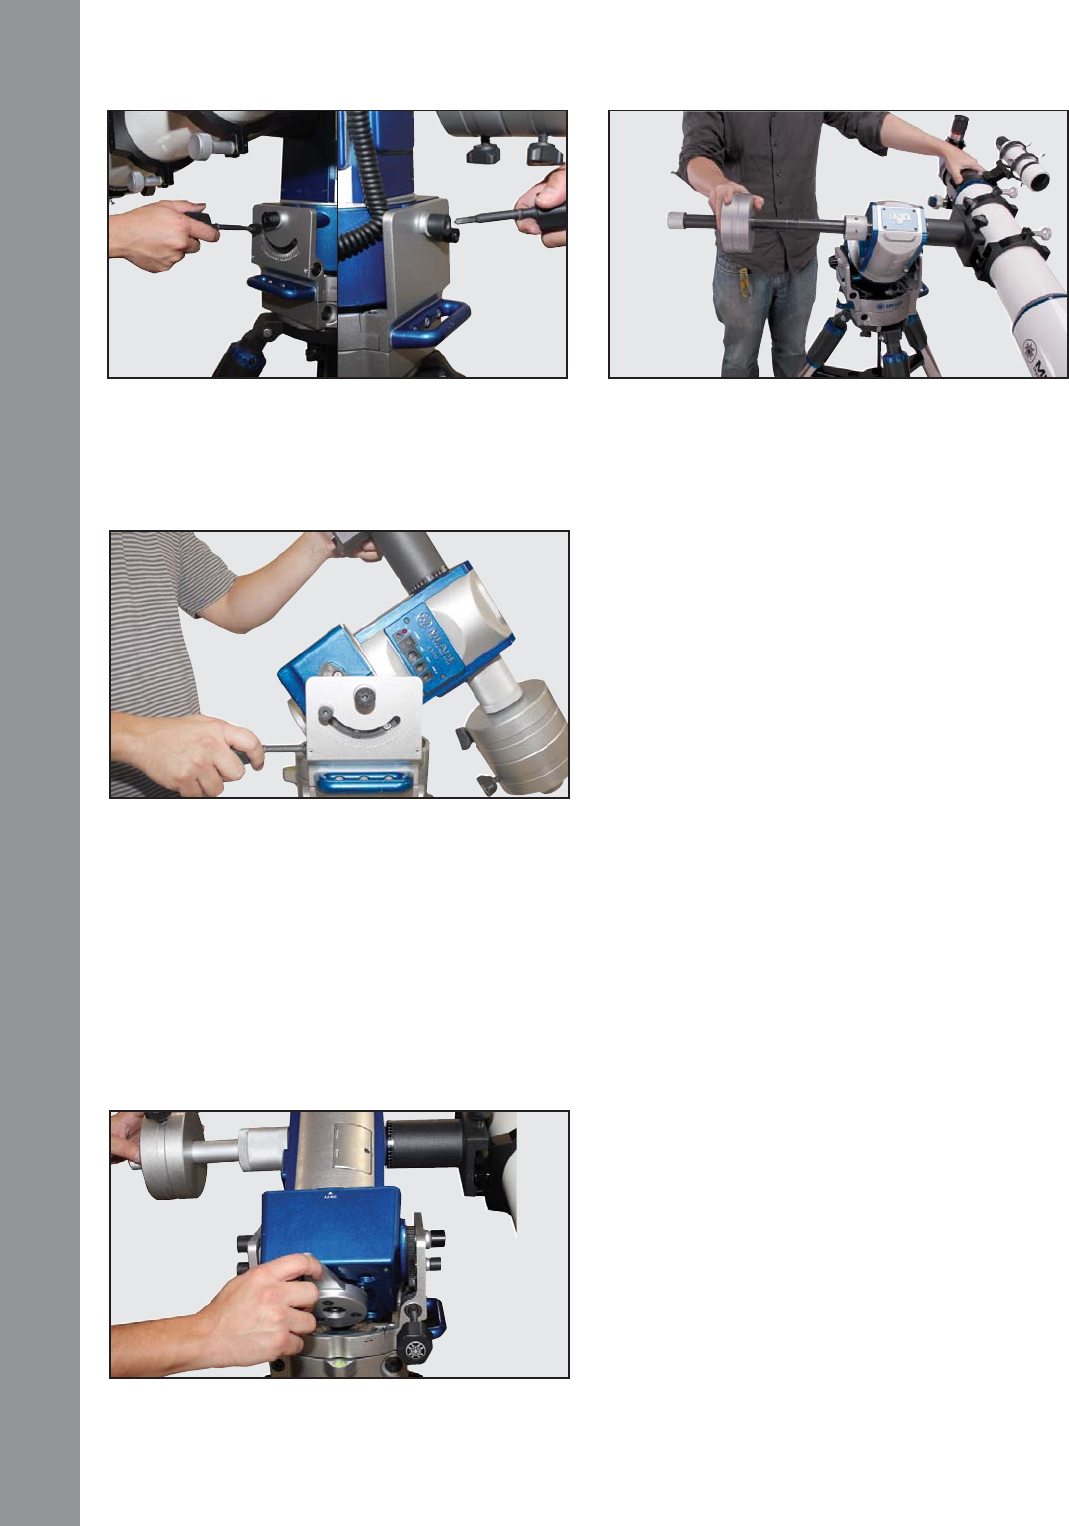
(See Fig 31). Manually rotate the counterweight shaft
so it is parallel to the ground. Continue to keep your
hand on the counterweight shaft to control rotation.
Loosen Counterweight: Loosen the lock knob
on the counterweight so it is free to move. Slide the
counterweight along the counterweight shaft so that
the mount head does not rotate in either direction and
is properly balanced. Lock the RA axis when balance
is achieved.
Note: If your telescope came with additional
weights you may need to attach counterweight shaft
extension pieces to achieve balance. Your telescope
is now balanced in both DEC and RA axes and will
perform optimally.
Return to Alt-Az Mode: Insert the LX80 tool into the
hex headed latitude adjustment, twisting the tool in a
counter clockwise direction to bring the mount head
back up to a vertical (alt-az) confi guration. This can
be checked by lining the latitude indicator back at 90°
degree mark.
Aligning the Viewfi nder
The wide fi eld of view of the telescope’s viewfi nder
(Page 8, Fig 1, 1) provides an easier way to initially
sight objects than the main telescope’s eyepiece
(Page 8, Fig 1, 6), which has a much narrower fi eld of
view. If you have not already attached the viewfi nder
to the telescope tube assembly, follow the procedure
described in Step 7, Page 17.
In order for the viewfi nder to be useful, it must be aligned
to the main telescope, so that both the viewfi nder and
telescope’s optical tube (Page 8, Fig 1, 17) point at
the same position in the sky. This alignment makes it
easier to fi nd objects by fi rst locating an object in the
wide-fi eld viewfi nder, then looking into the eyepiece of
the main telescope for a detailed view.
To align the viewfi nder, perform steps 1 through 4
during the daytime; perform step 5 at night. Refer to
Figs 1 and 2.
1. Remove the dust covers from the optical tube
(Page 8, Fig 1, 18) and the viewfi nder.
2. If you have not already done so, insert the low-
power SP 26mm eyepiece (Page 8, Fig 1, 6) into
the accessory adapter of the main telescope. See
step 8, Page 17.
3. Look through the viewfi nder eyepiece at an object
Fig 31: Adjust counterweight to achieve balance
Fig 29: Tilting the mount head
Fig 30: Disengage the RA lock
AudioStar #497 HANDBOX
Getting Started
20
Fig 28: Loosen RA lock – right and left sides


