4
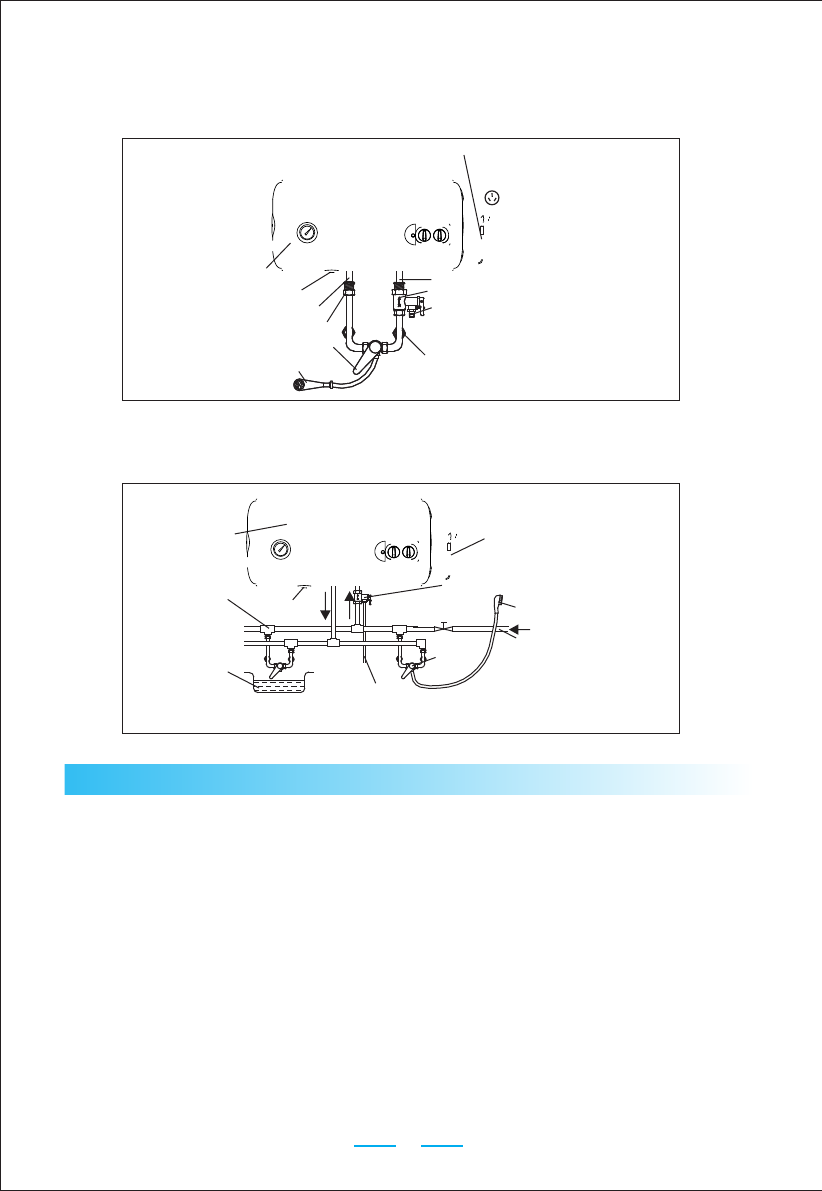
3. In order to avoid leakage when connecting the pipelines, the rubber seal
gaskets provided with the machine must be added at the end of the
threads (see Fig.3).
4. If the users want to realize a multi-way supply system, refer to the method
shown in Fig.4 for connection of the pipelines.
Power cord
Water heater
Sewerage exit (30L)
Hot water outlet
Joint screw for hot water outlet
Adjusting handle
for mixing valve
Shower nozzle
Cold water inlet
One-way safety valve
Pressure release hole
Joint screws for water inlet
(Fig.3)
Triple joint
Power cord
Water heater
Water pool
Sewerage
exit (30L)
One-way safety valve
Shower nozzle
Water inlet valve
Running water pipe
Mixing valve
Pressure release
flexible pipe
(Fig. 4)
1. First, open any one of the outlet valves at the outlet of the water heater,
then, open the inlet valve. The electric water heater begins to be filled
with water. When there is water coming out of the outlet valve normally,
it implies that the heater has been filled fully with water, and the outlet
valve can be closed.
►Methods of use
Note: During normal operation, the inlet valve shall be set in the status of “open”.
2.Insert the supply plug into the socket.
Note: That the rated current of the socket should be no lower than 10A.
3.When it is initially electrified, the heating indicator light turn on, the water heater
starts to heat. When the water temperature inside the unit has reached the set
temperature, it will stop heating automatically, and the indicator lights turn off,
but the user can use hot water. When the water temperature is decreased to a
certain point, it will be turned on automatically to restore the heating.


