23
RQT9487
Basic
operations
Timer recording (Manual timer recording)
HDD
Refer to “Important notes for recording” (➡ 26)
and “Advanced timer recording” (➡ 32) for detailed
information.
PAUSE
STOP
SLOW/SEARCH
CH
PAGE
SELECT
INPUT
CH
AV
TV
DRIVE
SELECT
VOL
DEL
MANUAL SKIP
SKIP
PLAY/x1.3
0
9
8
7
6
54
3
2
1
abc def
jklghi
mno
tuvqrs
p
xyz
w
TIME SLIP
STATUS
REC MODE
REC
CREATE
CHAPTER
G
U
I
D
E
RETURN
PROG/CHECK
EXIT
OK
OPTION
D
I
R
E
C
T
N
A
V
I
G
A
T
O
R
F
U
N
C
T
I
O
N
M
E
N
U
OK
RETURN
PROG/CHEC
EXIT
e, r, w, q
“Green”
“Red”
This operation will only record to HDD.
Timer recording of the broadcast
Recording mode:DR
Timer recording from the external equipment connected to AV1 or AV2
Recording mode:XP, SP, LP, EP, FR
Depending on the type of broadcast, there may be restrictions on
the title you are trying to record.
y You can enter up to 32 programmes up to a month in advance.
(Each daily or weekly programme is counted as one programme.)
Preparation
y Turn on the television and select the appropriate video input to suit
the connections to this unit.
y Turn on this unit.
y Make sure that the clock settings are correct (➡ 90).
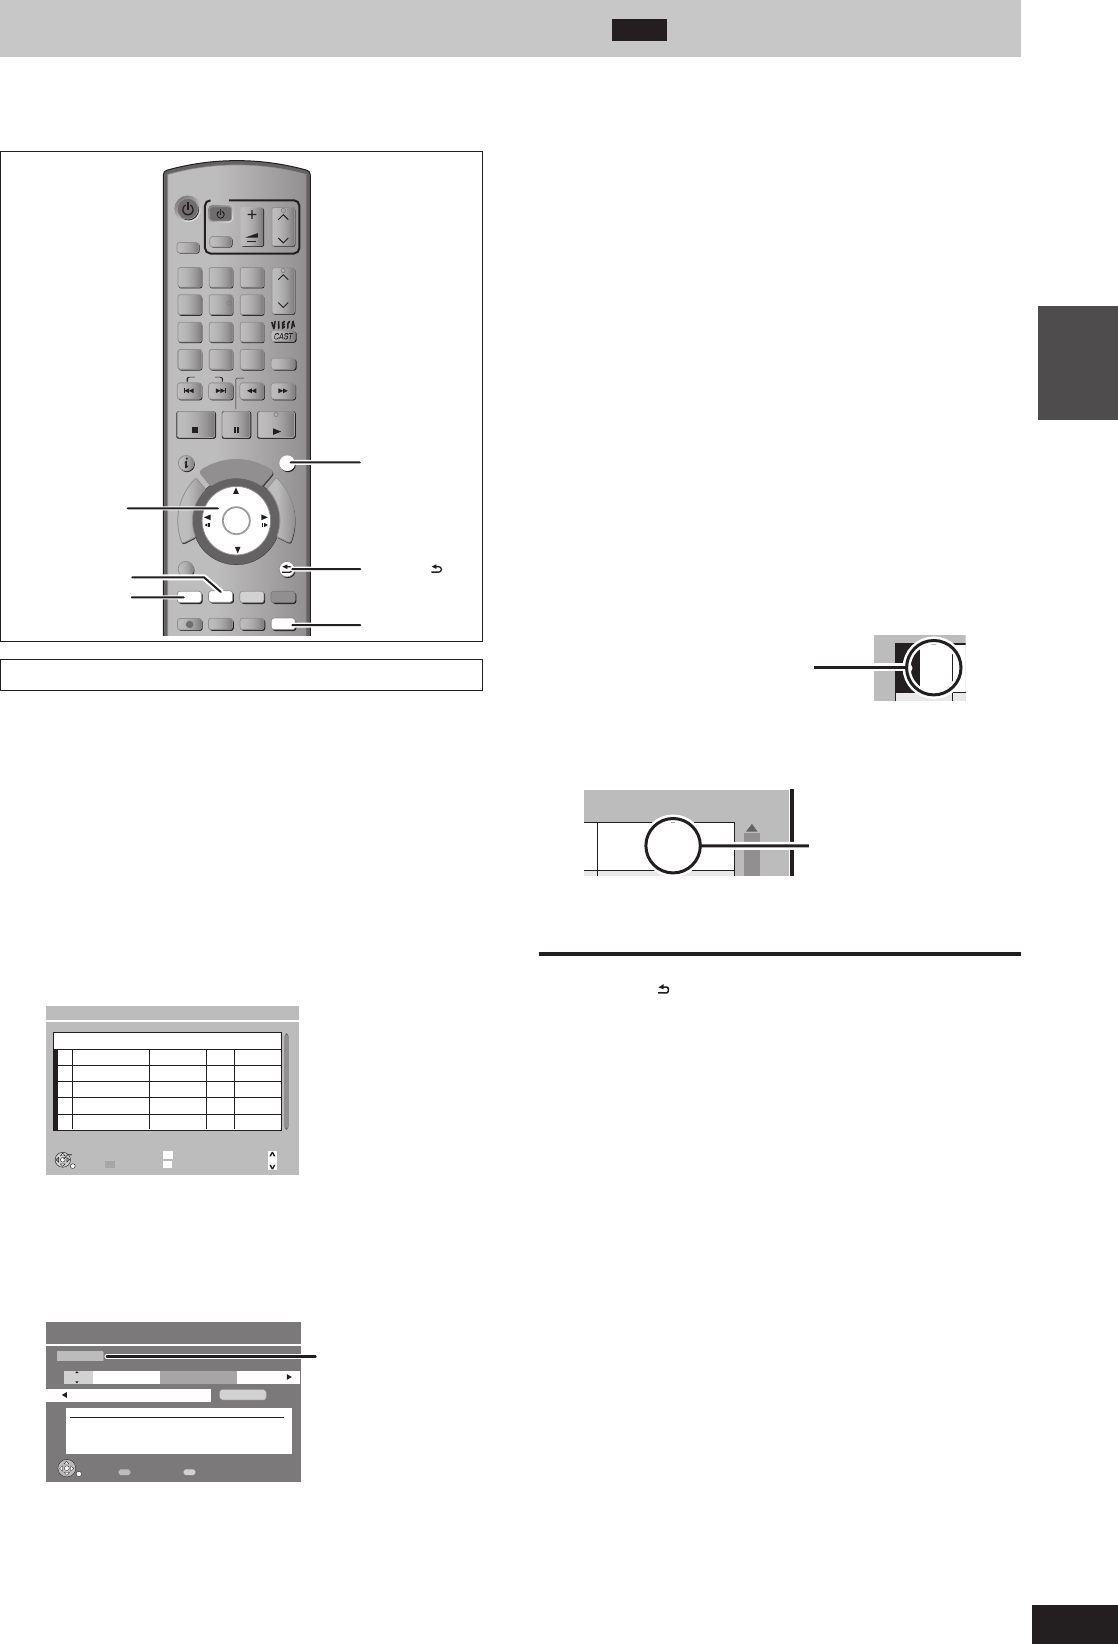
1 Press [PROG/CHECK].
Channel Name Schedule Drive/Mode Space
New Timer Programme
OK
RETURN
Page Up
Page Down
CH
Timer Off
Total 0/32
History List
Timer Recording
30:30 DR
HDDRemain
FRI 23.01.2009 8:59
DEL
Delete
2 Press [
e
,
r
] to select “New Timer
Programme” and press [OK].
3 Press [
w
,
q
] to select the items and
change the items with [
e
,
r
].
Favourites/AV
Timer Recording Remain HDD 30:30 DR FRI 23.01.2009 8:59
All DVB Channels
Programme Name
Channel
21 FRI 23.01 08:59 -- HDD DR
Date/Week Start Stop Drive Mode
[Prog.Name]
TVNZ SPORT EXTRA
RETURN
Favourites/AV 1 day/Weekly
y Channel
Select the channel to record.
You can press “Red” button (Favourites/AV) to change “AV
input”, “All DVB Channels”, “TV” or “Favourites 1”, etc.
You can perform this operation when you select the box of
“Channel”.
y Date/Week
You can select current date up to one month later minus
one day. You can select “1day” or “Weekly” by pressing the
“Green” button only when “Date/Week” is selected.
Titles recorded using the same daily or weekly timer are
bundled and displayed as a “group” in the DIRECT
NAVIGATOR screen (➡ 38) except when using Auto
Renewal Recording.
y Start/Stop
Press and hold [
e
,
r
] to alter the Start (Start time) and
Stop (Finish time) in 15-minute increments.
y Drive
HDD (You cannot change the drive.)
y Mode
Recording modes (➡ 28)
“XP”, “SP”, “LP”, “EP”, “FR” can be selected when “AV1” or
“AV2” is selected in “Channel” column.
It will be fi xed to DR mode if anything else is selected.
y Renew (Auto Renewal Recording) (➡ 33)
y Programme Name
Press [OK]. (➡ 72, Entering text)
4 Press [OK].
The timer programme is stored and the timer icon (red) is
displayed.
z
Timer icon (red)
“
z
” lights on the unit’s display to indicate timer recording
standby has been activated.
Check for available space on
HDD when “!” is displayed.
To return to the previous screen
Press [RETURN
].
To exit the screen
Press [EXIT].
■ Timer recording Using the TV Guide System
(➡ 32)
■
To release the unit from recording standby (➡ 33)
■ To cancel recording when recording has already
begun (➡ 33)
■ Notes on timer recording (
➡ 34)


