5
RQT8655
Control reference guide
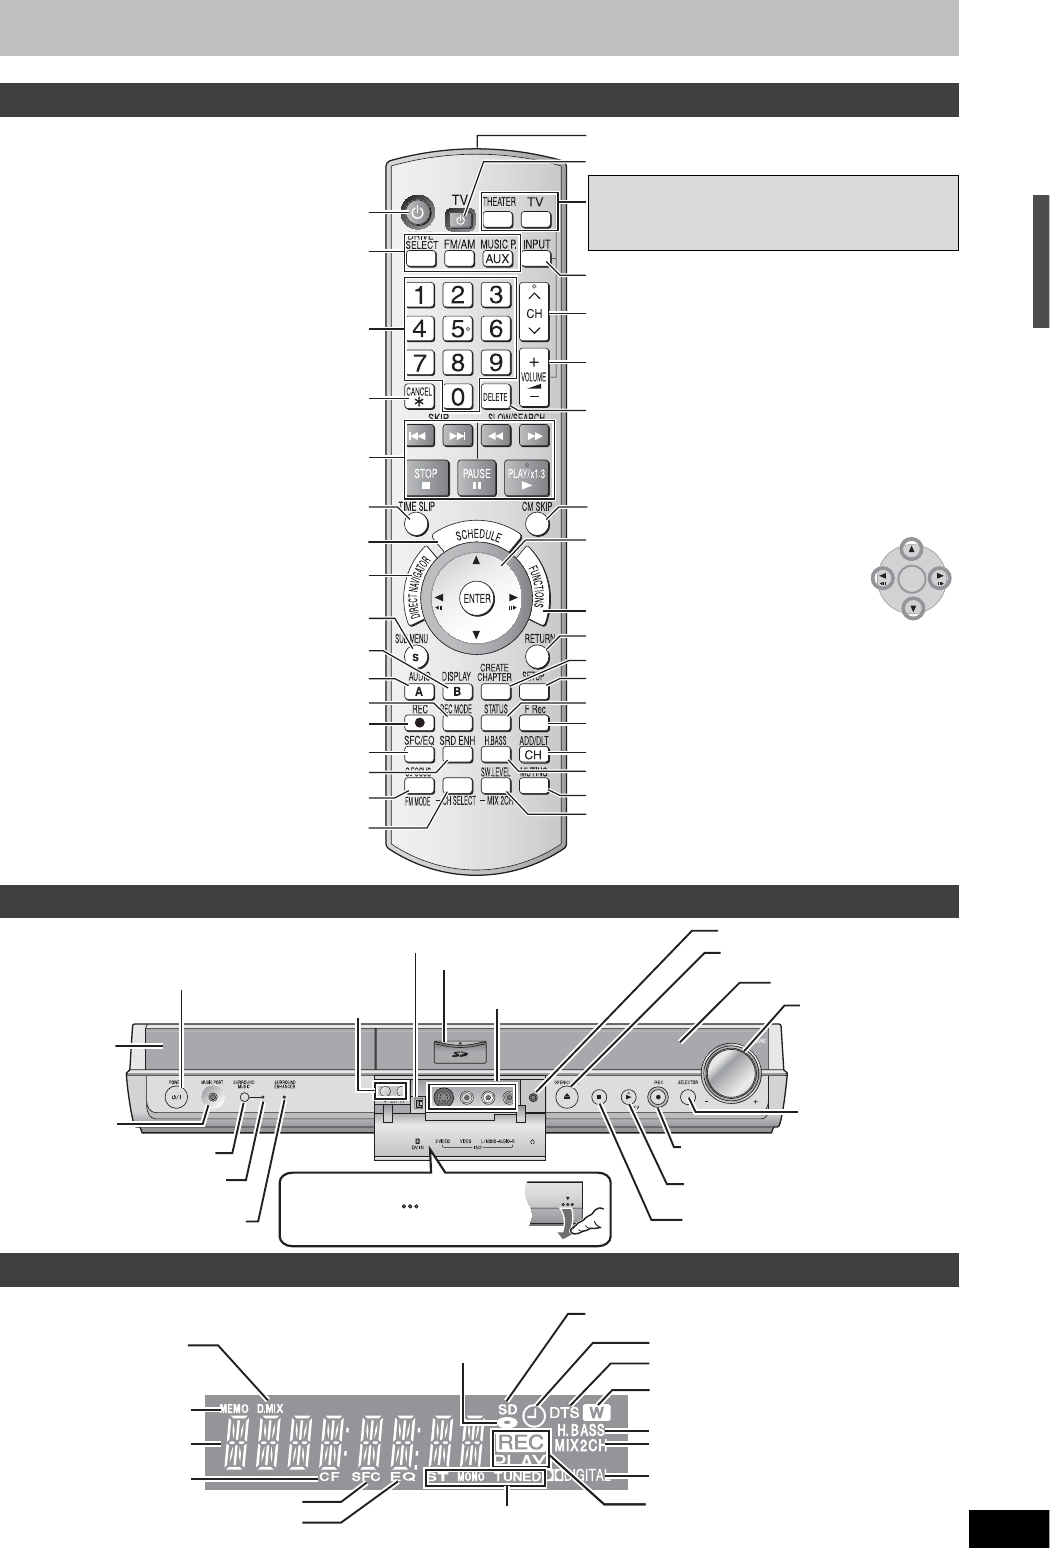
Remote control
SRD MUSIC
Turn the unit on
Select the source
DVD/SD, FM/AM,
AUX/FRONT MUSIC P./REAR MUSIC P.
Cancel
Basic operations for recording and play
Show Direct Navigator/Top menu
(
➡
page 16, 18, 20, 22, 26)
Skip the specified time(
➡
page 17)
Show sub menu (
➡
page 22, 26)
Select channels and title numbers, etc./
Enter numbers
Selection (, , , ) /Enter,
Frame-by-frame (, )
(
➡
page 17)
ENTER
Show on-screen menu (
➡
page 21)
[B] for Direct Navigator (
➡
page 18)
Select audio (
➡
page 13, 17)
[A] for Direct Navigator (
➡
page 16)
Change recording mode (
➡
page 12)
Start recording/Specify the time to stop recording (
➡
page 12, 13)
Change the sound quality (
➡
page 35)
Enhance surround sound(
➡
page 35)
Enhance the sound from the center speaker(
➡
page 35)/
Change radio reception mode(
➡
page 34)
Equalize the sound(
➡
page 35)/
Select speaker channels(
➡
page 36)
Remote control signal output
Turn on the television
Switches the remote control operation between the
unit and the TV.
Press [THEATER] when operating the main unit, or
press [TV] when operating the television.
Input select (IN1, IN2 or DV)
Adjust the volume
Skip a minute forward (
➡
page 17)
Show scheduled recording list (
➡
page 14)
Show FUNCTIONS window
Return to previous screen
Create chapters (
➡
page 17)
Show Setup menu (
➡
page 37)
Show status messages (
➡
page 16)
Delete items (
➡
page 31)
Start Flexible Recording (
➡
page 13)
Add/delete channel (Setup Guide
➡
page 13)
Enhance the bass sound (
➡
page 35)
Muting (
➡
page 36)
Adjust the subwoofer level (
➡
page 36)/
Down-mix signals to 2 channels (
➡
page 36)
Channel select (
➡
page 12)
Main unit
Disc tray
(
➡
page 12)
Channel select (
➡
page 12)
SD card slot (
➡
page 8)
Connector for headphones (
➡
page 41)
Turn up/down the
volume
Connector for an
external device
(
➡
page 41)
Equalizing the sound (
➡
page 35)
Connector for external
equipment (
➡
page 30)
Stop (
➡
page 12, 17)
Open/close disc tray (
➡
page 12)
Start play (
➡
page 16)
Start recording (
➡
page 12)/Specify
the time to stop recording (
➡
page 13)
Display (
➡
below)
Select the source
DVD
SD
FM
AM
AUX
FRONT MUSIC P.
REAR MUSIC P.
Return to DVD
POWER button[POWER
/I]
Press to switch the unit from on to
standby mode or vice versa. In standby
mode, the unit is still consuming a small
amount of power.
Connector for a digital video (DV) camcorder (
➡
page 30)
SURROUND MUSIC indicator
(
➡
page 35)
SURROUND ENHANCER indicator
(➡ page 35)
Opening the front panel
Press down the part with
your finger.
The unit’s display
This lights up when optional Panasonic wireless
accessories are plugged in (
➡
page 41).
H.BASS indicator (
➡
page 35)
MIX2CH indicator (
➡
page 36)
Dolby Digital indicator (
➡
page 36)
DTS indicator (
➡
page 36)
Equalizer indicator (
➡
page 35)
Radio broadcast display (
➡
page 34)
TUNED : Receiving radio signal/ST : Stereo/MONO : Monaural
Sound field control indicator (
➡
page 35)
Center Focus indicator
(
➡
page 35)
Radio broadcast display
(➡ page 34) :
Channel preset memory
indicator
Main display section
Disc indicator
This indicator lights up when
a disc that is supported by
this unit is inserted.
SD Card indicator
This indicator lights up when a card is inserted.
Scheduled recording indicator (
➡
page 14)
D.MIX indicator
(
➡
page 36)
Rec/Play indicator (
➡
page 12,16)
Accessories/The remote control information / Control reference guide


