7
1 Connect the component video cables (not
supplied) to:
the • Y Pb Pr jacks on this product.
the COMPONENT VIDEO input jacks •
on the TV.
2 Connect the audio cables (supplied) to:
the • AUDIO OUT L/R jacks on this
product.
the audio input jacks on the TV.•
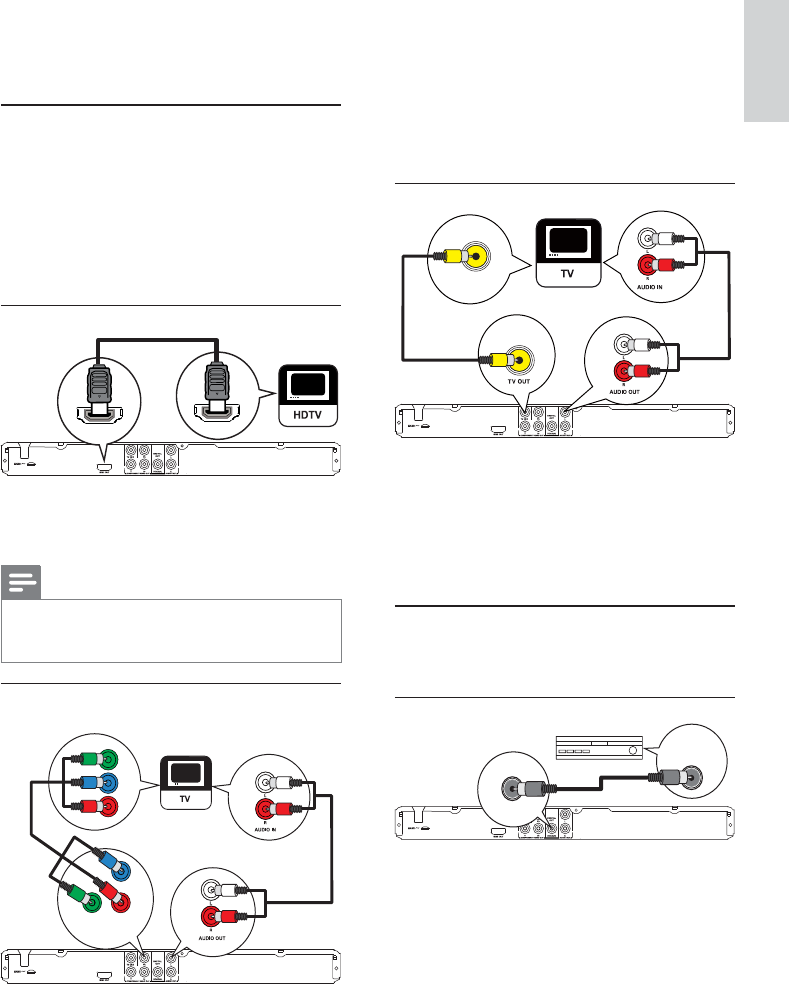
Option 3: Connect to the video (CVBS) jack
VIDEO IN
1 Connect a composite video cable (supplied) to:
the • TV OUT jack on this product.
the video input jack on the TV.•
2 Connect the audio cables (supplied) to:
the • AUDIO OUT L/R jacks on this
product.
the audio input jacks on the TV.•
Route audio to other devices
Route the audio from this product to other devices
to enhance audio play.
Connect to digital amplifier/receiver
COAXIAL
COAXIAL
DIGITAL AUDIO
INPUT
1 Connect a coaxial cable (not supplied) to:
the • COAXIAL jack on this product.
the COAXIAL/DIGITAL input jack on •
the device.
Optional connections:
Route audio to other devices:•
Digital amplifier/receiver•
Analog stereo system•
USB flash drive•
Connect audio/video cables
Select the best video connection that TV can
support.
• Option 1: Connect to the HDMI jack (for a
HDMI, DVI or HDCP-compliant TV).
• Option 2: Connect to the component video
jacks (for a standard TV or Progressive Scan TV).
• Option 3: Connect to the composite video
jack (for a standard TV).
Option 1: Connect to the HDMI jack
HDMI IN
HDMI OUT
1 Connect an HDMI cable (supplied) to:
the • HDMI OUT jack on this product.
the HDMI input jack on the TV. •
Note
If the device supports HDMI CEC, you can control •
compliant devices with a single remote control (see “Get
started” > “Use Philips EasyLink”).
Option 2: Connect to the component
video jack
Pb
Y
Pr
Pb
COMPONENT VIDEO OUT
Y
Pr
English
EN


