6
Connect audio/video cables
Select the best video connection that TV can support.
• Option 1: Connect to the HDMI jack (for a
HDMI, DVI or HDCP-compliant TV).
• Option 2: Connect to the component
video jacks (for a standard TV or Progressive
Scan TV).
• Option 3: Connect to the composite video
jack (for a standard TV).
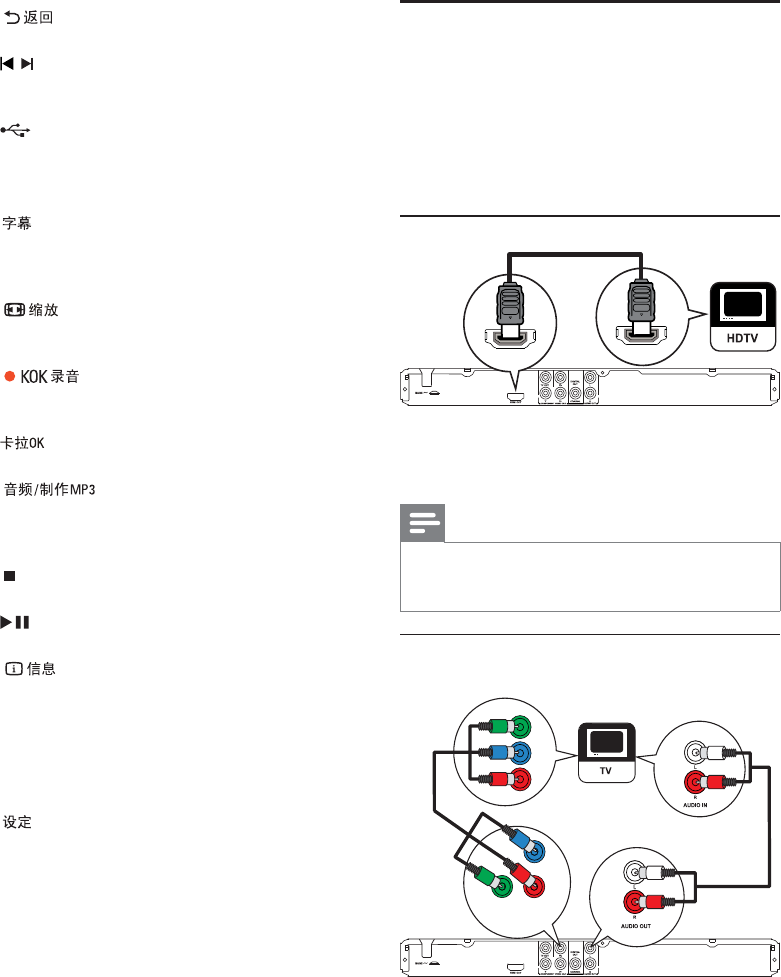
Option 1: Connect to the HDMI jack
1 Connect an HDMI cable (not supplied) to
the • HDMI OUT jack on this product.
the HDMI input jack on the TV. •
Note
If the device supports HDMI CEC, you can control •
compliant devices with a single remote control
(see “Get started” > “Use Philips EasyLink”).
Option 2: Connect to the component
video jacks
1 Connect the component video cables (not
supplied) to:
the • Y Pb Pr jacks on this product.
the COMPONENT VIDEO input jacks •
on the TV.
2 Connect the audio cables (supplied) to:
the • AUDIO OUT L/R jacks on this product.
the audio input jacks on the TV.•
HDMI IN
HDMI OUT
Pb
Y
Pr
Pb
COMPONENT VIDEO OUT
Y
Pr
e
Return to the previous display menu.•
f
/
Skip to the previous or next title, chapter, •
or track.
g
Switch to the USB mode.•
h Numeric buttons
Select an item to play.•
i
Select a subtitle language on a disc.•
Access the menu of copying/deleting •
audio fi les in a USB fl ash drive.
j
Fit the picture display to the TV screen.•
Zoom the picture in or out.•
k
Record the voice and music during •
karaoke into a USB fl ash drive.
l
Access or exit the Karaoke setup menu.•
m
Select an audio language or channel on •
a disc.
Access the menu of creating MP3 fi les.•
n
Stop play.•
o
Start, pause or resume disc play.•
p
For discs, access the play options or •
display the current disc status.
For slideshows, display a thumbnail view •
of photo fi les.
q OK
Confi rm an entry or selection.•
r
Access or exit the setup menu.•
3 Connect
Make the following connections to use this product.
Basic connections:
Video•
Audio•
Optional connections:
Route audio to other devices:•
Digital amplifi er/receiver•
Analog stereo system•
USB fl ash drive•
EN


