6
Assembly Instructions — continued
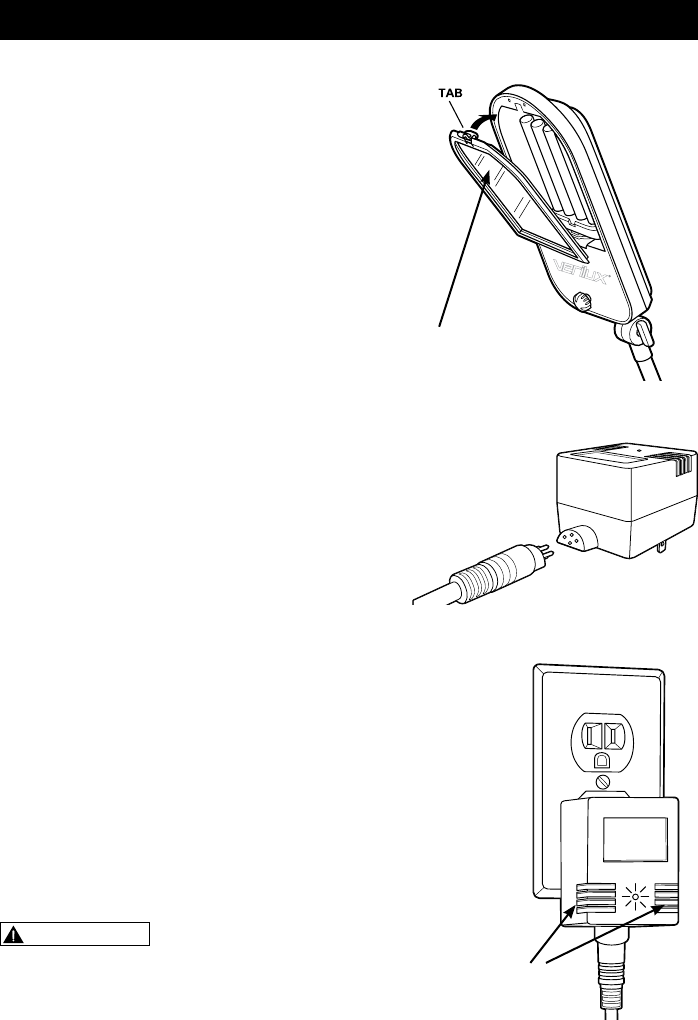
8. Attach the ballast to the power
cord.Usecaretoalignthe4-pin
plugproperly.DONOTFORCE.
The 4-pin plug was designed to fit
in only one orientation (Fig. 3).
Fig. 3
9. Plug ballast into a standard 120V 50/60Hz
outlet. Turn lamp on. The green LED indicator
on center of the ballast should be illuminated
(Fig. 4). If the LED indicator does not illuminate,
please refer to the troubleshooting section of
this manual (see page 9).
10. If bulb does not illuminate instantly, please
refer to the troubleshooting section of this
manual.
11. Adjust lamp brightness to the desired level.
WARNING: Do not block vents on ballast.
Vents are necessary for proper function of the
ballast; blocking them may cause overheating of the
ballast.
Fig. 4
Vents
Note: Do not
touch material
7.AttachingtheOptix
®
glare control
filter:
• Removeglarecontrollterfrom
protective plastic bag. Take
care to hold filter by the edges
only.
• Inserttabsonbottomoflter
into opening. (Fig. 2)
• Pressintoplaceusing
thumb tab.
Do not touch or press
on the filter material itself.
Fig. 2


