15
N+ Wireless Modem Router
SECTIONSTable of Contents 1 2 3 5 6 7 8 9 104
CONNECTING AND CONFIGURING YOUR ROUTER
Step 1: Hardware Connections – Follow the Quick Installation Guide (QIG)
1.1 Brand-New Setup
Follow these steps if you are not replacing an existing modem. If you are
replacing an existing modem, skip to the next section, “Replacing an
Existing Modem or Modem Router”, starting on page 16.
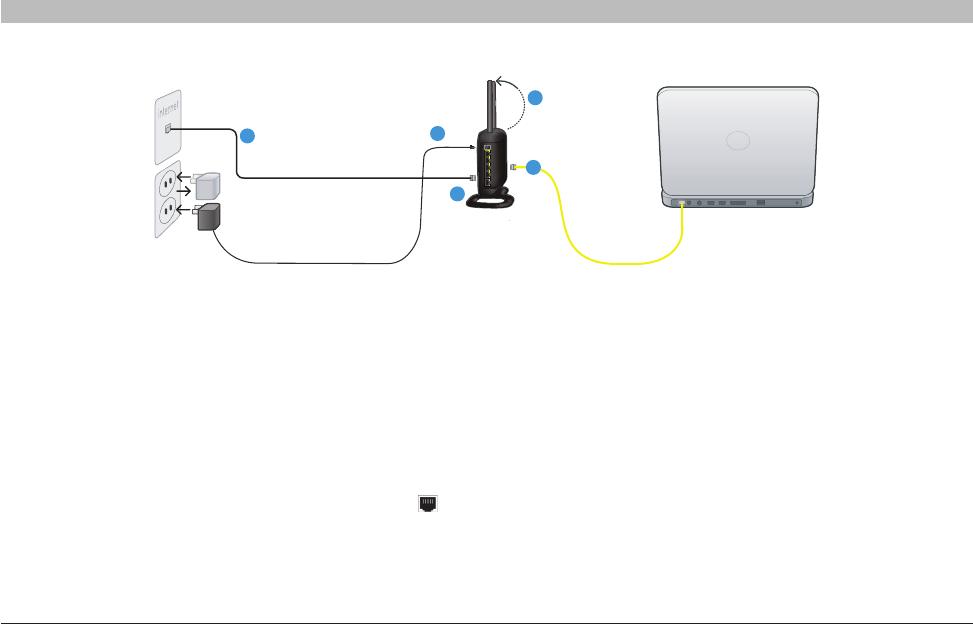
1. Unpack your new Router from the box and place it next to your
computer. Raise the Router’s antennas.
2. Retrieve the yellow RJ45 cable that was included with your Router.
First, connect one end to any yellow port labeled “to Wired
Computers” on the back of your Router. Then, connect the other
end to the networking port on the back of your computer.
3. Retrieve the included gray RJ11 phone cord. Connect one end to
the gray port labeled “to ADSL” on the back of your Router. Then
connect the other end to your ADSL connection (either a wall jack
or an ADSL splitter).
Note: Some ADSL connections require a microfilter. Your ADSL provider
can tell you if you need one. Belkin includes a microfilter in regions
known to use them. You may or may not have received one in your box.
4. Plug your Router’s power supply into the black port labeled
“Power” on the back of your Router.
5. Wait 20 seconds for the Router to start up. Look at the display on
the front of the Router. Make sure the “Wired” and “Router” icons
are lit up in blue. If they are not, recheck your connections.


