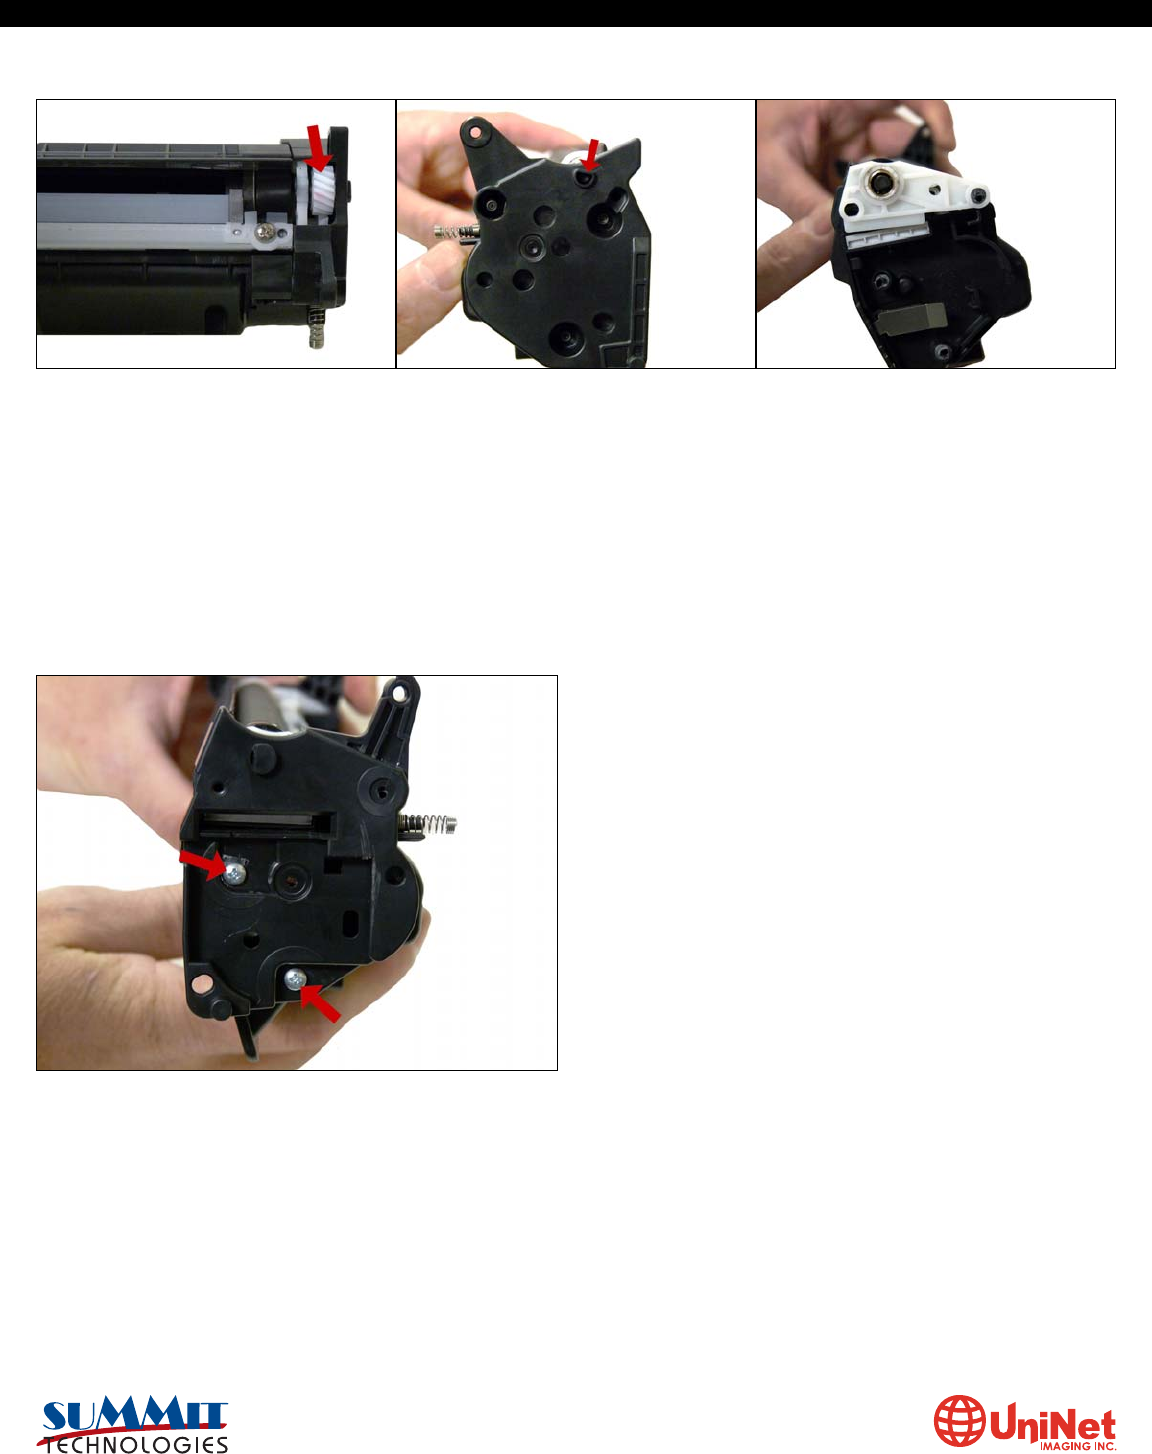
26. Install 2 small screws into the holes previously drilled out.
Leave the top 3rd hole alone! (This weld was broken when the
end cap was removed). A screw here will interfere with
installing the cartridge in the printer. In our tests, the two
screws will hold the end cap on with no problems.
25. Re-assemble the toner hopper section. Place the Mag. Roller drive gear in place, install the magnetic roller assembly. Turn
the roller until the keyed end fits into the drive gear properly. Install the end cap, align the keyed magnet into the keyed slot on
the gear side first, this will help in aligning the opposite end cap.
HP P2035 • 2055 CARTRIDGE REMANUFACTURING INSTRUCTIONS
3232 West El Segundo Blvd., Hawthorne, California 90250 USA • Ph +1 424 675 3300 • Fx +1 424 675 3400 • techsupport@uninetimaging.com • www.uninetimaging.com
© 2009 UniNet Imaging Inc. All trademark names and artwork are property of their respective owners. Product brand names mentioned are intended to show compatibility only. UniNet Imaging does not warrant downloaded information.