SECTION 7—RECLINER
Part No. 1076155 61 9000 Series
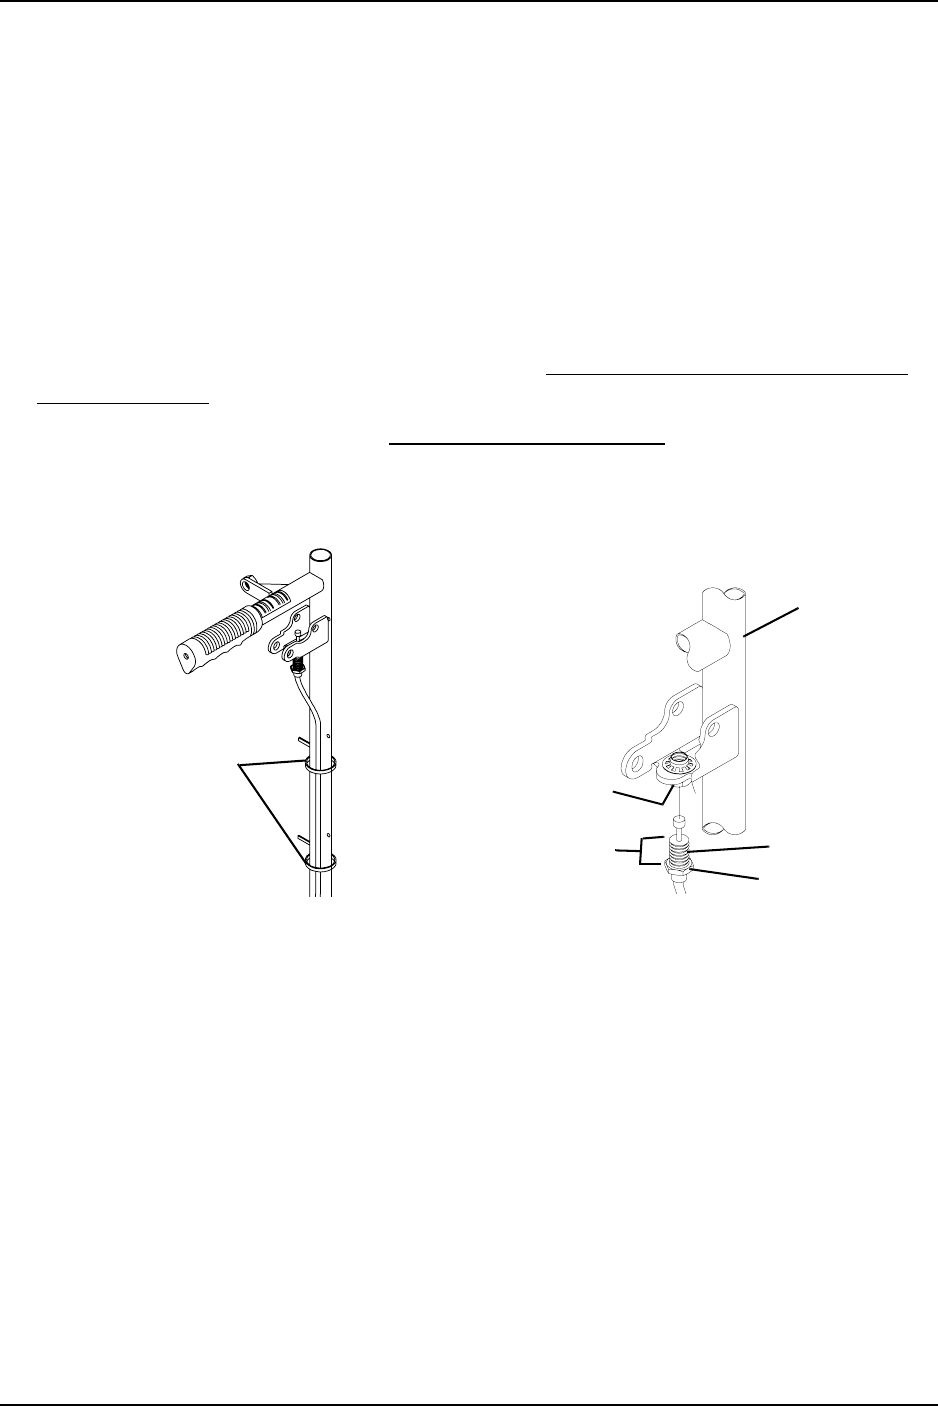
4. Loosenthejamnut,rotateclockwise(downward)andrunthejamnuttothebottom
ofthethreads.
5. Holdswivelnutinplaceandunthreadcableassemblyfromswivelnut.Tounthread,
rotateclockwise.
NOTE:Forproperinstallationofthenewcableassembly,notethenumberofrevolutionsrequired
forremovingtheexistingcableassembly.
6. Insertthethreadedendofthecableassemblyintotheexistingswivelnut.
7. Holdtheswivelnutandrotatethecableassemblycounterclockwise(upward)the
numberofrevolutionsnotedfromSTEP5(approximatelyten(10)revolutions).
8. Connectthenewlowercableassembly.RefertoDisconnecting/ConnectingLower
CableAssemblyonpage 61.
9. Reinstallreleasehandle.RefertoReplacingReleaseHandle
onpage 58.
10. Securethecabletothebacktubewithnewtiewraps.
FIGURE 7.3 Replacing Cable Assembly
Disconnecting/Connecting Lower Cable Assembly
NOTE:Forthisprocedure,refertoFIGURE 7.4onpage 63.
Disconnecting
1. RemovetheU‐boltandtwo(2)locknutsthatsecurethehousingandsupportplateto
thereclinertube.
Connecting
1. Lubricatethreadsofboththethreadedsectorandthethreadsofthelockingrod
(WD‐40®orequivalent).
Tie Wraps
(STEPS 1,9)
Cable
Assembly
Back Tube
STEPS 2, 7, and 8
Swivel Nut
Jam Nut
Threads


