A-61555 March 2007 6-5
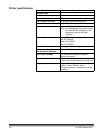
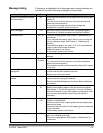
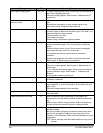
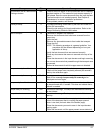
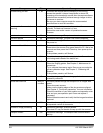
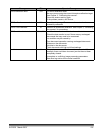
Message listing Following is an alphabetic list of messages and corrective actions you
can take if one of the following messages is encountered.
Messages ID# Operator Message
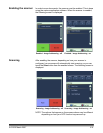
Background accessory changed
while powered up
381 The Background Accessory was changed while the scanner was
powered on.
• Turn the power off to the scanner, wait a few seconds and
power the scanner back on.
• If you get this message and you did not change the
Background Accessory, clean the scanner.
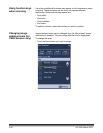
Cable unplugged 319 Some device on the FireWire bus was unplugged/plugged in.
• Check that all FireWire connectors are securely fastened.
Calibration failed 106, 331 • Clean the imaging guides. See Chapter 5, Maintenance for
procedures.
• Try to calibrate the scanner again. Be sure you are using the
correct calibration target. See Chapter 3, “Calibrating the
scanner”.
• The calibration target is too small. A 12- x 12-inch calibration
target is required for image calibration.
• Calibration target is too narrow.
• If the problem persists, call Service.
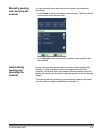
Calibration succeeded 105, 342 Informational message. The scanner has been successfully
calibrated.
Call Service Many ID
numbers
A condition was detected that may require repair.
• Turn the power off to the scanner, wait a few seconds and
power the scanner back on.
• If the problem persists, call Service and provide the ID number
of the error.
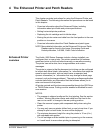
Cannot calibrate with white
background
184 Both a front and rear print head is installed in the scanner. Only
one print head can be installed at one time.
• Remove one of the print heads.
Cannot run with both printers
installed
90 The White Background Accessory is installed in the scanner
while the scanner is trying the calibrate.
• Remove the White Background Accessory before calibrating
the scanner.
Check document preparation 123, 135,
81
• The gap between your documents is too small.
• Make sure the leading edges of the documents are aligned.
See Chapter 3, “Document preparation” for more information.
• Check the condition of your feed module and separation roller
tires and your pre-separation pad. Clean and replace if
necessary.
Check imaging guides and lamps 149, 178,
139
• Verify that the imaging guides are installed correctly. See
Chapter 5, Maintenance.
• Clean both sides of the imaging guides and lower glass plate
between the lamps.
• Check that the white patch on the imaging guides is clean and
in good condition.
• If the problem persists, call Service.
Clean lower imaging guide 294 The lower imaging guide is dirty or there may be a small piece of
paper in the imaging guide area.
• Clean the imaging guides. See Chapter 5, Maintenance for
procedures.