4
Manual No. 701-186M 11/30/06
Land Pride
Assembly Instructions
2500 Lb. Winch Assembly
The winch assembly instructions below are for mounting
this winch to Trekers with a Heavy Duty Brush Guard.
The winch assembly instructions for 4200 & 4400 Series
Trekers are included with the Winch Mounting Kit. See
manual 701-159M for NT Trekers and 701-158M for ST
Trekers.
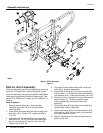
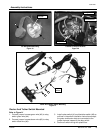
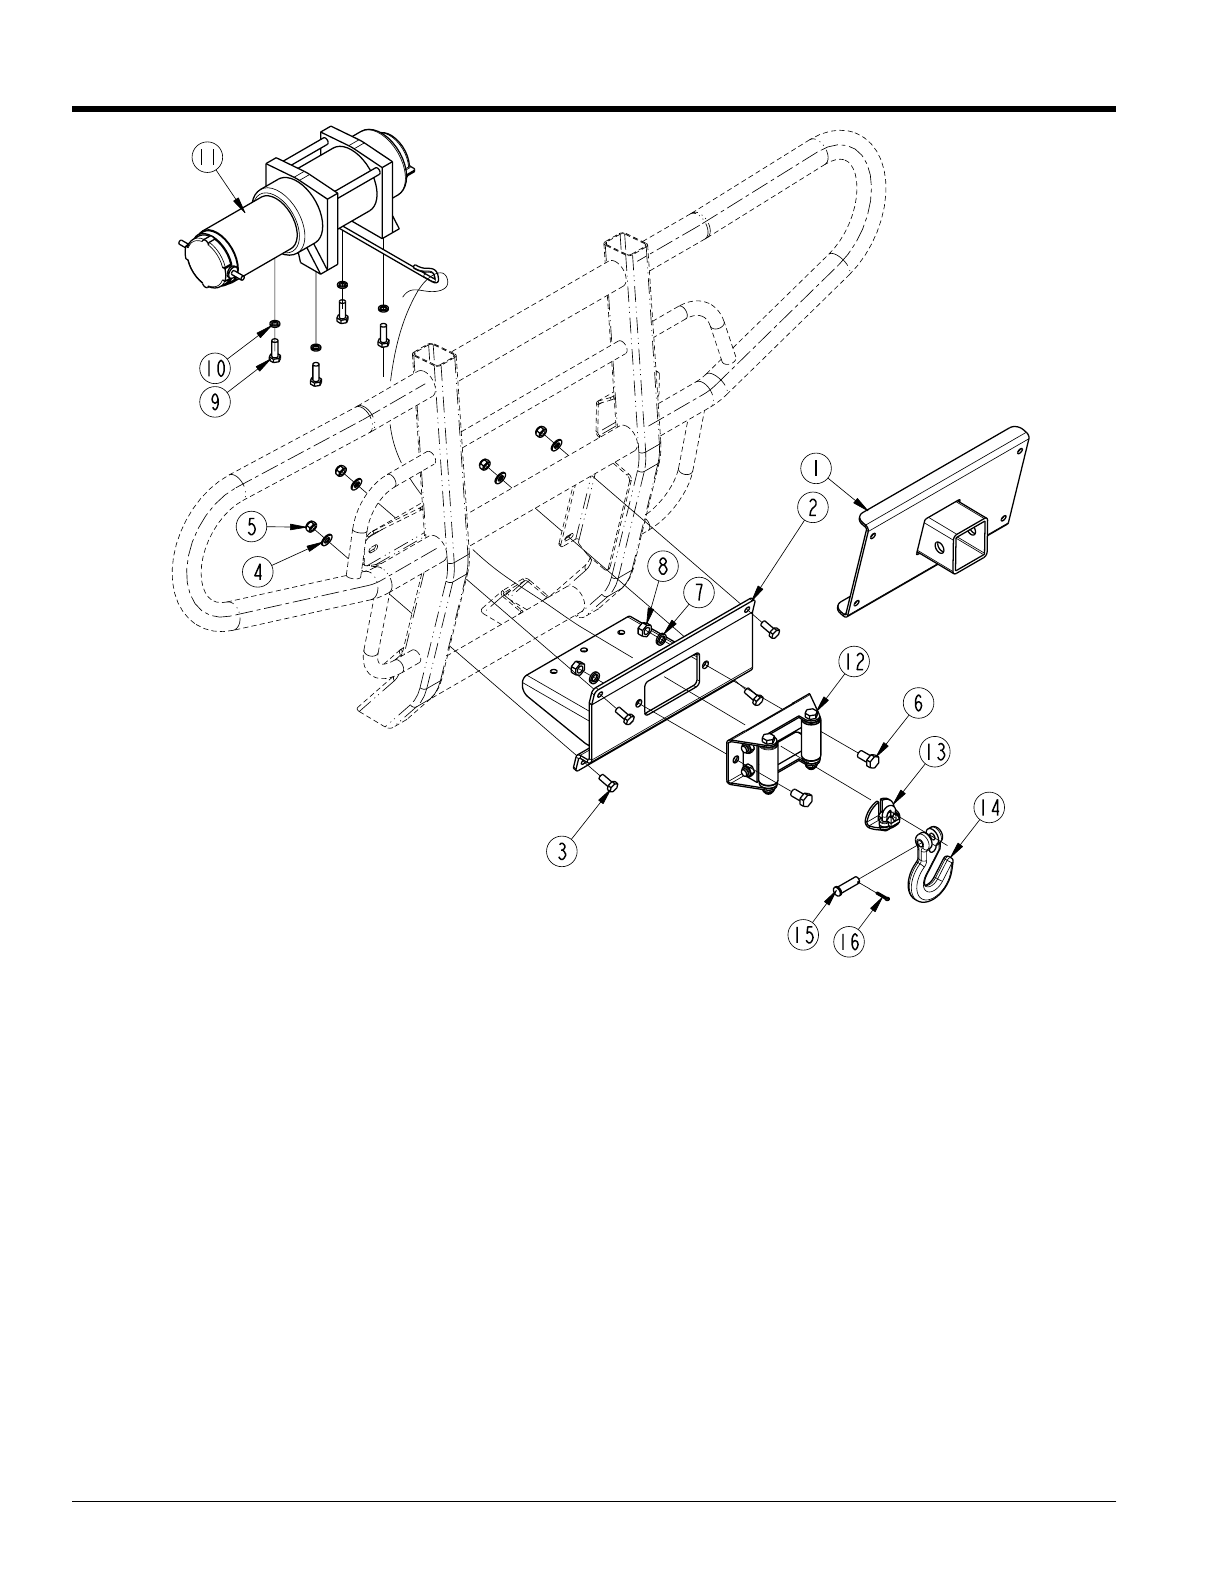
Refer to Figure 4:
1. Remove receiver plate (#1). Save mounting
hardware (Items #3, 4 & 5) for installing winch
mounting plate.
2. Install winch mounting plate (#2) with existing hard
ware (#3, 4 & 5). Torque 5/16" nylock nuts (#5) to
17 ft- lbs.
3. Assemble roller fairlead (#12) to winch plate (#2)
with two M10 x 1.5 x 20 GR8 hex cap screws (#6),
spring lock washers (#7) and M10 hex nuts (#8).
Tighten nuts to 39 ft. lbs.
4. Cut plastic tie and remove cable hook (#14) from
winch (#11). Keep for reassembly.
5. Attach 2500 lb. winch (#11) to mounting plate (#2)
with four M8 x 1.5 x20 G8.8 hex cap screws (#9) and
lock washers (#10). Torque cap screws to 19 ft. lbs.
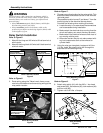
6. Set winch clutch to“Freespool” andpull wire rope out
approximately 12". Thread wire rope through
mounting plate (#2) and roller fairlead (#12)
openings.
7. Orient cable stop (#13) as shown and thread wire
rope through u-bolt in cable stop.
8. Attach cable hook (#14) to wire rope with pin (#15)
and cotter pin (#14). Secure cotter pin by bending
one leg 45 degrees or more.
9. Position cable stop (#13) close to cable hook and
tighten u-bolt nuts.
2500 Lb. Winch Assembly
Figure 4
23697