Wireless Network PC Card
14
Instant Wireless
®
Series
13
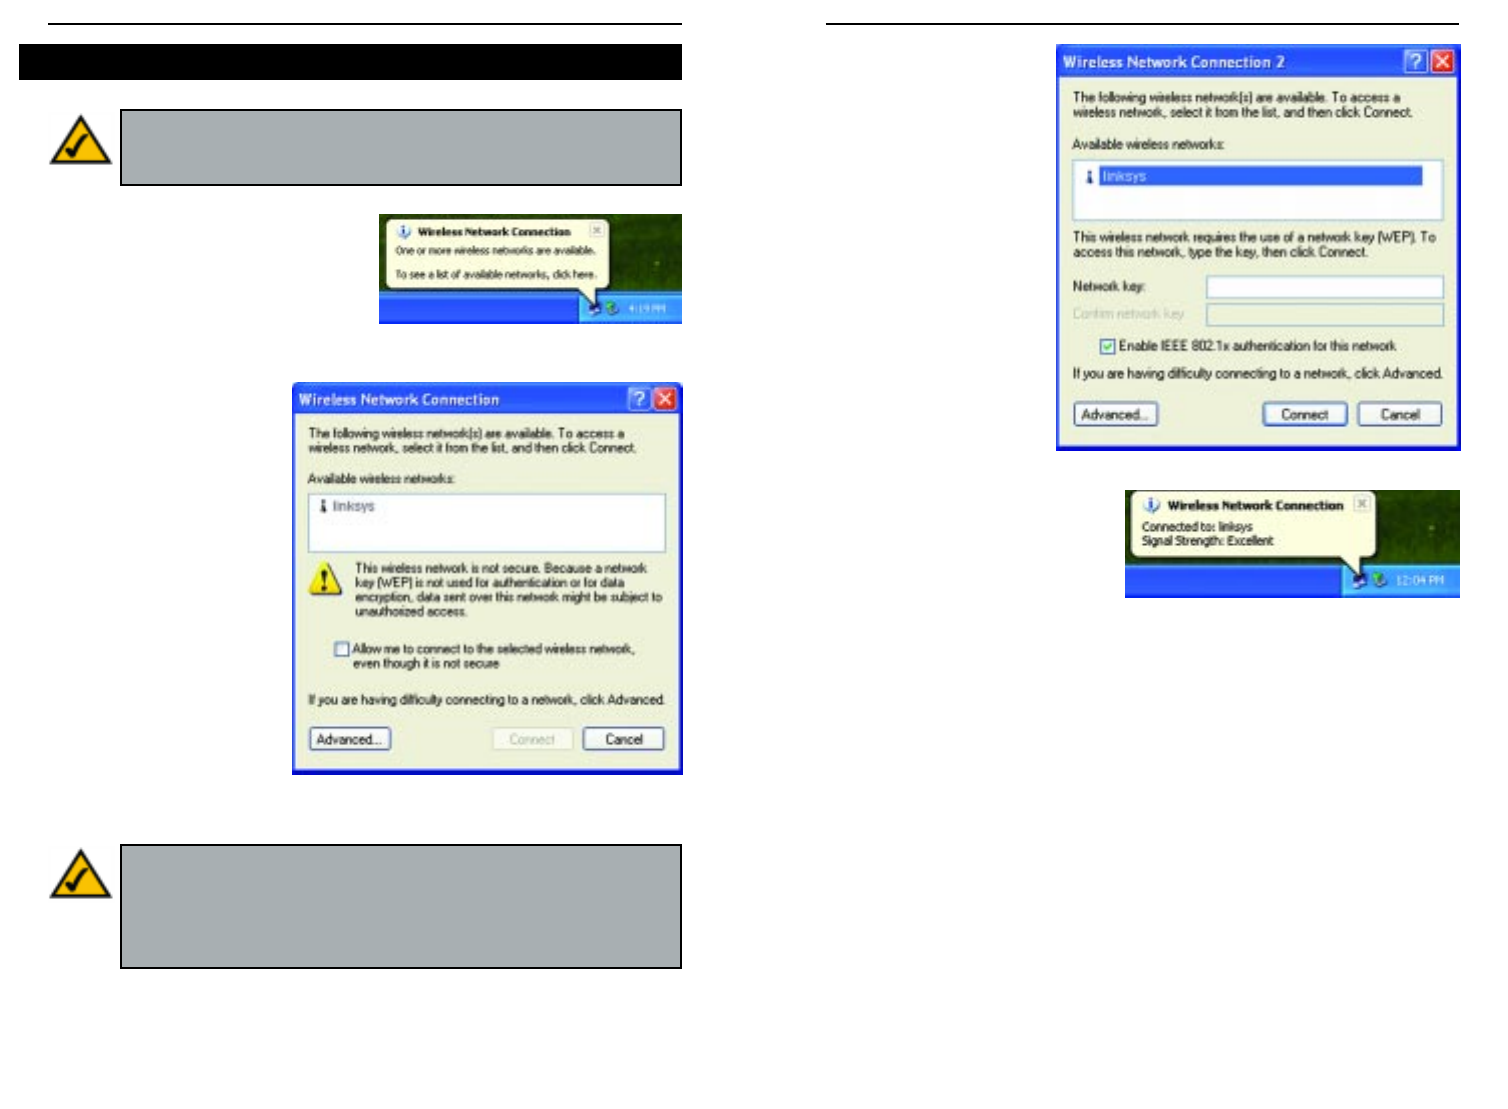
3. The screen in Figure 6-
5 will appear. Enter the
WEP key of your wire-
less network in the
Network key field, and
re-enter it in the
Confirm network key
field. Click the
Connect button.
4. The screen in Figure 6-6 will
appear if your connection is
active.
For more information about WEP, refer to your access point’s documentation,
or visit www.linksys.com.
For more information about wireless networking on a Windows XP computer,
enter the keyword wireless in the Windows XP search engine.
Congratulations!
Your notebook is now connected to your wireless network.
Figure 6-5
Figure 6-6
1. After installing the PC Card, the
Windows XP Wireless Zero
Configuration icon will appear in
your computer’s system tray (see
Figure 6-3). Double-click the icon.
2. The screen that appears
will show any available
wireless network. Select
the network you want.
If this network has WEP
encryption enabled, go to
step 3. If this network
does not have WEP
encryption enabled, then
the screen in Figure 6-4
will appear. Check the
box next to Allow me to
connect to the selected
wireless network, even
though it is not secure.
Then click the Connect
button and go to step 4.
For Windows XP users: Windows XP has a built-in configuration tool.
Use Windows XP Wireless Zero Configuration (in the system tray at
the bottom of your screen) to configure the PC Card.
Figure 6-3
Figure 6-4
Note: In Steps 2 and 3, these are the instructions and screenshots for
Windows XP with Service Pack 1 installed. If you have not installed
Service Pack 1, select the network you want, and click the Connect
button. If the network has WEP encryption enabled, enter the WEP
key in the Network key field, and then click the Connect button.
Windows XP Wireless Zero Configuration