76
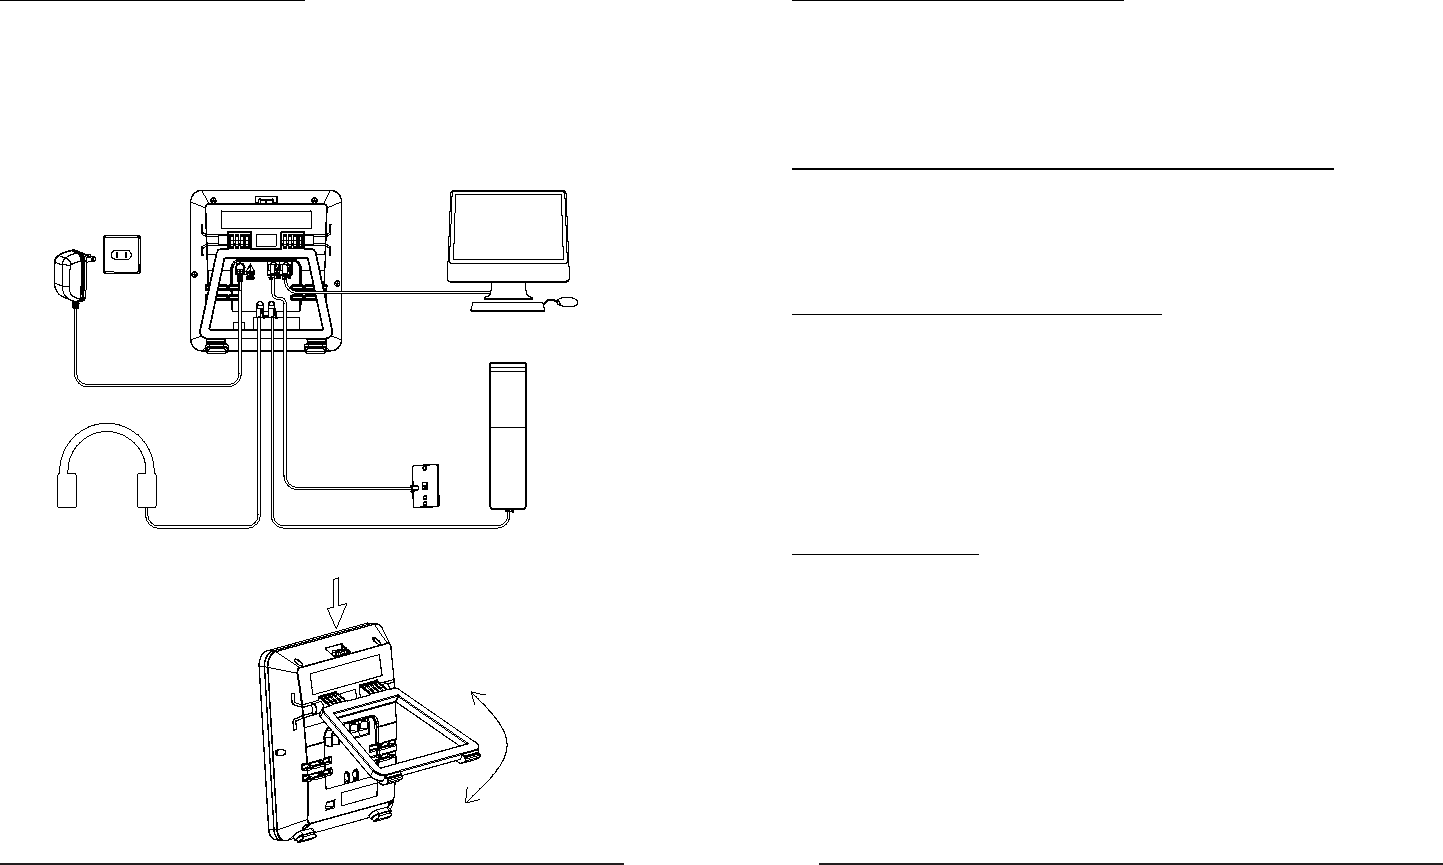
Connect Network and Power
Connect the phone to AC Power directly using the included power adapter.
The LAN Port can also be connected to Hub/Switch/IP PBX or other internet devices.
The phone can also share the network connection with other network devices such
as a PC. Connect the phone’s PC port to the computer’s network port using an
Ethernet cable.
Conguration and Registration
Some simple congurations are needed to get your phone ready for making calls:
network and account information must be correct.
If you are not an administrator, please contact your internet administrator or
service provider for more details.
Telephone Features and your VoIP Service Provider
Not all phone features are available with all VoIP service providers. Please make
sure all features are properly congured with the service provider before installing
the IP110.
Basic Conguration via Web Page
The IP110 features an embedded web server to help administrators and users congure,
manage and use their phone in an intuitive and simple manner. The phone’s web server can
be accessed with any web browser.
Press the OK button when the phone is in idle mode to nd out your IP110’s IP address.
Enter it (for example http://10.0.4.66) into the address bar of your web browser. The default
administrator’s login name and password are admin/admin.
Network Settings
Click on NETWORK[INTERNET PORT (WAN) Settings.
DHCP: By default the phone attempts to contact a DHCP Server in your network in order to
obtain its valid network settings, e.g. IP address, subnet mask, gateway, DNS server, etc.
Static IP Address: If your phone cannot contact a DHCP Server for any reason, you need to
enter the network settings manually via Static IP Address. Please contact your network
administrator for more details.
Power Socket
Headset
PC
Handset
Network Socket
Press here to release stand


