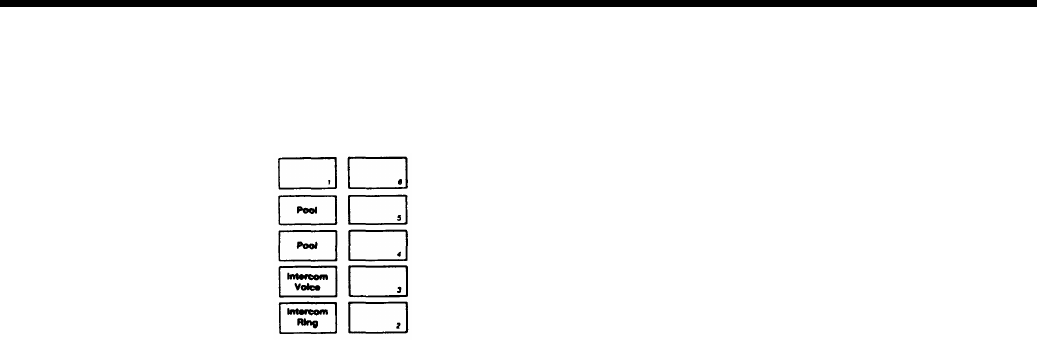
assigning determines what buttons they occupy on the voice terminal whose lines
you are setting up. The numbers in the diagram show the order in which the system
assigns additional lines to a voice terminal in a pooled system.
Assigning Calling Restrictions
6. Touch the button labeled
Call Rstr
until the green light beside it shows the code
for the calling privileges you want this voice terminal to have. Each successive
touch gives you one of the codes:
STEADY GREEN ON = All calls permitted
FLASHING GREEN
= Local calls only
GREEN OFF
= Intercom calls only
7. Follow Steps 3 through 6 of this procedure until all your voice terminals are set
up. If you want to give a voice terminal the same assignments as one that has
already been set up, there is a short-cut:
●
●
●
Dial the intercom number (or touch the Intercom Auto Dial button) of the new
voice terminal that you want to have the same lines and calling privileges
as the voice terminal you intend to copy.
Touch the
Copy
button.
Dial the intercom number (or touch the Intercom Auto Dial button) of the voice
terminal whose assignments you want to copy.
8. If you have no further system administration to do, slide the T/P switch to the center
position and set switch A on the Processor Module to Attendant (up) to return
to normal operation. Otherwise, continue to administer your system.
ESTABLISHING NIGHT SERVICE
You can have up to three optional extra-alerting devices connected to your
MERLIN
system. If you have such devices, you can use them to provide Night Service for your
business when the person who usually answers calls is not available. You can assign
individual lines to ring at any of the three extra-alerting devices.
Follow these steps to assign lines for Night Service:
1. If you have not already done so, set the administrator/attendant console for line
administration by following the boxed instructions on page 25.
2. Touch the button labeled
Night Service.
●
The green light beside the button becomes steady.
3. One by one, touch the button for each line that you want to activate a Night Ser-
vice extra-alerting device until the green light beside the line button shows the
appropriate code. Each successive touch gives you one of these codes:
STEADY GREEN ON
= Line rings at alerting device 1
FLASHING GREEN
= Line rings at alerting device 2
RAPIDLY FLASHING GREEN
= Line rings alerting device 3
GREEN OFF
= Line does not ring at an alerting device
4. If you have no further system administration to do, slide the T/P switch of the ad-
ministrator/attendant console to the center position and set switch A on the Pro-
cessor Module to Attendant (up) to return to normal operation. otherwise, con-
tinue to administer your system.
29


