1. Introduction and Installation
15
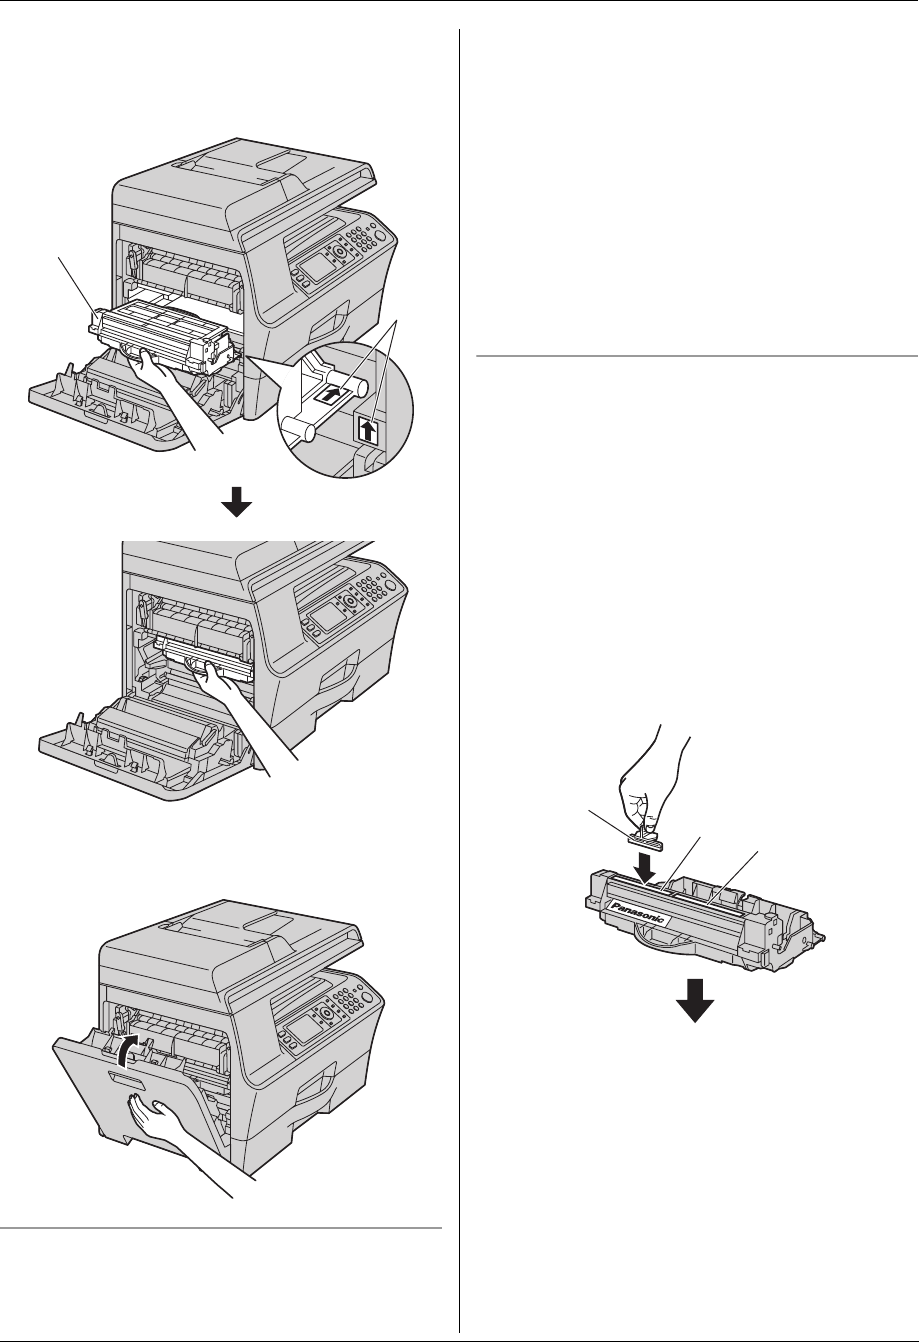
7 Install the drum and toner unit (l) by holding the
centre handle.
L Make sure that the arrows (m) match to install
the drum and toner unit correctly.
8 Close the left cover.
When to replace the toner cartridge and the drum
cartridge
When the display shows the following, replace the toner
cartridge.
– “Change Supplies Toner Low”
– “Change Supplies Toner Empty”
Note:
L To check the drum life and quality, please print the
printer test list (page 109) and refer to page 111 for
information on the drum life. If printing quality is still
poor or “Replace Drum” appears on the display,
replace the toner cartridge and drum cartridge.
L To ensure that the unit operates properly, we
recommend the use of Panasonic toner cartridge
and drum cartridge. See page 10 for accessory
information.
L See page 110 for information on toner life and drum
life.
Cleaning the drum cartridge
Important:
L If the groove of the drum cartridge is dirty, lines
or dirty patterns may appear on printed sheets.
Be sure to remove any toner remaining on the
inside of the drum cartridge to maintain the print
quality.
L A cleaner for the drum cartridge is supplied with the
replacement toner cartridge. If you replace only the
toner cartridge, clean the drum cartridge using the
cleaner.
L Insert the cleaner (n) into the left groove (o) and
move it from side to side at least 3 times to clean the
inside of the drum cartridge. Repeat this for the right
groove (p).
l
m
o
p
n


