Using Voice Mail Group Lists 37
7 Dial one of these destination numbers plus #:
■ The internal extension or mailbox number of the recipient
■ A speed dial number. See “Speed Dials” in Chapter 5
■ Another personal or system group list number
■ A VPIM extension
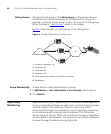
■ A site code plus extension (to send to a user on another NBX system in
your organization). Example: neee or neeee (where n = one or more
site code digits and e = the extension digits on the other system)
For valid site codes in your organization, see your administrator.
8 When you have added all of the destination numbers, press:
■ 1 to save the group list
■ 2 to cancel creating the group
■ ** to return to the previous menu
OR hang up.
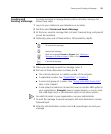
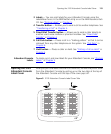
To create a Personal Voice Mail List through the NBX NetSet Utility:
1 Log in Netset > NBX Messaging > Personal Group List. You see a list
of your current personal voice mail groups with Group IDs and Group
Names.
2 Click Add.
3 Enter a Group ID, a number from 01–99 that is not used for a current
group.
4 Enter a Name for the new group.
5 Enter any VPIM extensions in the VPIMs box.
6 Select members from the Non-Members list and move them to the
Members list by clicking the left arrow.
7 Click Apply and OK to complete the list.
Modifying or
Deleting Personal
Groups
You can review your Personal Voice Mail Groups, add members, or delete
a group from the telephone or from the NBX NetSet utility.
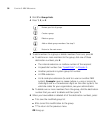
To review or modify a Personal Voice Mail Group from the telephone:
1 Log in to your mailbox at your telephone or remotely.
2 Dial 9 for Mailbox Options.