Page 5 of 19 2478D - Rev: 1/21/2014 7:32 AM
Installing SwitchLinc – with 1 Switch
1) Turn off circuit breaker(s) or remove fuse(s) feeding wall box
2) Use a voltage meter to verify that power is off
3) Remove wallplate from the switch and unscrew switch you are replacing and gently pull out
4) Disconnect wires from switch
1
5) Turn breaker(s) back on
6) Use a voltage meter to identify Line and Load
wires which connected to the switch
7) Identify Neutral and Ground wires
8) Turn breakers(s) back off
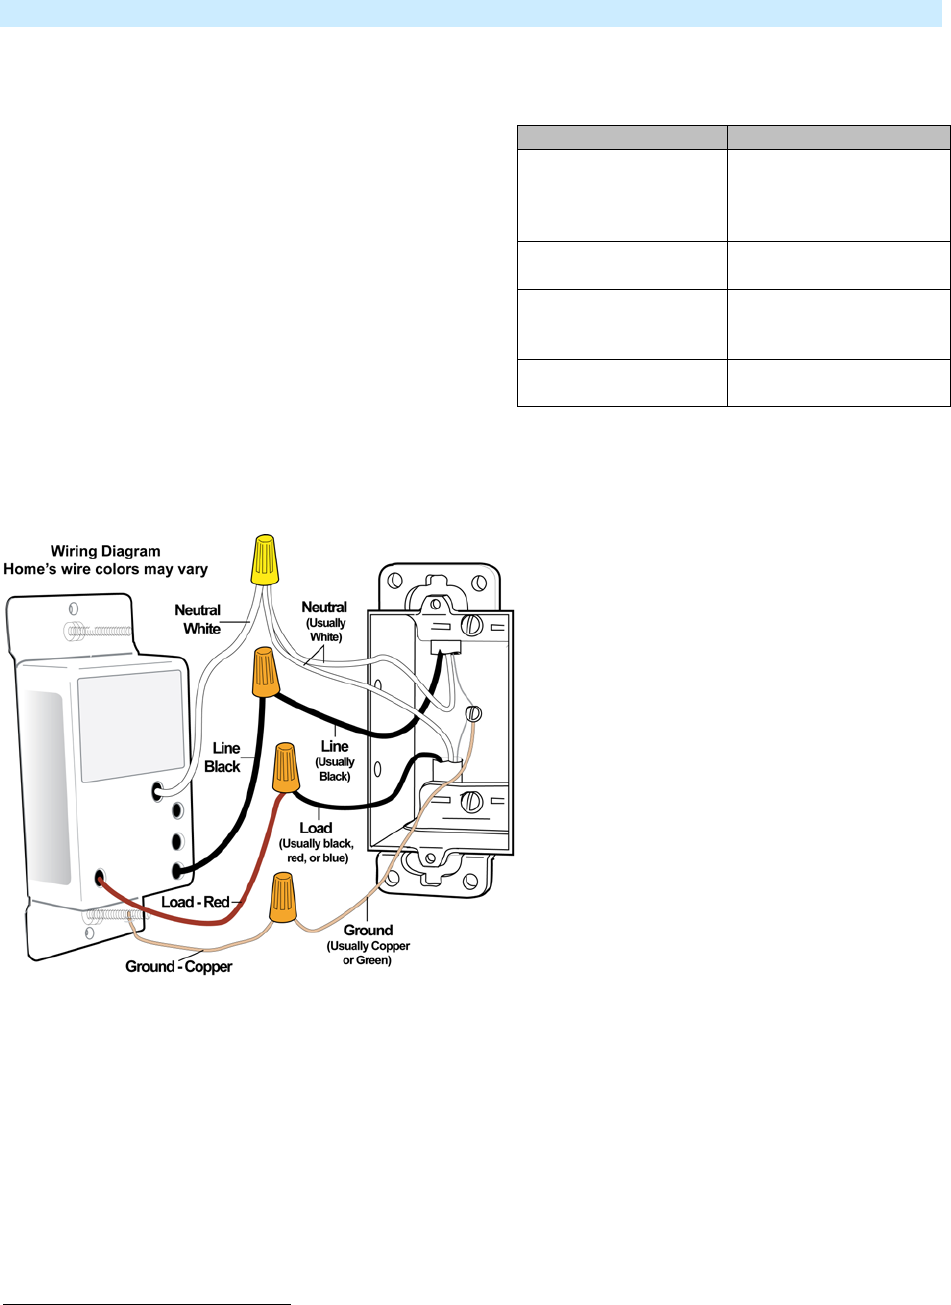
9) Connect wires as per Table A/Fig. 1(confirm firm
attachment with no exposed wire)
10) Gently place SwitchLinc into wall box, orienting
unit with the LED bar on left. Then, screw
SwitchLinc into place.
11) Turn breaker(s) back on
SwitchLinc’s LED bar and connected
light will turn on
12) Verify SwitchLinc is working properly by tapping SwitchLinc’s paddle turning light (load) on and off
13) Reinstall the wallplate
1
If the wires cannot be detached by unscrewing them, cut the wires where they enter the switch, then strip ½” of insulation off the ends
Bare copper
(commonly Bare,
Green wire or Green
White
Red
(Light, commonly
Black
Line (100 – 277V to
Ground)
