36 MPC User Manual Rev 0D
Chapter 4 Using the MPC
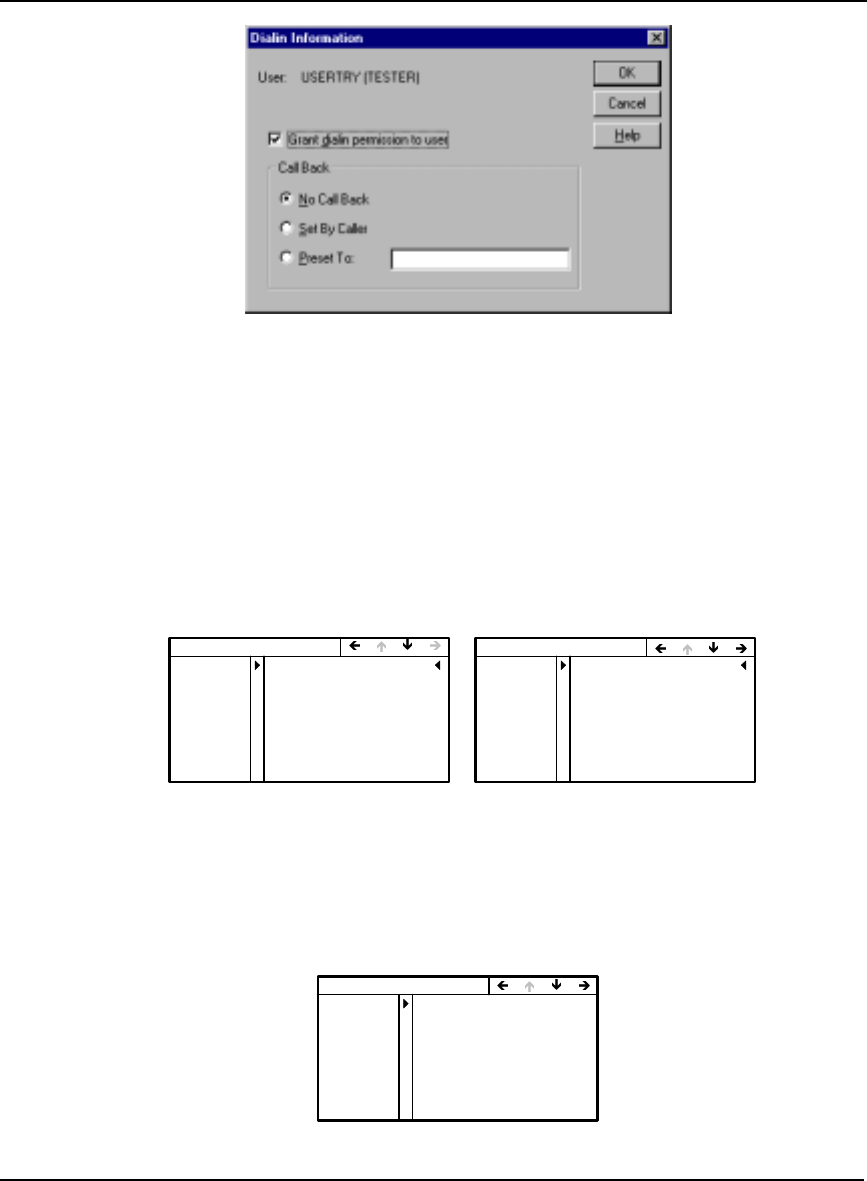
Figure 27: Dialin Information
Check the Grant Dialin Permission to User check box and click in the No Call Back field. Click on the
OK button.
Restart your PC for the new settings to take effect.
Ensure your MPC is powered on. At the MPC VFD screen, use the navigation button to go to the
CONFIG DIRECT, or CONFIG MODEM, menu. Set up a client as described in Section 5.2.3,
Configure Client on Page 45. If you have a PPP connection, use the MPC navigation buttons to go to
the CONFIG DIRECT menu, see also Section 5.2.6, Configure Direct (PPP) on Page 48. Or, if you
have a modem connection, use the MPC navigation buttons to go to the CONFIG MODEM menu, see
also Section 5.2.5, Configure Modem on Page 47. Examples of both menus are shown in Figure 28.
Figure 28: Config Direct and Modem Menus
Select your protocol (PROTO: TYPE) as PPP. Enter the same User Name and Password that you set
up for the MPC to ‘dial in’ to your computer. In the SOURCE row, select AUTO IP:YES.
Use the MPC navigation buttons to go to the MPC CONNECT menu, see also Section 5.2.2, Connect
on Page 44. An example of the MPC CONNECT menu is shown in Figure 29.
Figure 29: MPC Connect Menu
CONFIG MODEM
PHONE
PC COM
19002446262
TYPE:PPP
USRNAME USERNAME4
PASSWRD PASSWORD4
PROTO
IP ADDR 000.000.000.000
SOURCE AUTO IP:NO
57600 8 NONE 1 N
USERTRY
TESTER
YES
CONFIG DIRECT
MPC
PC COM
CLIENT
115200 8NONE1 N
USRNAME
PASSWRD
USERNAME5
PASSWORD5
PROTO TYPE:PPP
IP ADDR 000.000.000.000
SOURCE AUTO IP:NO
USERTRY
TESTER
YES
MPC CONNECT MENU
MODEM
ENET
CONNECT:NO
DIRECT CONNECT:NO
CONNECTED
ESTATUS
MSTATUS
DSTATUS
198.161.68.216
000.000.000.000
000.000.000.000
000.000.000.000
YES
192.168.001.201


