Chapter 6 Tutorials
GS1920 Series User’s Guide
49
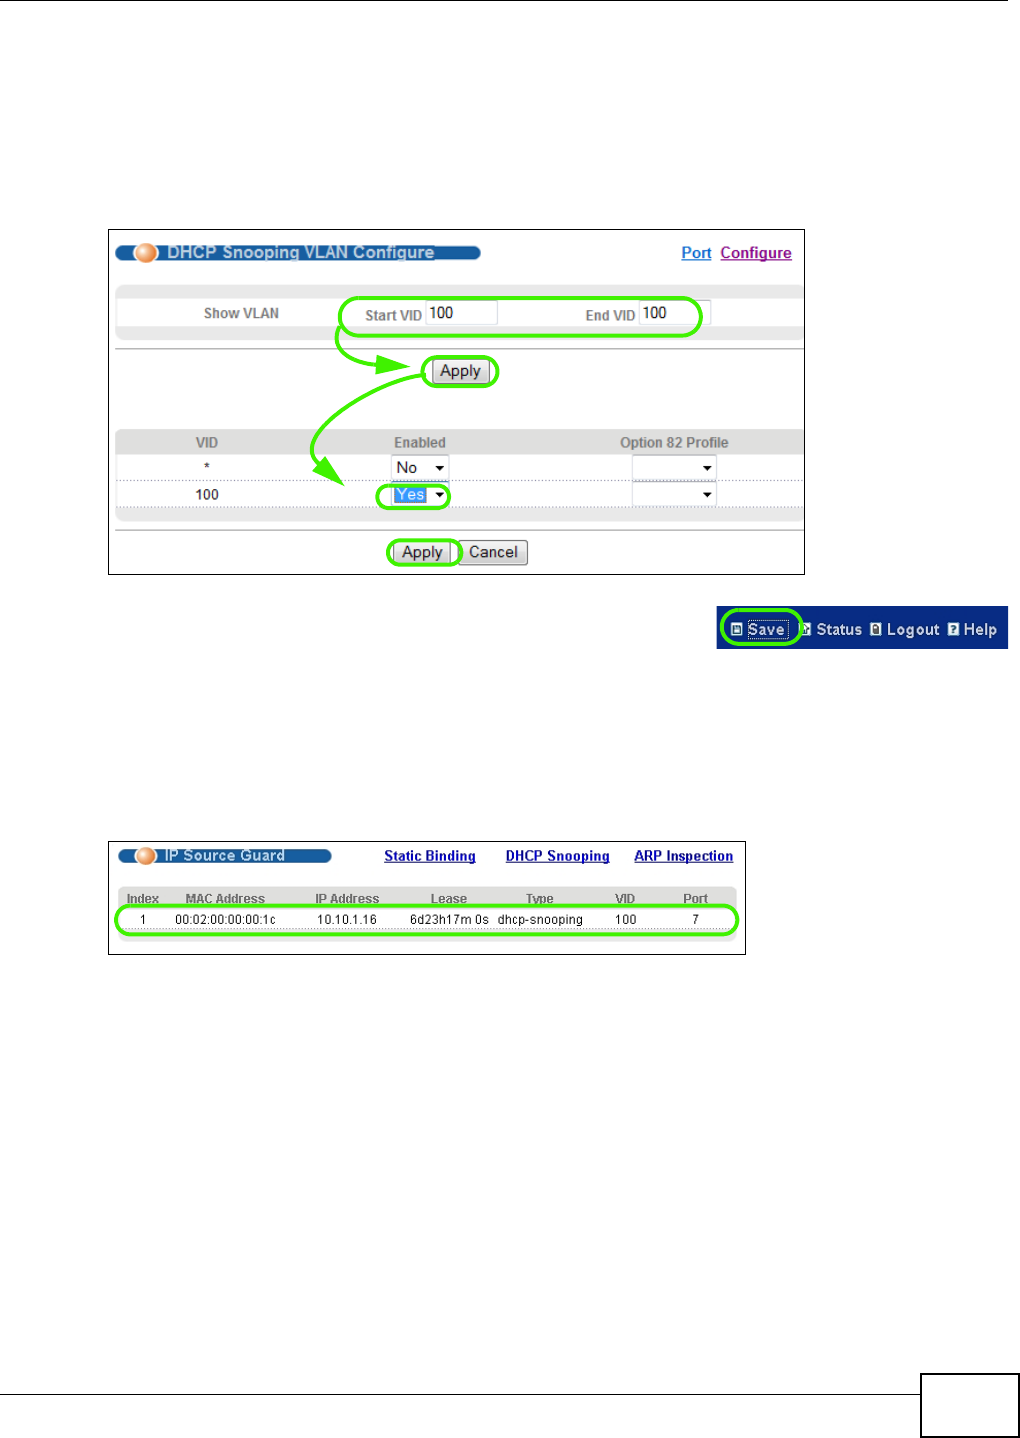
7 Go to Advanced Application > IP Source Guard > DHCP snooping > Configure > VLAN,
show VLAN 100 by entering 100 in the Start VID and End VID fields and click Apply. Then select
Yes in the Enabled field of the VLAN 100 entry shown at the bottom section of the screen.
If you want to add more information in the DHCP request packets such as source VLAN ID or
system name, you can also select the Option82 Profile field in the entry. See Section 25.10.1.3
on page 207.
Figure 34 Tutorial: Enable DHCP Snooping on this VLAN
8 Click Save at the top right corner of the web configurator to save
the configuration permanently.
9 Connect your DHCP server to port 5 and a computer (as DHCP client) to either port 6 or 7. The
computer should be able to get an IP address from the DHCP server. If you put the DHCP server on
port 6 or 7, the computer will not able to get an IP address.
10 To check if DHCP snooping works, go to Advanced Application > IP Source Guard, you should
see an IP assignment with the type dhcp-snooping as shown.
Figure 35 Tutorial: Check the Binding If DHCP Snooping Works
6.3 How to Use DHCP Relay on the Switch
This tutorial describes how to configure your Switch to forward DHCP client requests to a specific
DHCP server. The DHCP server can then assign a specific IP address based on the information in the
DHCP requests.
6.3.1 DHCP Relay Tutorial Introduction
In this example, you have configured your DHCP server (192.168.2.3) and want to have it assign a
specific IP address (say 172.16.1.18) to DHCP client A based on the system name, VLAN ID and
port number in the DHCP request. Client A connects to the Switch’s port 2 in VLAN 102.


