17 C2657M-A (7/08)
PERFORMING AN ENHANCED SEARCH
To perform an enhanced search:
1. In the live view mode, press the “E” key or navigate to Enhanced Search through the Main menu and Search/Export. The Enhanced Search
dialog box opens (refer to Figure 13).
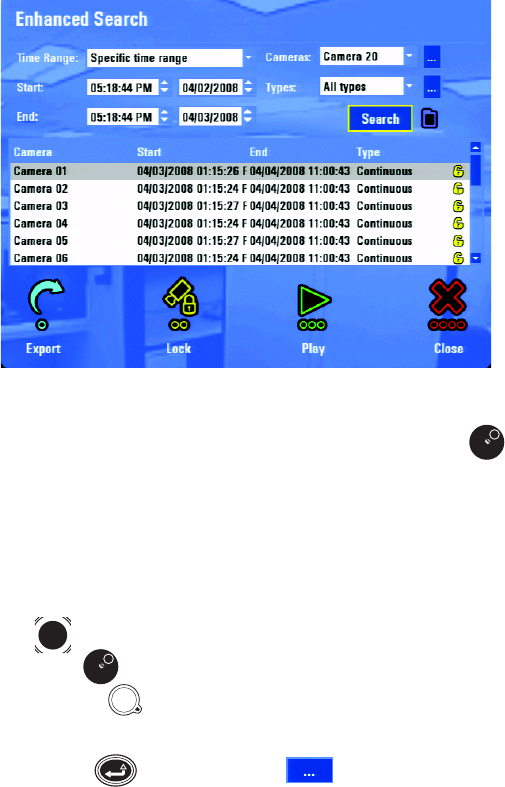
Figure 13. Enhanced Search Dialog Box
2. Click the Time Range box [or navigate to the Time Range box, and then turn the Jog (inner dial) right or left] to select the time range
(“Last 24 hours,” “Last 3 days,” “Last 7 days,” and “Specific time range”).
3. If you select “Specific time range,” you must select a time and date range for the search as follows:
• Keyboard and mouse: Click in the Start and End time and date fields, and then type the specific time range. Or, click the up and down
arrow to select the specific time range.
• Control pad:
– Use the Joystick to navigate between time and date boxes. The first field (hours) is selected by default.
– Turn the Jog (inner dial) to change the values.
– Turn the Shuttle (outer ring) to move to the next field after each change is made.
4. Select a camera or cameras from the Cameras list (“All Cameras,” “Multiple cameras,” or individual cameras). If you select “Multiple
cameras,” press Enter [or Enter/Shift ]
, or select the button next to the Cameras box. The Select Cameras dialog box
appears (refer to Figure 14).
NOTE: By default, all cameras are selected. You must clear the selection for cameras that you do not want to search.


