12 C4614M (3/09)
Creating a Map
For complete instructions on creating maps, refer to the operation manual.
1. Click the Edit Mode button in the toolbar to switch to the Edit Mode.
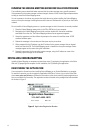
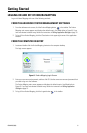
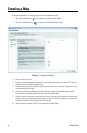
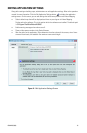
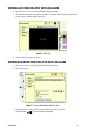
2. Click the Create Map button to display the New Map Settings screen.
Figure 7. Creating a New Map
3. Enter a name for the map.
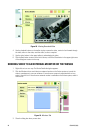
4. If desired, import a background image for the map. Background maps can be AutoCAD
®
DXF files,
bitmap files, or other types of graphics files.
5. If desired, click the Icons tab, and then adjust the size of the icons on the map. A default icon size is
set automatically for all maps.
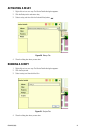
6. If desired, click the Parent Map tab, and then select the map to which the new map is related.
The new map will be listed under the parent map in the Map Browser.
7. If desired, click the Scale tab, and then adjust the size of the map and its relation to the real world.
Settings on this tab include measurement (metric or standard), width and height of the map, scale,
and physical location of the map (latitude and longitude).
8. When the map is complete, Click OK. Any setting can be edited later.