14 C4614M (3/09)
ADDING ICONS TO A MAP
By default each map contains at least one icon layer. Use icon layers to place icons on the map that
represent devices at your site. You can create several icon layers to organize the devices for easier
viewing.
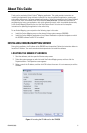
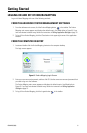
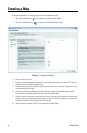
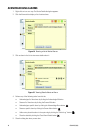
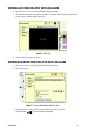
1. In Edit Mode, click the plus symbol (+) under the Icons Layer browser. A new icon layer appears in
the list.
Figure 9. Adding an Icon Layer
NOTE: To show or hide an icon layer in the list, click the icon to the left of the list. To reorganize the list,
select a layer, and then click the up or down arrow buttons until the icons are in the preferred order.
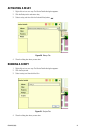
2. Right-click the layer, and then select Edit Name.
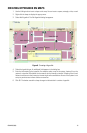
3. Enter a name for the layer. For example, if you want to create an icon layer that represents all of the
devices in the perimeter of an office building, you might name the layer “Perimeter.”
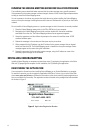
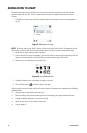
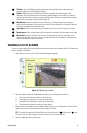
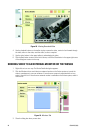
4. Select an icon, and then drag it onto to the map.
Figure 10. Icons Selection List
5. If desired, rotate the icon to represent its angle on the map.
6. Click the Save button to save the layer to the map.
After you place icons on the map, right-click the icon to view the shortcuts menu and perform the following
additional tasks.
• Associate one or more devices with each icon.
• Edit icon settings that include renaming each icon and changing its image or border thickness.
• Change the default settings for all icons on the map.
• Move the icon to the front or back of other icons.
• Copy or delete it.