Chapter 4 Using the LCD Screen
V500 Series User’s Guide
65
1 Press the MENU key to enter the menu system.
2 Select Advanced Setting.
3 Use the navigator to highlight Auto Provision (Off).
4 Press the On softkey.
5 Press the Select softkey.
" You can enable and disable a sub-feature only when you first enable the
feature. For example, you can enable or disable specific call forwarding only
when you first enable call forwarding.
4.6 LCD Menu Overview
This section shows the LCD menus, and describes what you can do with each.
Press the MENU key to access the V500’s LCD menu system.
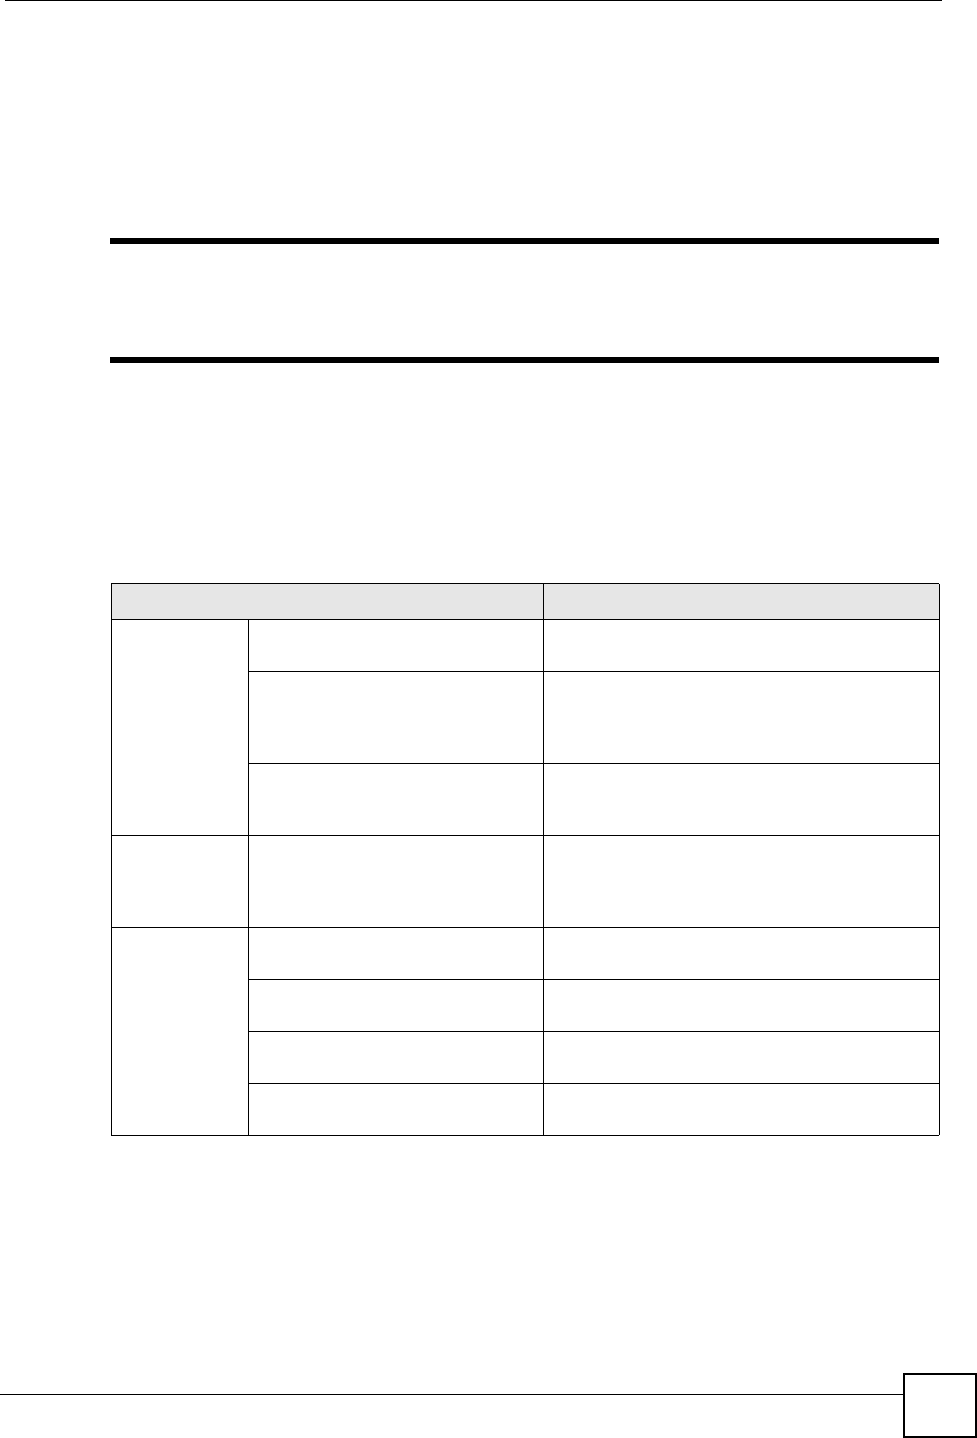
Table 6 LCD Menu Overview
MENU DESCRIPTION
System Info Firmware Version Use this to see the version number of the
firmware the V500 is currently using.
IP Address Use this to see the IP address, subnet mask,
gateway, DNS settings currently assigned to the
V500, as well as the V500’s Media Access
Control (MAC) address.
VOIP Status Use these to see the SIP number used by each
SIP account (1 ~4), and to check whether each
account is registered with a SIP server.
Ring Setting Default / Family / Business / Friend
/ Others
Use these menus to set the V500 to ring
differently when an incoming call is from a
member of a group you set up in the
Phonebook > Group menu.
Volume
Setting
Speaker Volume Use this menu to set the loudness of the
internal speaker.
Phone Volume Use this menu to set the loudness of the V500’s
handset.
Ring Volume Use this menu to set the loudness of the V500’s
ringtone.
Headset Volume Use this menu to set the loudness of an
external headset you plug into the V500.


