10-7
5. Press the [ENTER/YES] key.
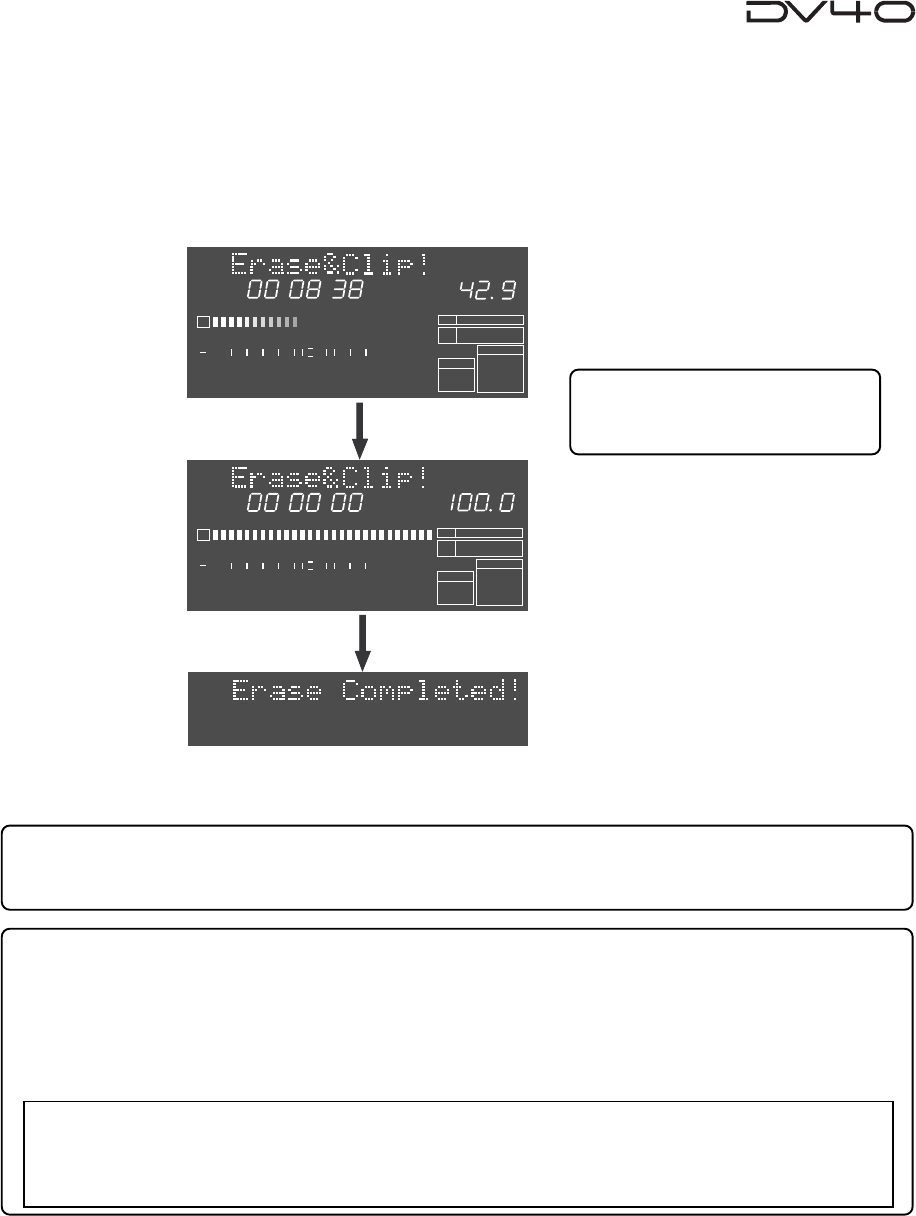
The unit starts erasing track data between the "SOURCE IN" and "SOURCE OUT" points of the specified
track(s).
The display shows the required time together with the achieved percentage for erase.
The time is counted down while the percentage is counted up as the erase operation is in progress.
Also, the status is graphically shown by the track 1 level indicators which gradually light up from left to
right. When all the data is erased, "Erase Completed!" is shown and the unit stops.
6. Press the [EXIT/NO] or [STOP] key repeatedly to exit the AUDIO EDIT mode.
Tips:
If you are not satisfied with the result, you can undo the erase operation.
Note that, however, you cannot undo the erase operation with a "Tape mode" audio file.
Tips:
The erased track data still remains in the clipboard after the erase operation is completed.
To check the erased track data, press the [PLAY] key while holding down the [STOP] key to perform the
"SOURCE PLAY" function.
While the erased data remains in the clipboard, you can paste or insert the erased data by executing
"Clip Paste?" or "Clip Insert?" described earlier in this chapter.
Tips:
When a "Tape mode" audio file is
selected, "Erase!" appears.
<Note>
With a
"Tape mode"
audio file, the erased track data does not remain in the clipboard. Therefore, if
you are going to perform the paste or
"SOURCE PLAY"
function,
"Empty Clipboard!"
appears and the
operation is canceled.
HMS
2
1
-INT-
BWF
FORMAT
CLOCK
-0.1%
kHz
48
24
FS
BIT
REMAIN
∞
60
50
42 34 28 2018
12
8
6543210OL
%
HMS
2
1
-INT-
BWF
FORMAT
CLOCK
-0.1%
kHz
48
24
FS
BIT
REMAIN
∞
60
50
42 34 28 2018
12
8
6543210OL
%


