1-5
Formatting a DVD-RAM disk
To make a DVD-RAM disk usable with the DV40, format the disk by the “UDF format”.
Two format modes, “Normal” and “Tape”, are available with this unit. Use either format
according to the situation.
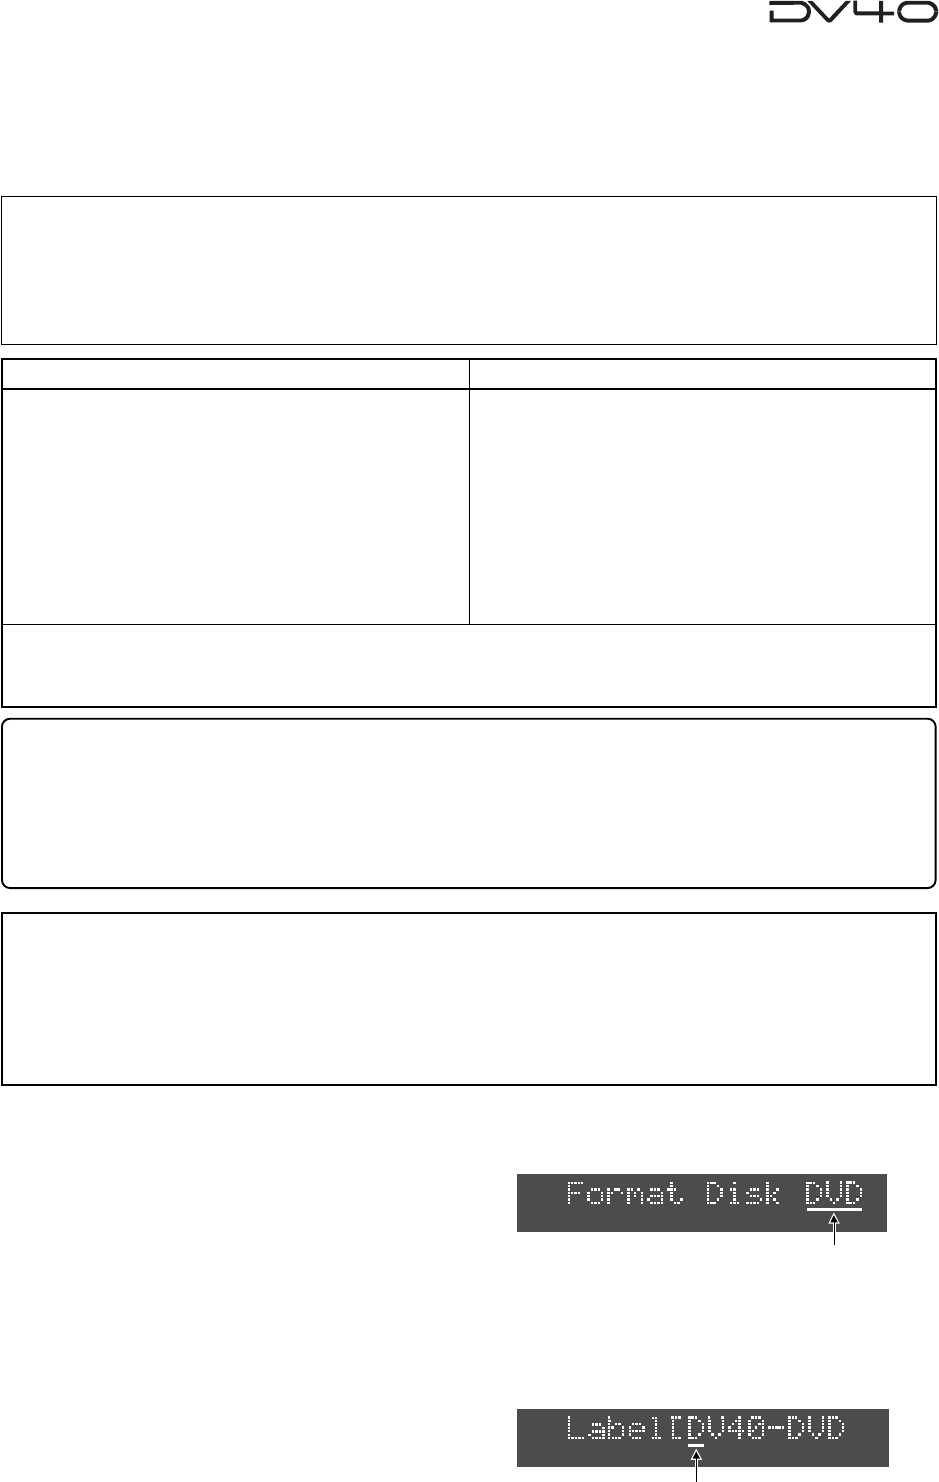
1. While "Format" with flashing "?" is shown on the display, press the [ENTER/YES] key.
The display changes to show "Format Disk DVD" (in which "DVD" is flashing).
2. Press the [ENTER/YES] key again.
The display changes to show "Label [DV40-DVD" (in which "D" of "DV40" is flashing).
This shows the label name of the disk can be edited and "DV40-DVD" is the tentative name.
See the following Tips for details about how to enter a desired label name. Of course, you may use
the tentative name when formatting. (You can also rename the tentative name in the Utility mode
described later.)
Normal Mode
Tape Mode
Normally, format a disk by selecting the format mode
to Normal. No audio file is automatically created when
formatting the disk in the Normal mode ("No Audio
Files!" is shown after formatting is completed).
On a "Normal format" disk, a "Normal mode" audio
file ("BWF" or "SDII") is automatically created when
executing recording in the NEW FILE mode.
Or you can also create "Normal mode" audio files us-
ing the file select function before recording. Up to 200
audio files can be created.
Two “Tape mode” audio files (“BWF” or “SDII”) of ap-
proximately 2 GB each are automatically created on a
disk when formatting the disk in the Tape mode.
Like an analog tape, a “Tape mode” audio file has the
fixed available space, and can playback recorded data
even if the system unexpectedly shuts down during
recording and the system data is destroyed. There-
fore, a “Tape mode” audio file is suitable for live re-
cording or preserving recorded data for a long period
of time.
<Notes for formatting a disk in the Tape mode>
When a disk is formatted in the Tape mode, an audio file is automatically created. Therefore, before formatting,
you must set the AUDIO FILE, TR MODE and SAMPLING FREQ switches on the front panel appropriately. Note that
you cannot change the settings after formatting.)
When formatting a disk in the Normal mode, you do not need to set these switches. However, you must set them
appropriately when making recording in the NEW FILE mode or creating a new audio file using the file select
function.
A disk formatted in the Tape mode reserves the “Normal mode” area (approx. 0.7GB) in addition to the “Tape
mode” area (2GB + 2GB = 4GB). In the Normal mode area, you can create “Normal mode” audio files (“BWF” or
“SDII”). See “About audio files on a formatted disk” on page 1-7 for details.
Flashing
Flashing
<About UDF format>
The DV40 formats a disk in the UDF “R1.50” format. It can read a disk formatted in the “R1.50” or “R2.0*”
format using a personal computer without any difficulty. Note that MAC OS 9.1 supports the “R1.50” format but
does not support the “R2.0*” format. Therefore, a Macintosh computer running on MAC OS 9.1 cannot read a
disk formatted in the “R2.0*” format using a Windows 98 computer. To ensure the compatibility among the
DV40 and computers, we recommend to format a disk in the “R1.5” format if you have a Windows 98 computer.
<Tips for using a disk formatted in the Tape mode effectively>
The following shows tips for using a disk formatted in the Tape mode effectively.
• If a 2GB “Tape mode” file is too large for you to handle, we recommended to create a “Normal mode” file and
copy & paste the necessary data on the “Tape mode” file to it. This is allows you to handle data, originally
recorded on the “Tape mode” file, on a small file.
• If the 0.7GB “Normal mode” area on a “Tape mode” file is too small, delete one of the “Tape mode” files and
optimize the disk. This increases the “Normal mode” area to 2.7GB.


