IES-1000 User’s Guide
Turning On the IES-1000 7-1
Chapter 7
Turning
On the IES-1000
This chapter discusses the fans and LEDs of the IES-1000 after you turn it on.
7.1 Introduction
Before turning on your IES-1000, make sure you:
• Have attached a computer to the IES-1000 serial port as explained previously.
• Can see the status LEDs on the front panel.
Push the power switch (located at the front of the IES-1000) to the ON or “|” position. You may also need to turn
on the power supply. The IES-1000 will automatically run a self-test that takes approximately 20 seconds. The
SYS LED will remain on if your IES-1000 has started normally.
If the SYS LED does not turn on then recheck your connections or refer to the Hardware
Troubleshooting chapter.
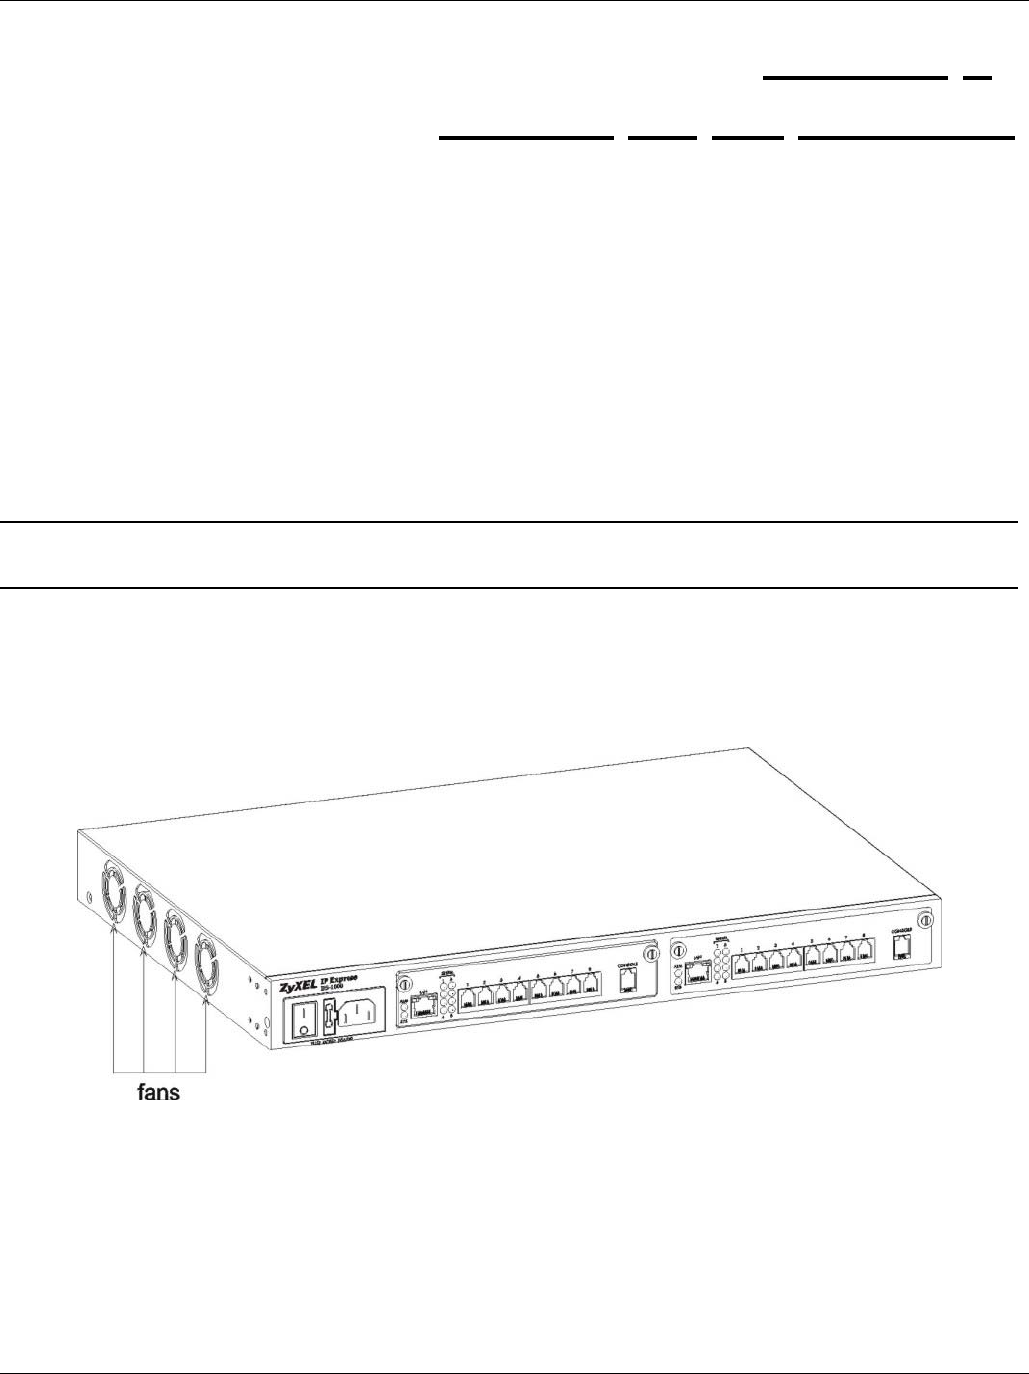
Make sure you can feel and/or hear the fans working — working fans emit a low buzz and blow air. The fans are
located on the IES-1000 as shown next. Refer to the Hardware Troubleshooting chapter to test the fans if they are
not working.
See the next section to interpret the operational status of your IES-1000.
Figure 7-1 Location of the IES-1000 Fans
7.2 Network Module Front Panel LEDs
The following figures show the front panels of the network modules. LEDs describe the operational status of your
network module. Please also refer to the Hardware Troubleshooting chapter to see how LEDs may aid in
troubleshooting.


