IES-1000 User’s Guide
10-16 Getting Started Screens
10.5.11 DHCP Relay Screen
Click DHCP Relay in the Bridge Setup screen to open this screen.
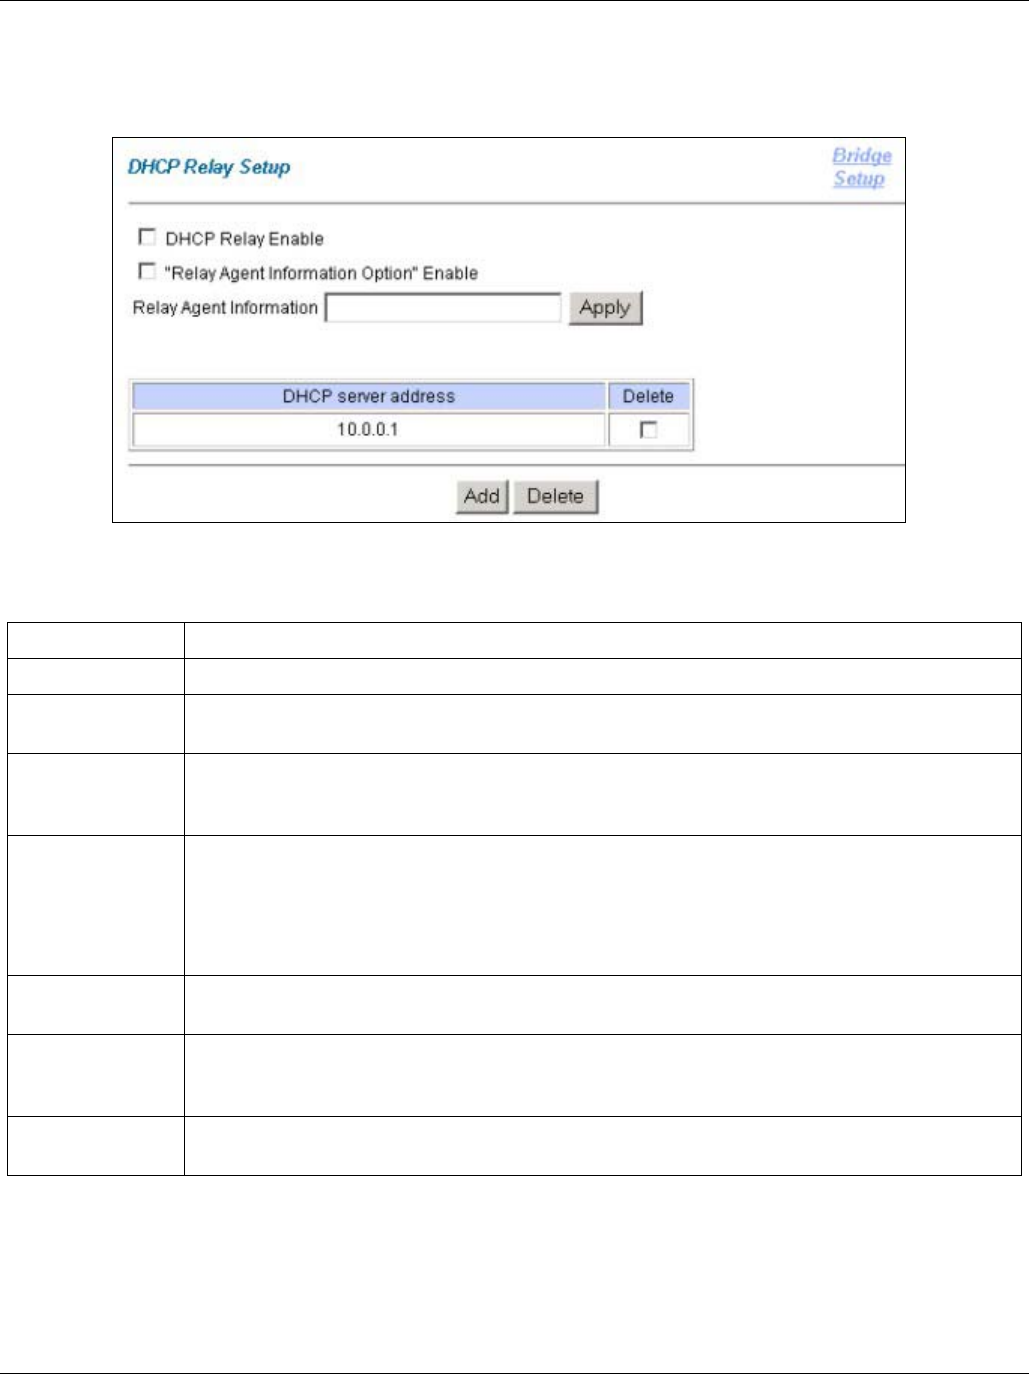
Figure 10-15 DHCP Relay Setup
Table 10-13 DHCP Relay Setup
LABEL DESCRIPTION
Bridge Setup Click this link to go to the Bridge Setup screen.
DHCP Relay
Enable
Enable DHCP relay to have the Integrated Ethernet Switch relay client TCP/IP configuration
requests to a DHCP server and the server’s responses back to the clients.
“Relay Agent
Information
Option” Enable
Select this check box to have the Integrated Ethernet Switch add the originating slot and
port numbers to client TCP/IP configuration requests that it relays to a DHCP server.
Relay Agent
Information
Use this field to specify up to 24 ASCII characters of additional information for the
Integrated Ethernet Switch to add to the DHCP client TCP/IP configuration requests that it
relays to a DHCP server.
Examples of information you could add would be the chassis number of the Integrated
Ethernet Switch or the ISP’s name.
DHCP server
address
There are the IP addresses of the DHCP servers to which the Integrated Ethernet Switch
should relay DHCP client TCP/IP configuration requests.
Add Click this button to go to a screen where you can configure an IP address of a DHCP server
to which the Integrated Ethernet Switch should relay DHCP client TCP/IP configuration
requests.
Delete Select an address’s Delete check box and click the Delete button to remove the DHCP
server.
Add DHCP Server Screen
Click DHCP Relay in the Bridge Setup screen to open the DHCP Relay screen.
Click Add in the DHCP Relay screen to open this screen.


